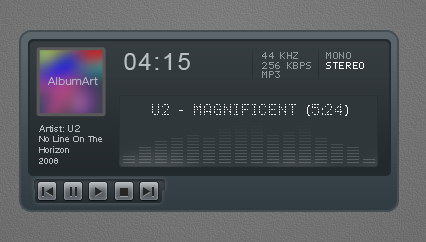
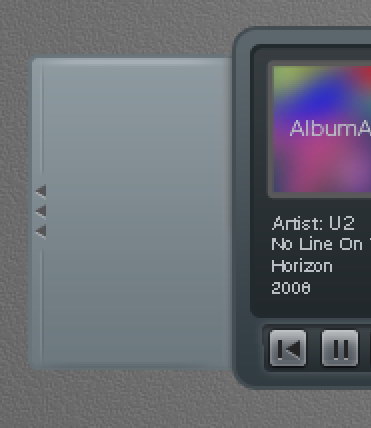
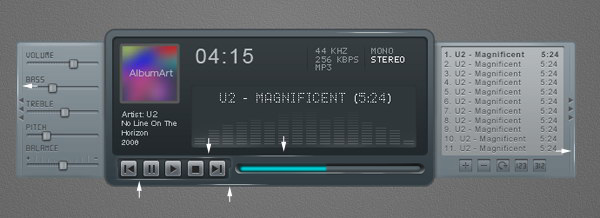
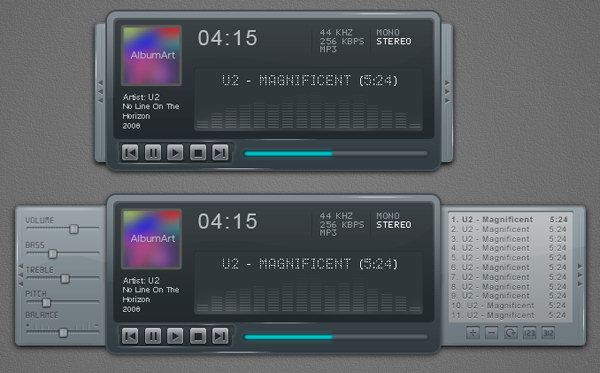
Final Product What You'll Be Creating
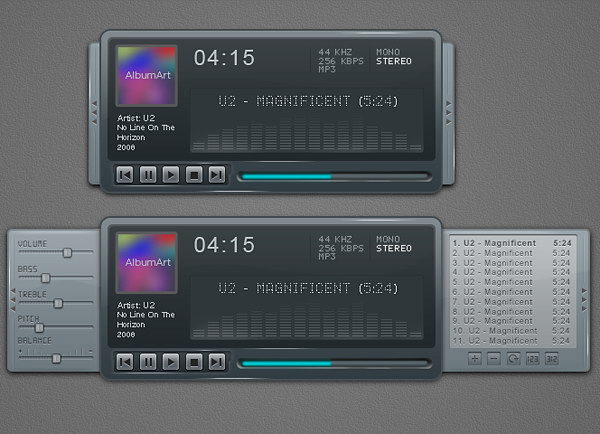
In this tutorial, we will design a sleek and clean MP3 player interface. The process involves a lot of manual drawing and lots of layer styles. Let’s get started!
Tutorial Assets
The following assets were used during the production of this tutorial.
- Font Digital-7 from Chess-7
- Font LCD Phone from Raúl Andrés Pérez Canseco (Grafito Design)
Step 1: Background
Let’s start by creating a background for our mp3 player. Draw a radial gradient from white to gray.

Step 2
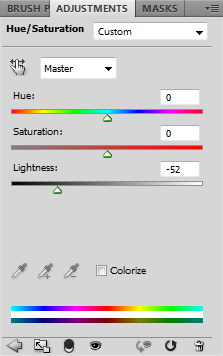
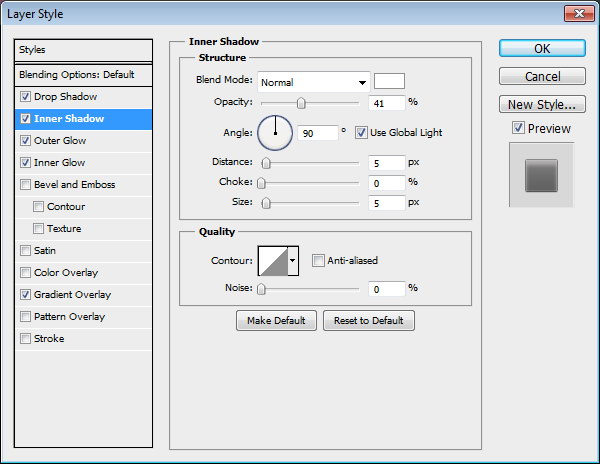
Darken the gradient by adding Adjustment Layer Hue/Saturation. Reduce the Lightness setting.

Step 3
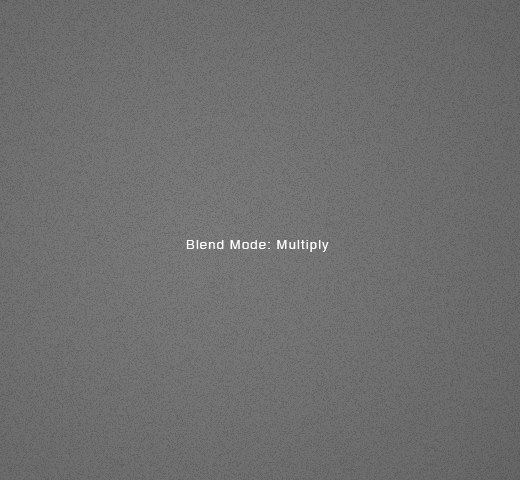
Create a new layer and fill it with white. Make sure you have white and black as foreground and background by pressing D. Click Filter > Noise > Add Noise. Set Distribution to Uniform and select Monochromatic.


Step 4
Change the blending mode of the layer to Multiply.
Step 5
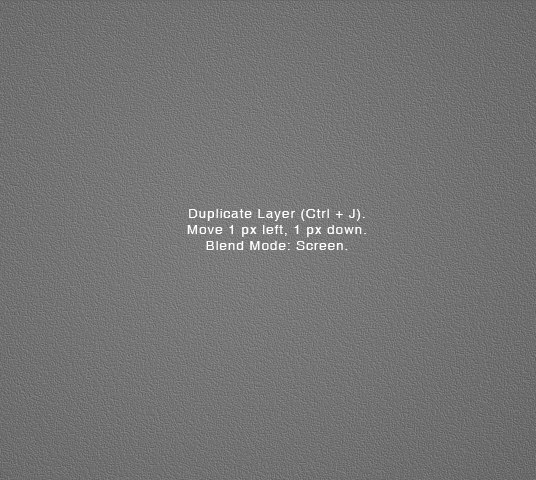
Duplicate layer by pressing Command/Ctrl + J. Invert layer by pressing Ctrl + I. Move layer 1 px left and 1 px down by activating tool move then press left arrow then down arrow. Change blend mode to Screen.
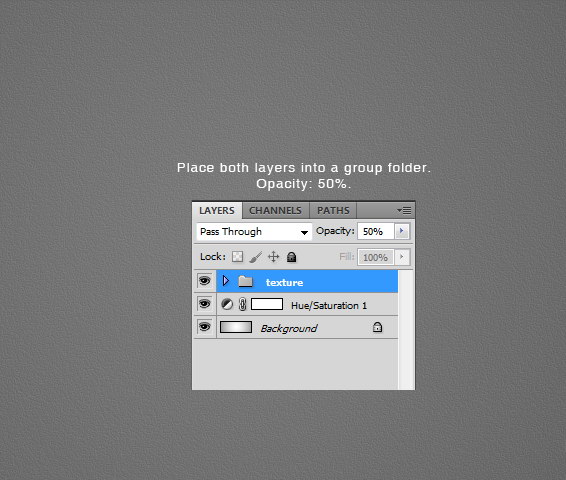
Step 6
Put both noise layers into a group folder and reduce its Opacity to 50%.
Step 7: MP3 Basic Shape
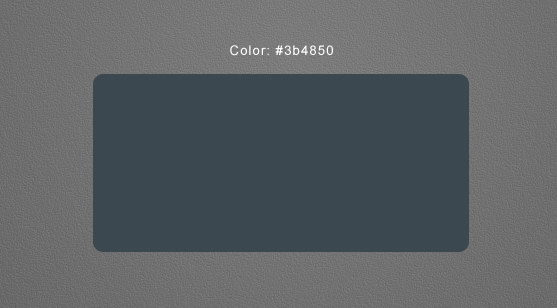
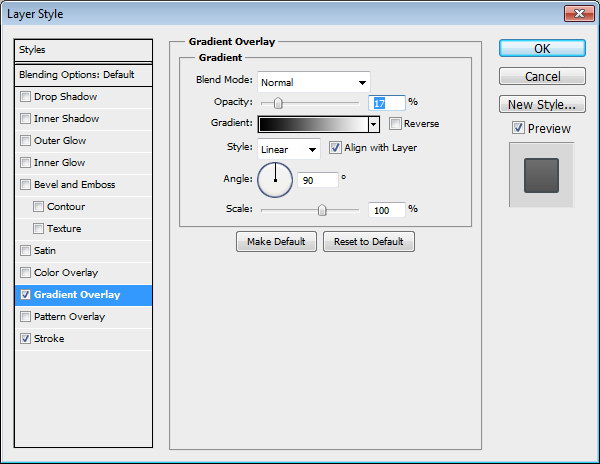
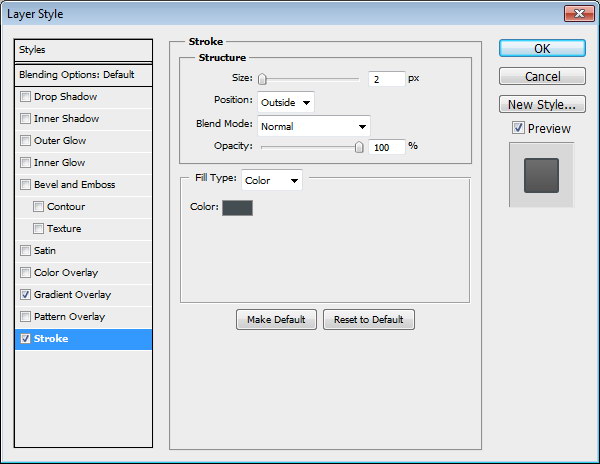
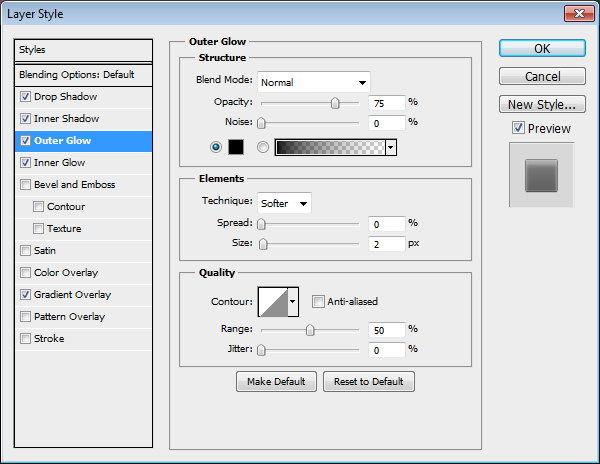
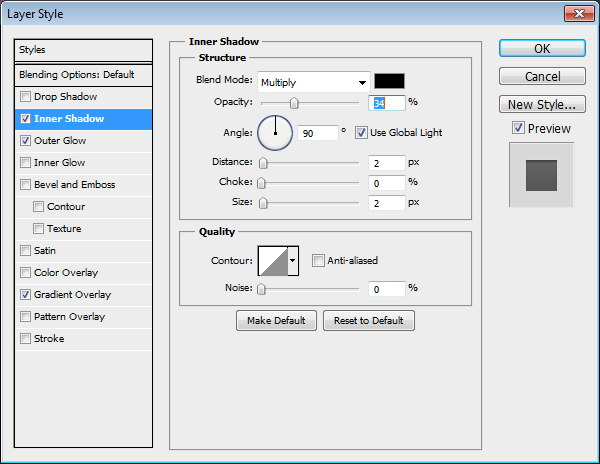
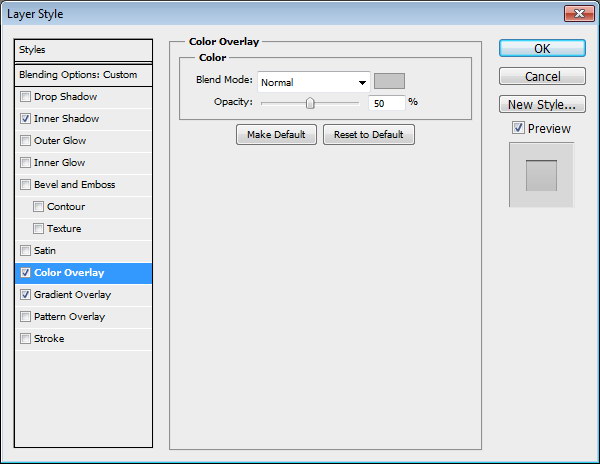
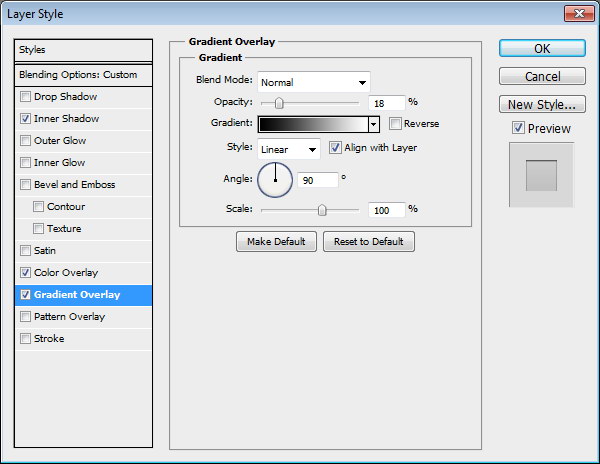
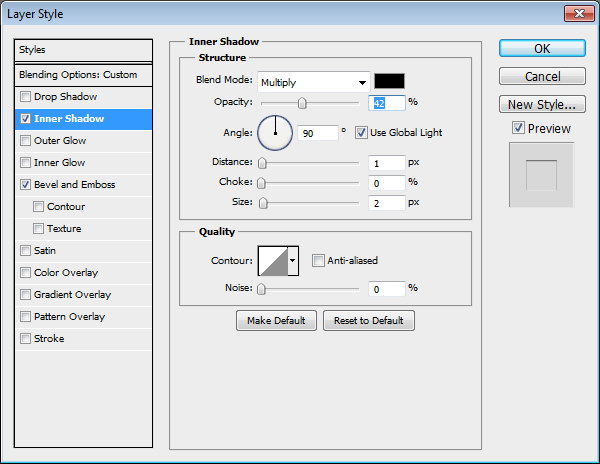
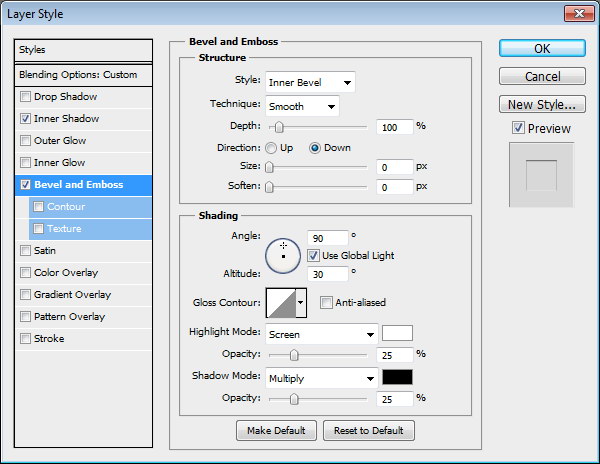
Create a rounded rectangle on the canvas. Use #3b484f as its color. Add following layer styles.
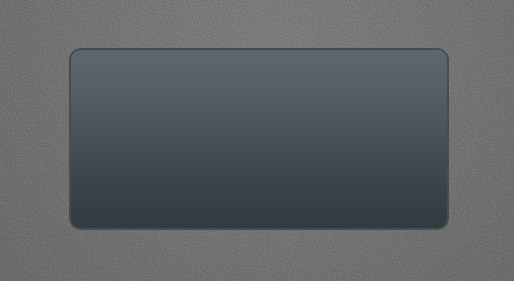
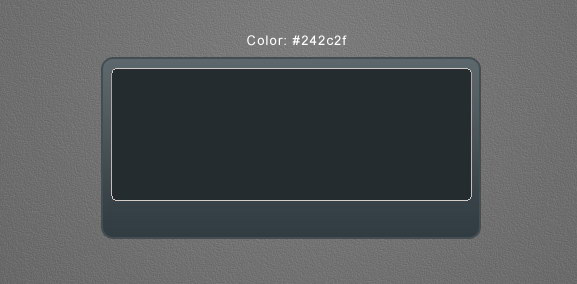
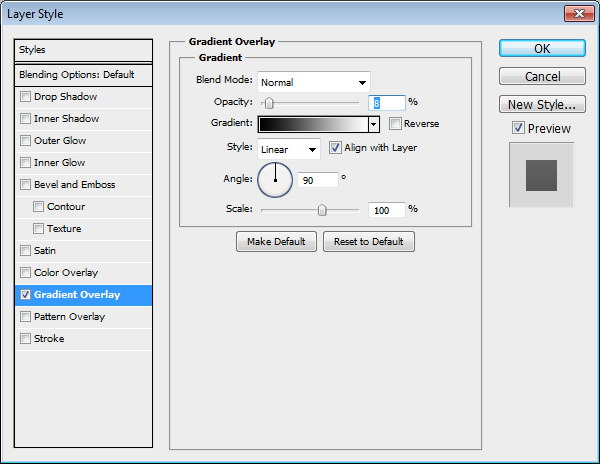
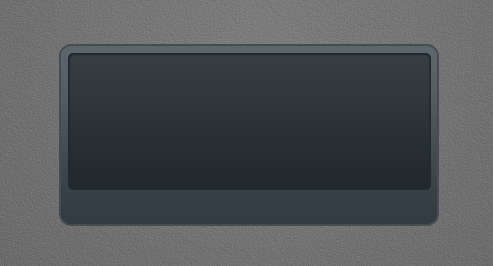
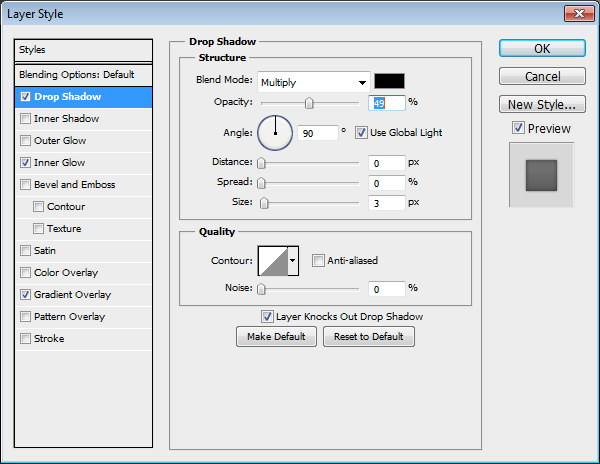
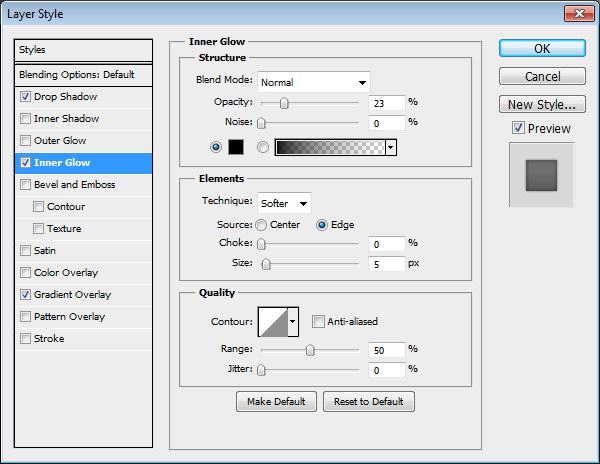
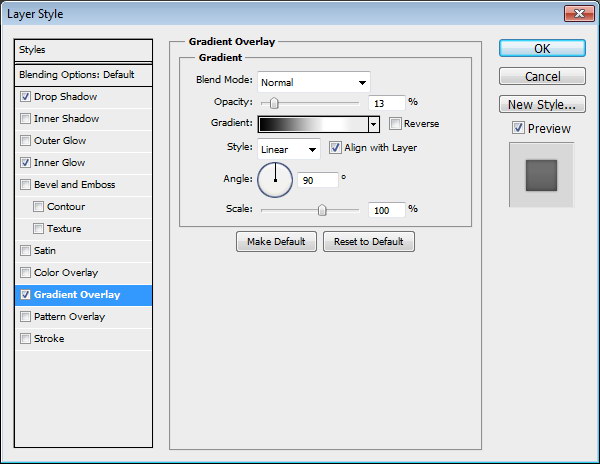
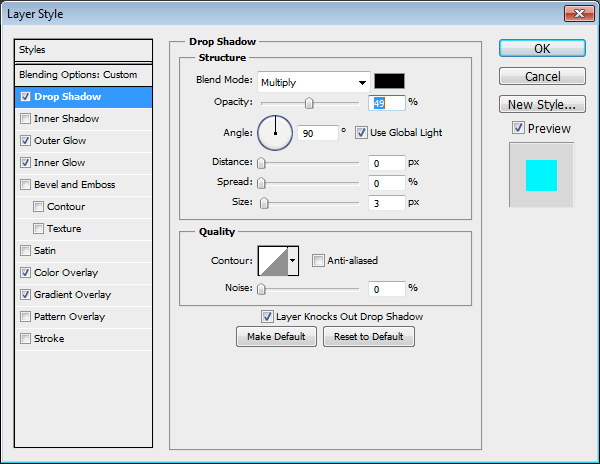
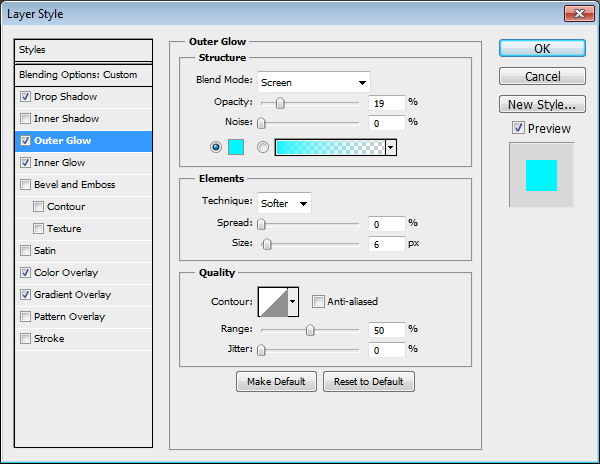
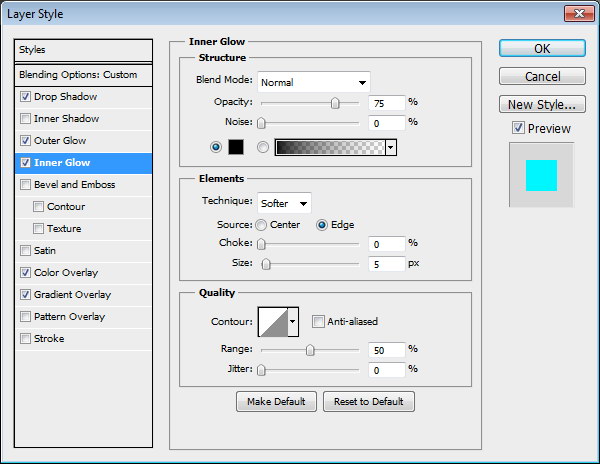
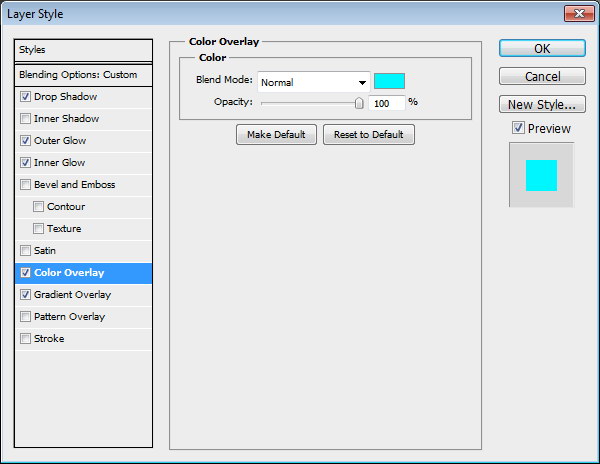
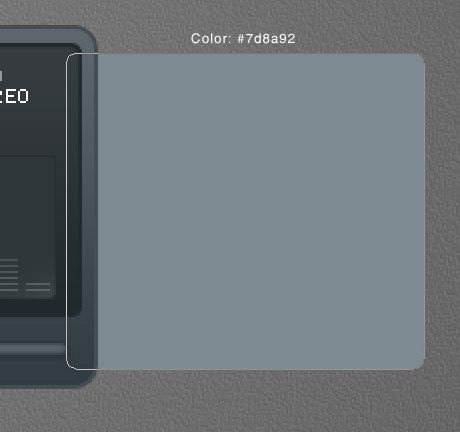
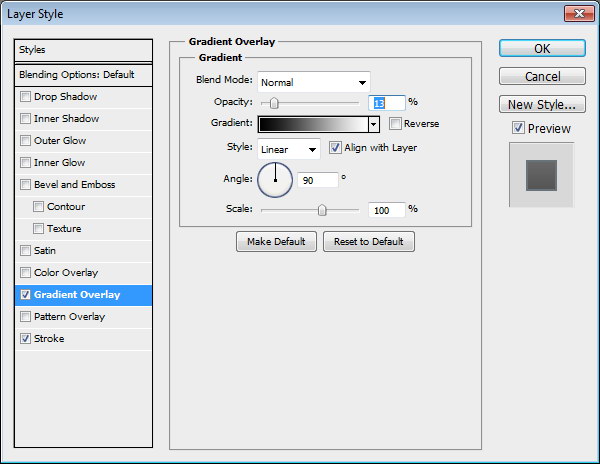
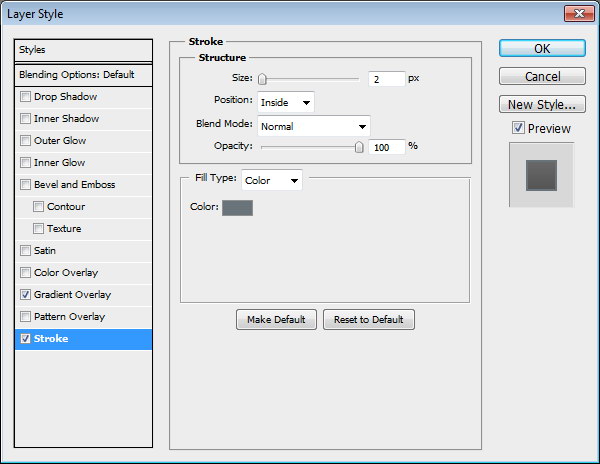
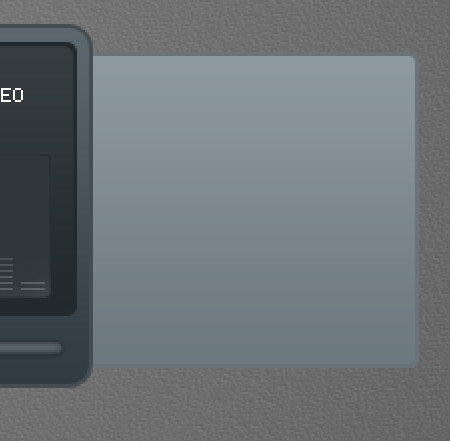
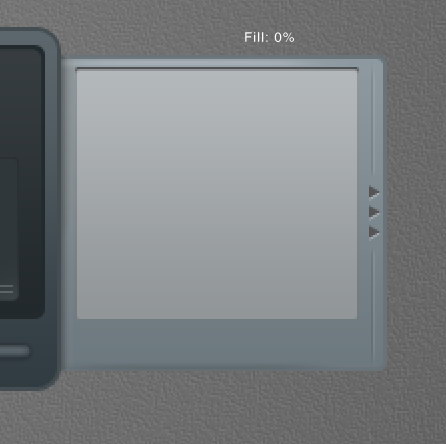
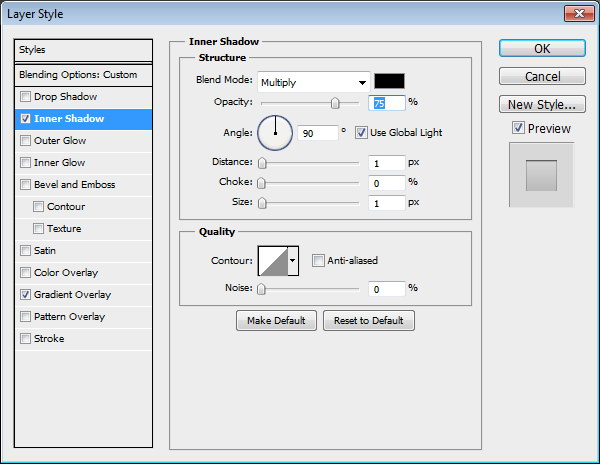
Step 8: Screen
Draw a smaller rounded rectangle. Add following layer styles.
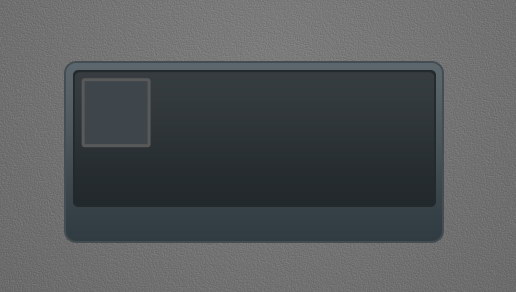
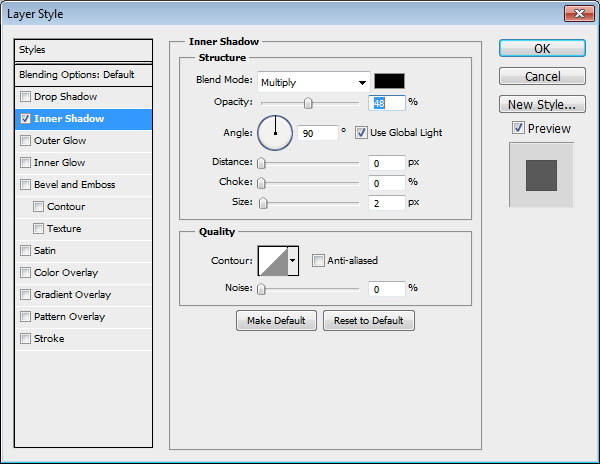
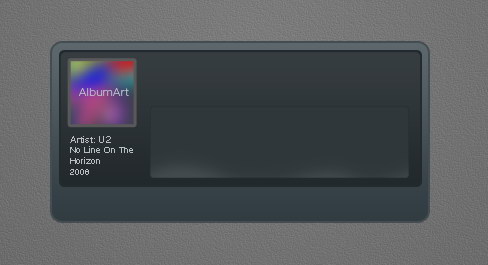
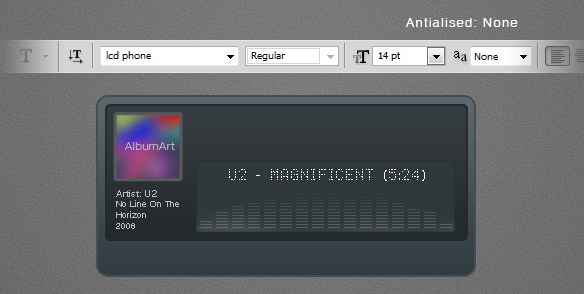
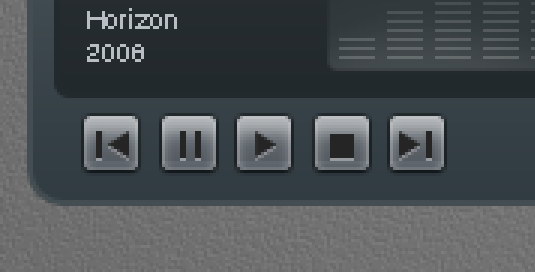
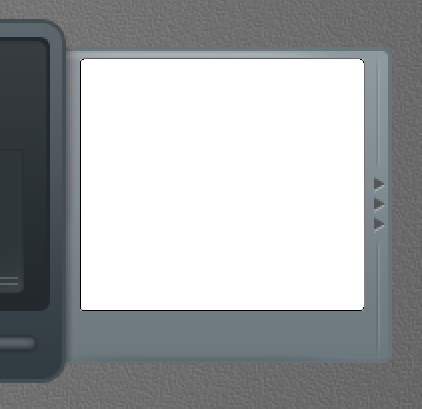
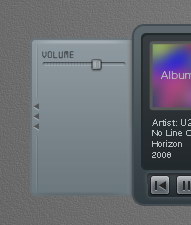
Step 9: Album Info
Add a small rounded rectangle. We’ll use it as a container for album cover. Add following layer styles.


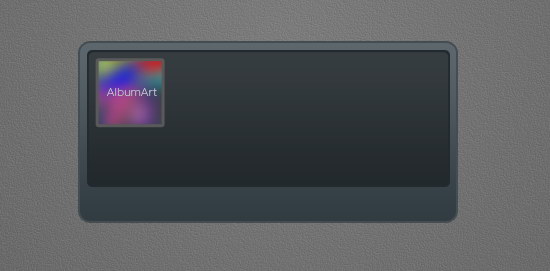
Step 10
Paste a picture on top of the rounded rectangle. Hit Command/Ctrl + Alt + G to convert it to clipping mask and put it inside the rounded rectangle.
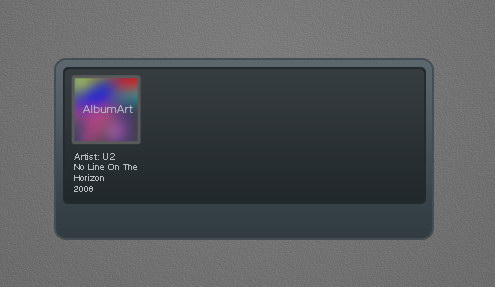
Step 11:
Add artist info, album’s name, and its year underneath the album cover.
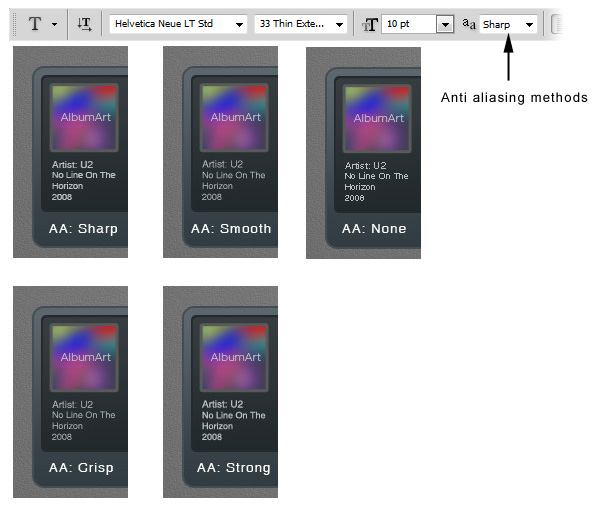
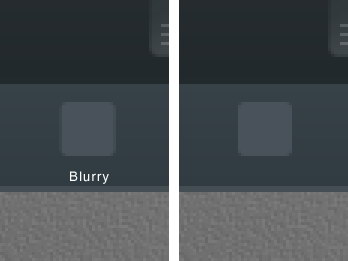
Step 12
From the option bar, you need to select the best Anti-aliasing methods to prevent blurry appearance. I can’t say which one is better because it’s different for each font type and size. You need to experiment with each setting. As you can see below, in this case None works best.
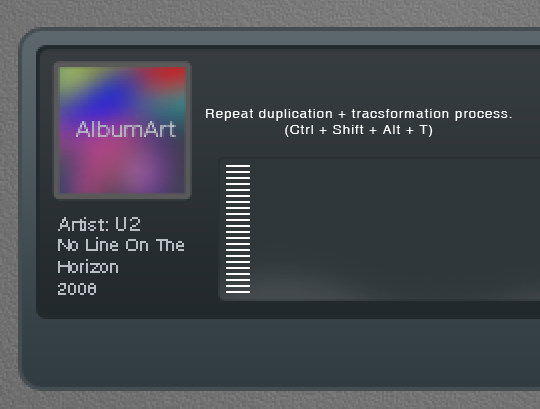
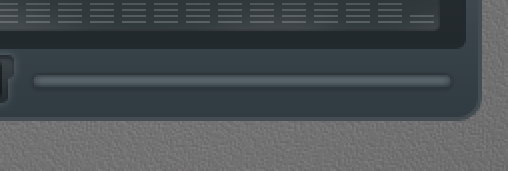
Step 13: Equalizer
Draw a rounded rectangle. Add following layer styles.


Step 14
Create new layer. Paint white using using a soft brush (Hardness: 0%) with low Opacity (10-15%). This will add a subtle light source under the equalizer.
Step 15
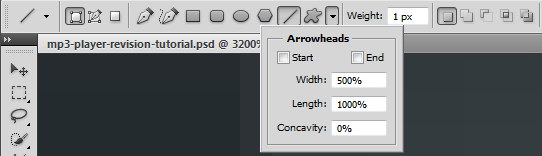
Select line tool and set its weight to 1 px.
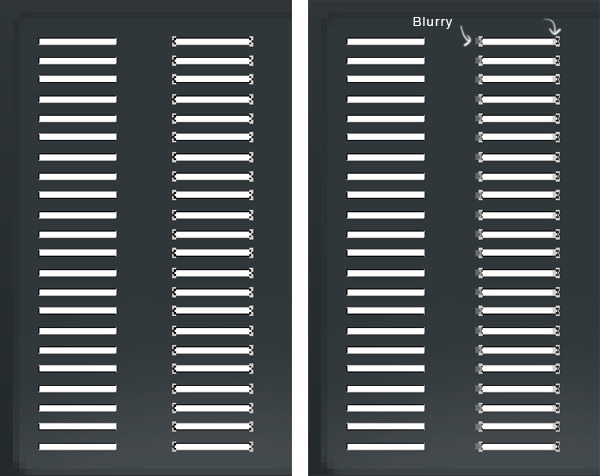
Step 16
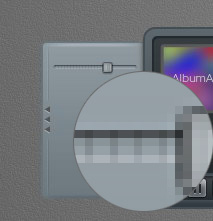
Draw a white line inside the equalizer. Activate zoom tool and click few times to zoom in to maximum view. We need to make sure that the line is not blurry. As you can see below, there is blurry spot on both ends of the line.
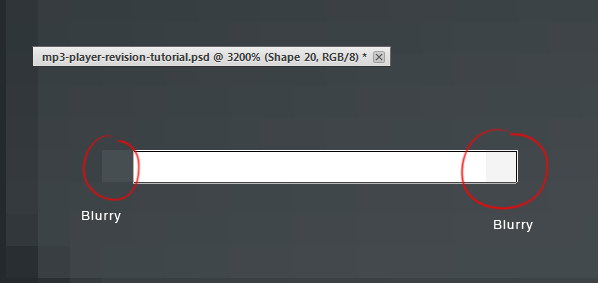
Step 17
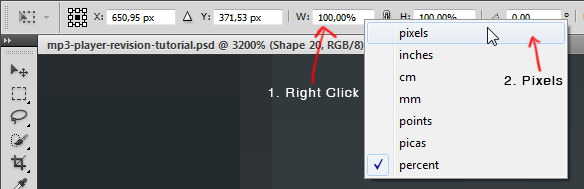
There are two ways to fix this blurriness. First we need to round up the size. Second is fixing its placement.
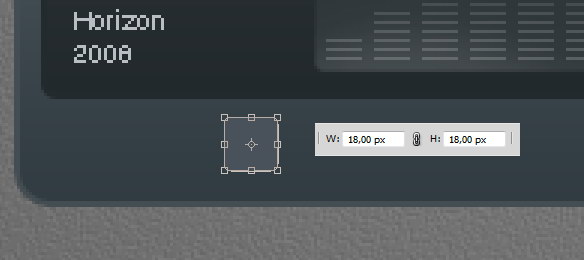
Hit Command/Ctrl + T to transform the line. Right click Width (W) box and select pixels. Do the same to Height (H) box.
Step 18
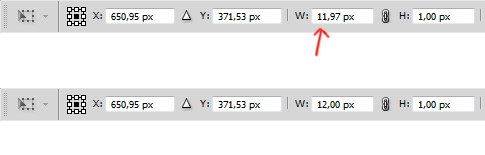
We need to round up the size. In this case we will need to change 11,97 px to 12 px.
Step 19
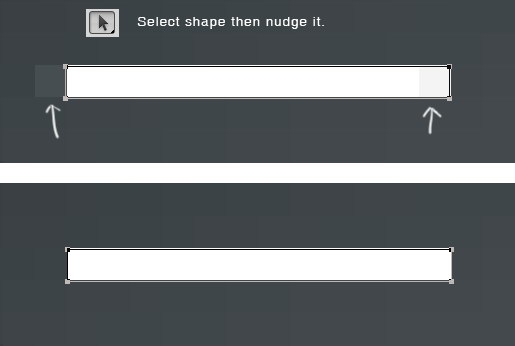
Next, let’s fix its position. Select line shape with tool Path. Hit arrow key to fix its position. Do this until we have no blurry spot.
Step 20
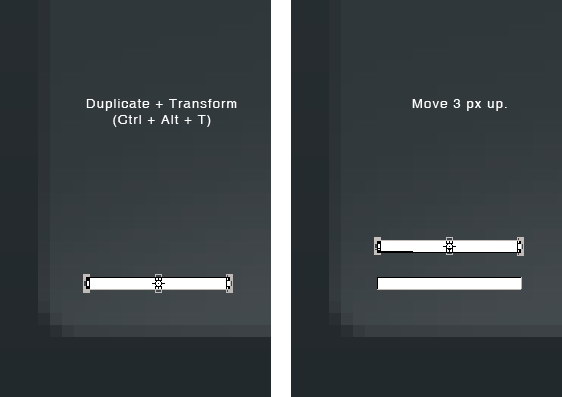
Duplicate and transform the line by pressing Command/Ctrl + Alt + T. Move it upward 3 px..
Step 21
Repeat the duplication and transformation process by pressing Command/Ctrl + Shift + Alt + T.
Step 22
Select all lines, duplicate it and place it to the right. Remember to keep it sharp. Make sure the position is perfect to avoid blurry spot.
Step 23
Repeat this process until we have some columns of 1 px height lines.
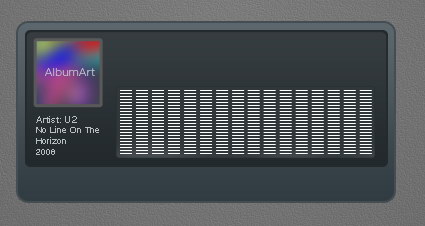
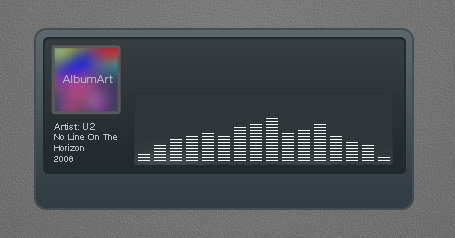
Step 24
Delete some of the lines until we get a natural shape of equalizer. Add following layer styles. Set Fill to 0%.
Step 25: Song Info
Add artist name, song title, and total track time on top of the equalizer. I’m using font type LCD Phone here. The Anti-aliased Method used here is None.
Step 26
Below, you can see the result with each Anti-aliased method.

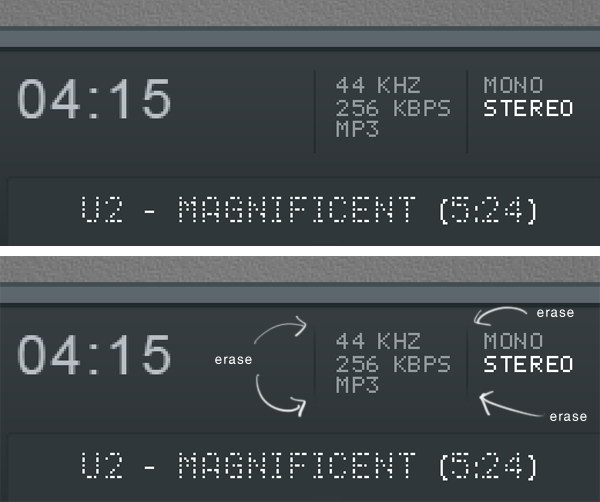
Step 27
Add more text for more info on top of the LCD. Use Pencil tool to draw a small black 1 px line separating each text. Erase both ends of these lines.
Step 28
Hit Command/Ctrl + 1. Let’s step back and see the result we have so far in 100% view. This is important to make there’s no blurry spots in our design.
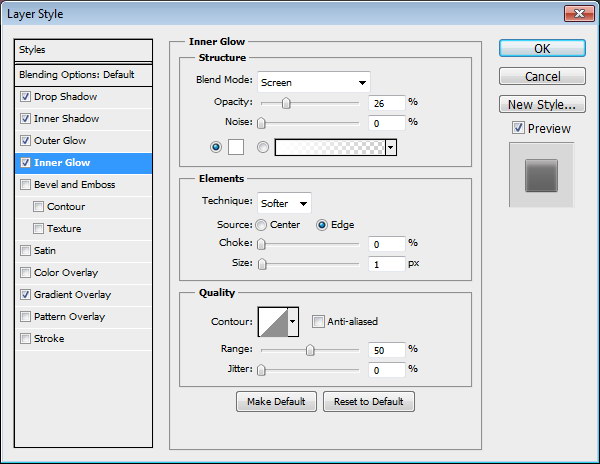
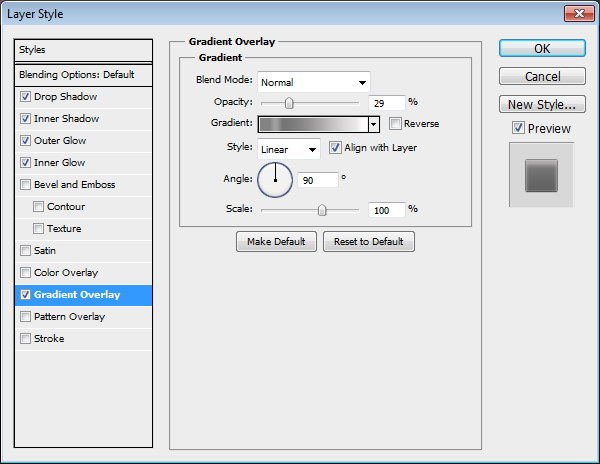
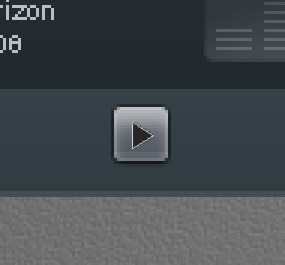
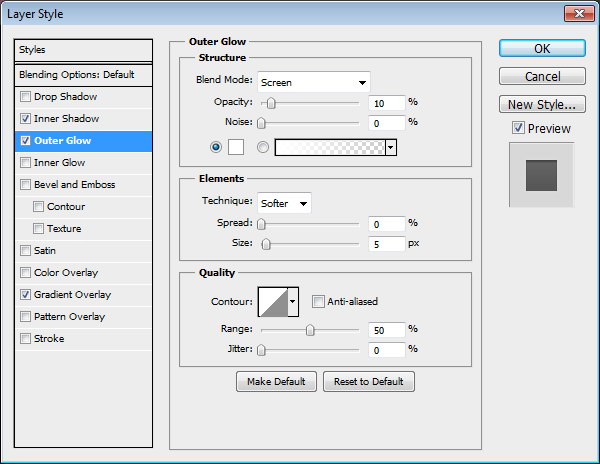
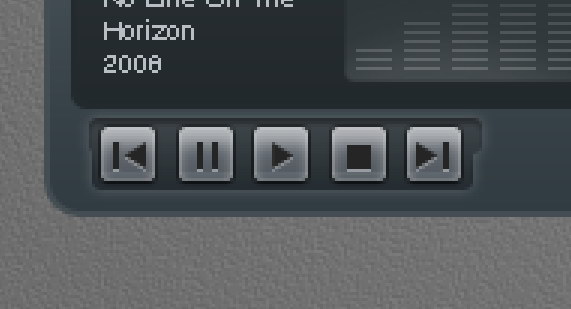
Step 29: Main Buttons
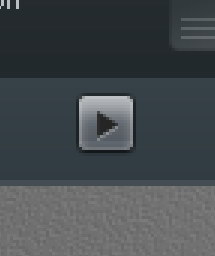
Draw a small rounded rectangle for the button.

Step 30
Again, we need to check its size and position to avoid blurry spots. Hit Command/Ctrl + T and make sure to round up its size.
Step 31
Make sure to check its position, we don’t want to see blurry edges.
Step 32
Add following layer styles.

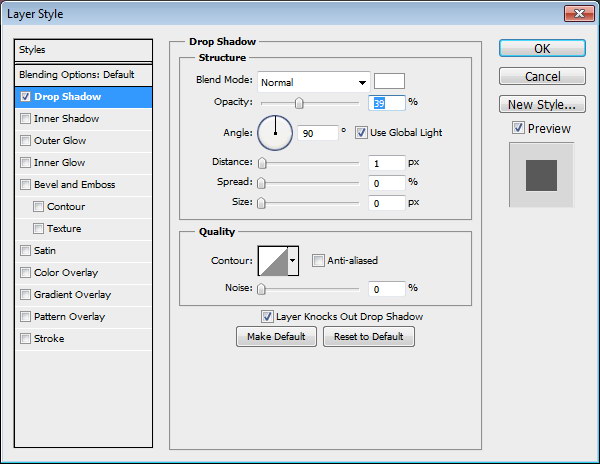
Step 33
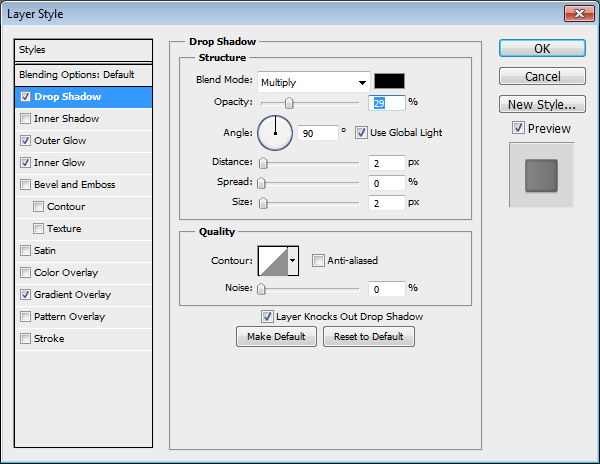
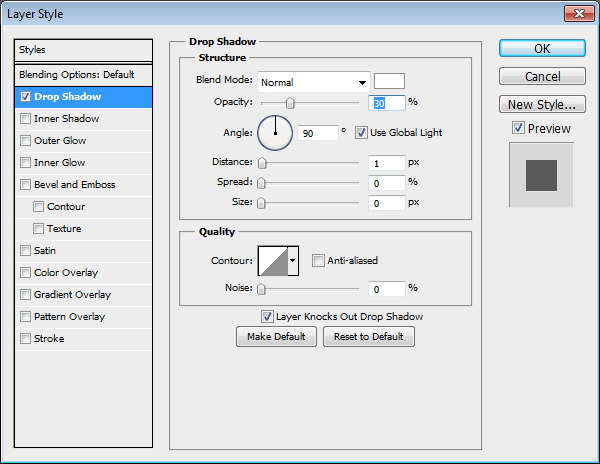
Draw a black triangle on top of the button. Add Drop Shadow with following settings.
Step 34
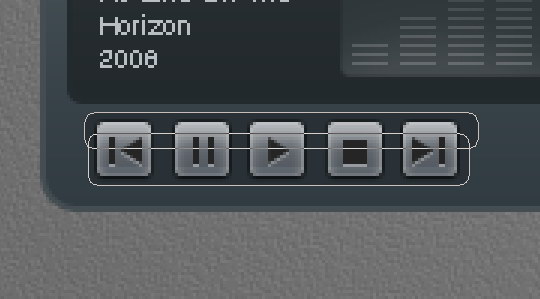
Repeat the process to create more buttons.
Step 35
Create button background made from two overlapping rounded rectangle. Add following layer styles.

Step 36
Let’s step back again and take a look at the design in 100% view. We need to make sure that there is no blurry spots.
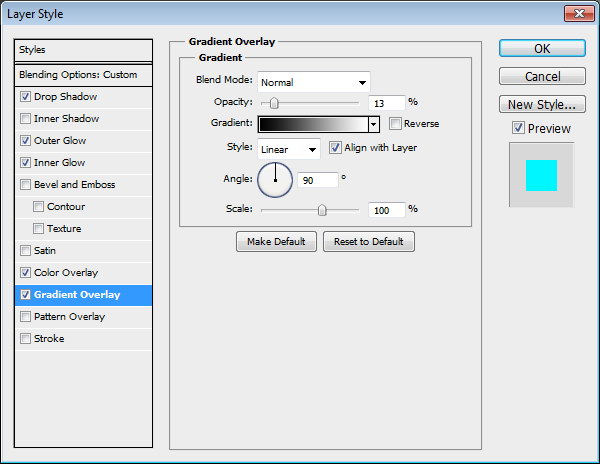
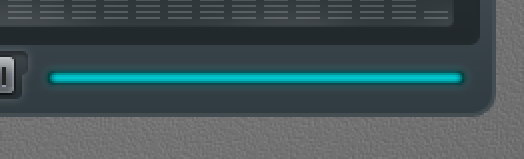
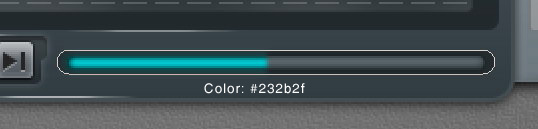
Step 37: Total Time Track
Create a long rounded rectangle. Add this following layer styles.
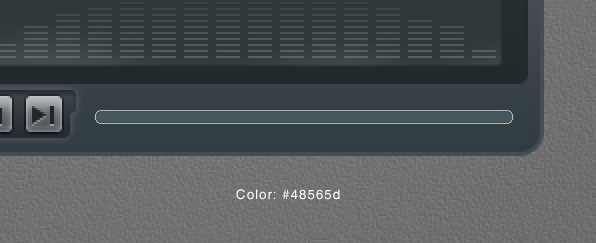
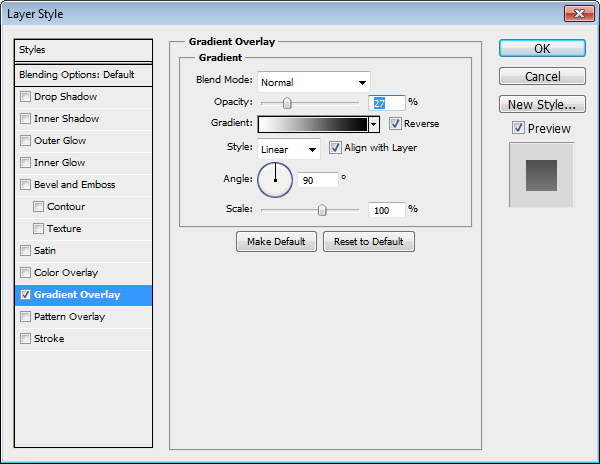
Step 38
Duplicate layer shape we have just created and add these layer styles.
Step 39
Add layer mask. Select half of the shape and fill it with black.

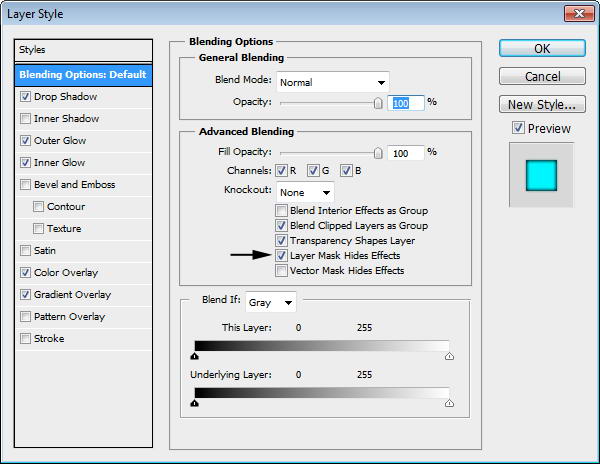
Step 39
Currently, layer styles are applied to the layer mask and they are adding a rounded shape on right end of the shape. To remove this, activate Layer Mask Hides Effects from layer style dialog box.
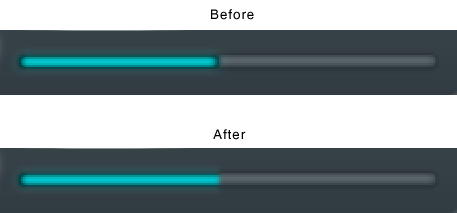
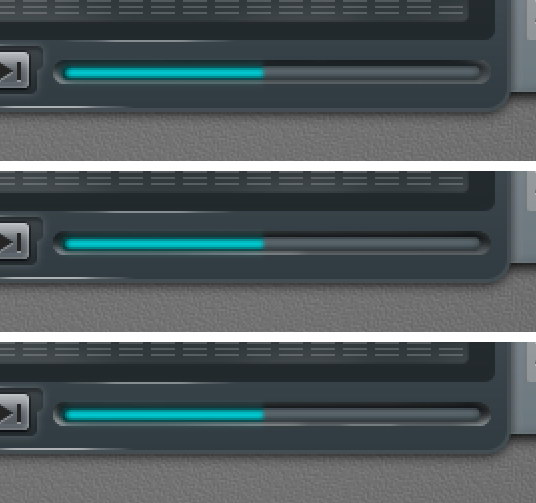
Step 40
You can see the difference below. The effect from layer style is now hidden by the layer mask.
Step 41
Create bigger rounded rectangle behind the time indicator for its background. Add this layer style.
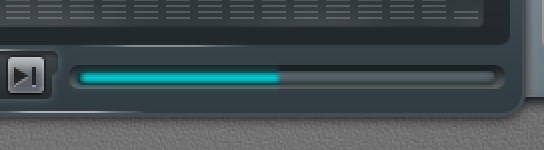
Step 42
Create new layer on top of the time indicator background. Paint some highlight and shadow. You can see the progress I made below.
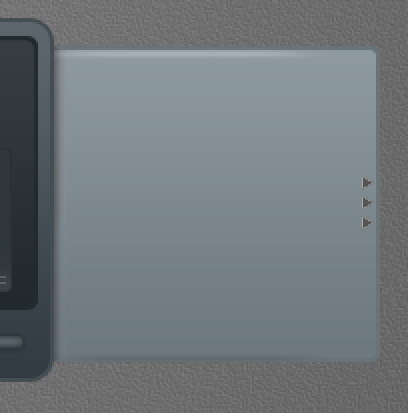
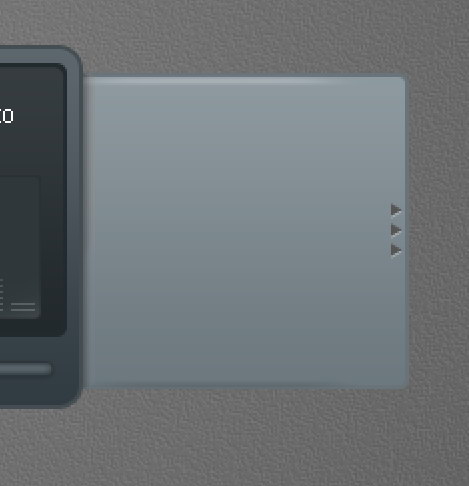
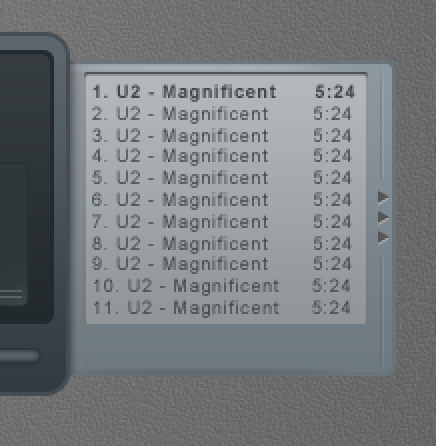
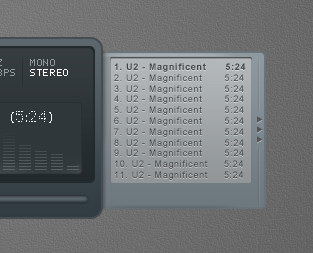
Step 43: Right Window – Playlist
Create a rounded rectangle and place it on right side behind the main shape. Add following layer styles.
Step 44
Create new layer on top of the rounded rectangle shape. Paint some highlight and shadows.
Step 45
Create some triangles and place them on right side of the shape. Add following layer style.

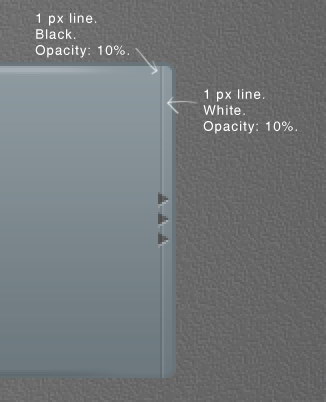
Step 46
Use pencil tool to draw two 1 px line, black and white. Set its opacity to 10%.
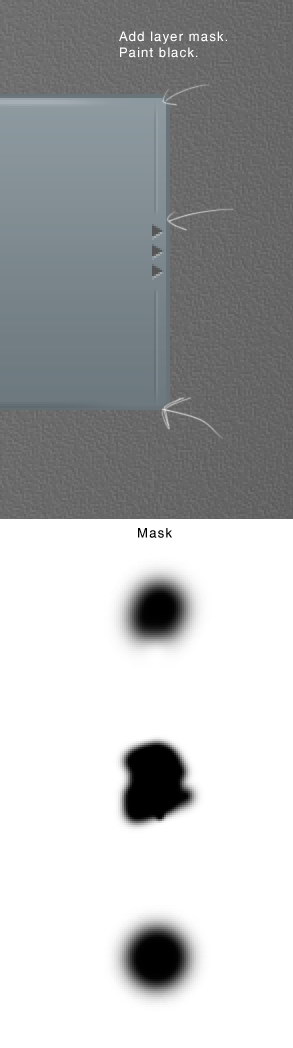
Step 47
Add layer mask and paint some parts of the line with black. Below you can see the mask used here.
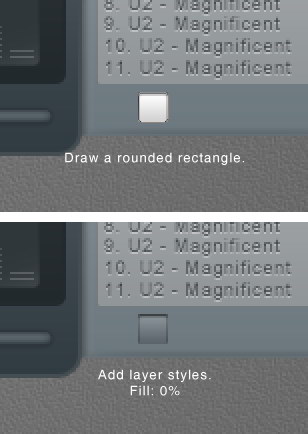
Step 48
Draw a rounded rectangle and add following layer styles. Set Fill layer to 0%.

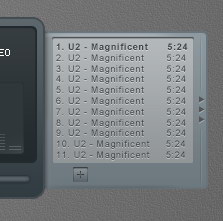
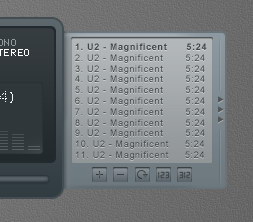
Step 49
Add song titles. Set one of the songs to bold to indicate it as an active song.
Step 50
Add Drop Shadow to give it inset effect.

Step 51
Draw a rounded rectangle. Add following layer styles and set its Fill layer to 0%.

Step 52
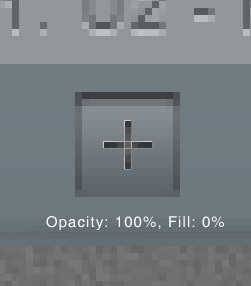
Create a plus sign made from two overlapping line shape. Set Fill to 0% and add these layer styles.


Step 53
Repeat the process to create other buttons.
Step 54: Left Window – Player Settings
Duplicate playlist basic shape. Hit Command/Ctrl + T, right click and choose Flip Horizontal. Move it to left side.
Step 55
Draw a thin rounded rectangle and add these layer styles.
Step 56
Create a small rounded rectangle for the slider. Add following layer styles.
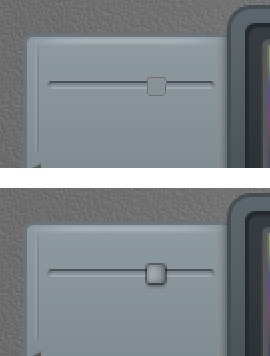


Step 57
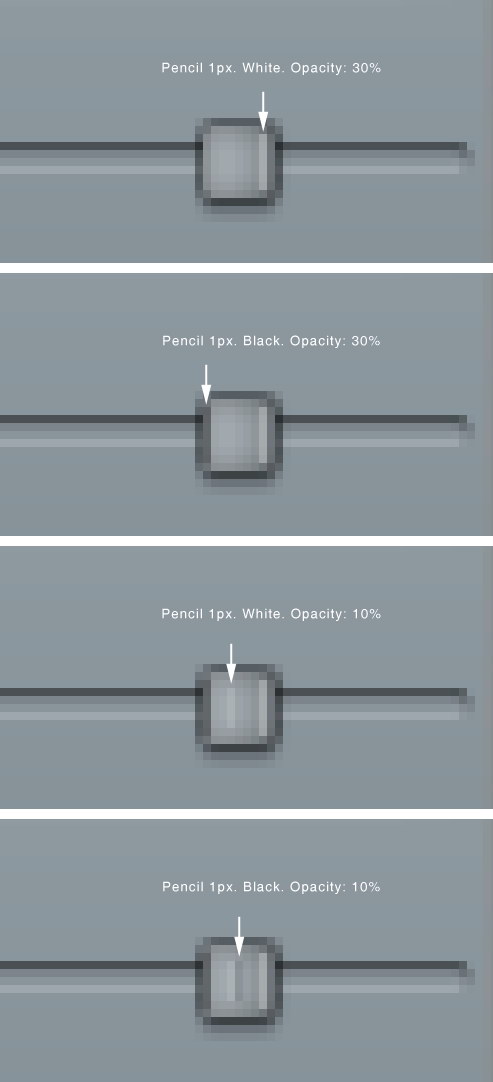
These layer styles is still not enough to get a convincing 3D appearance. Using pencil tool, we need to add some 1 px line detail on the slider. See picture below for reference.
Step 58
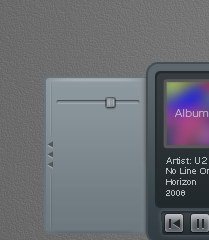
Let’s step back and see the result in 100% view.
Step 59
Paint some black stripes behind the slider.
Step 60
Let’s add label "VOLUME" for the slider. The font used is Digital-7. Add Drop Shadow.
Step 61
Create another slider by duplicating previous slider and change its label.
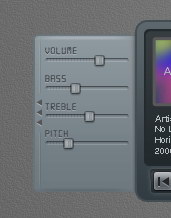
Step 62
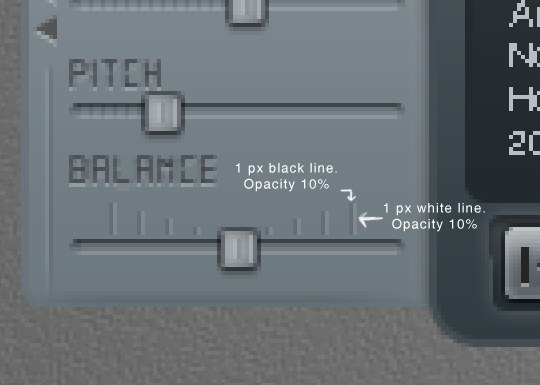
Now let’s focus on creating balance slider since this is a bit different. Add more space between the slider and its label. Delete stripes behind the slider. Use pencil to draw alternating 1 px black and white line. Set the layer’s Opacity to 10%.
Step 63
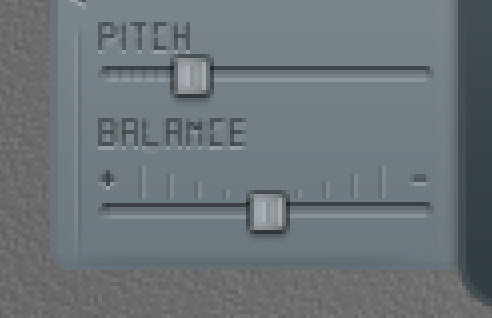
Add plus (+) and minus (-) character on both ends and add Drop Shadow.

Step 64
Hit Command/Ctrl + 1 to see the result at 100% view.
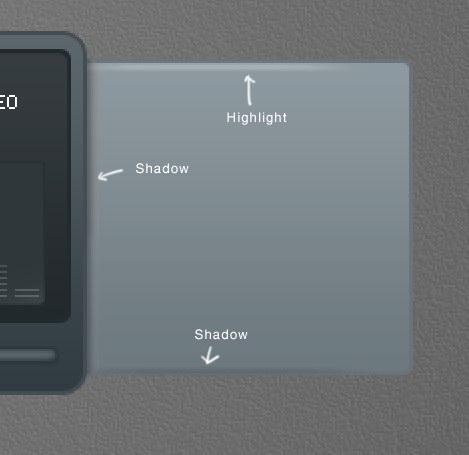
Step 65: Highlight
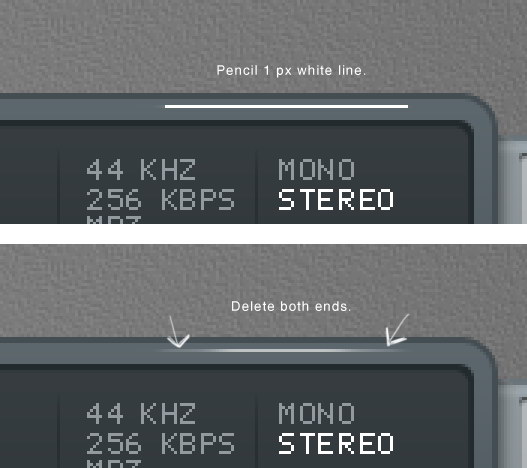
Our design is simply too clean and unnatural. To fix this let’s add some highlights. Draw a white 1 px line using pencil tool. Delete both ends.
Step 66
Repeat this process to create another highlights.
Step 67: Shadow
Hold Command/Ctrl and click basic shape, playlist shape, and player settings shape to create a new selection based on the mp3 player’s shape. Press down arrow a few times to nudge the selection down.
Step 68
Create new layer underneath all other layers. Fill selection with black. Presst Command/Ctrl +Shift + I to deselect. Soften the shadow by adding Gaussian Blur filter.
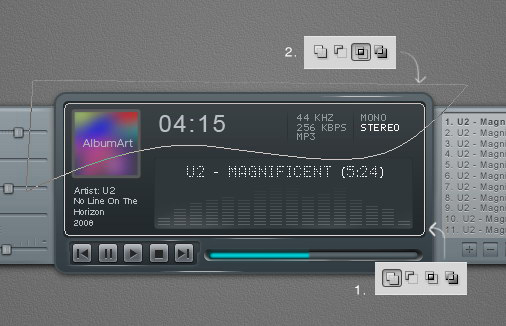
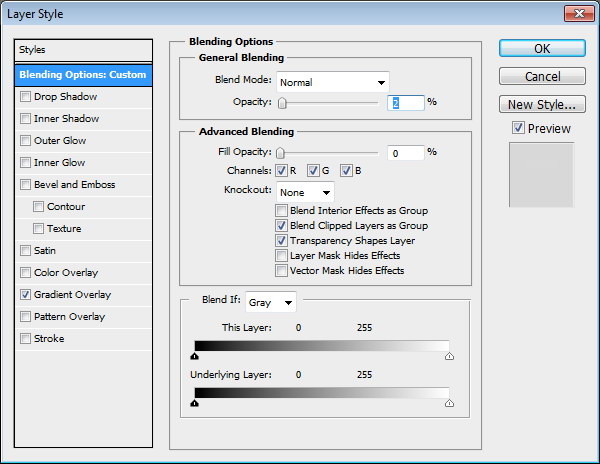
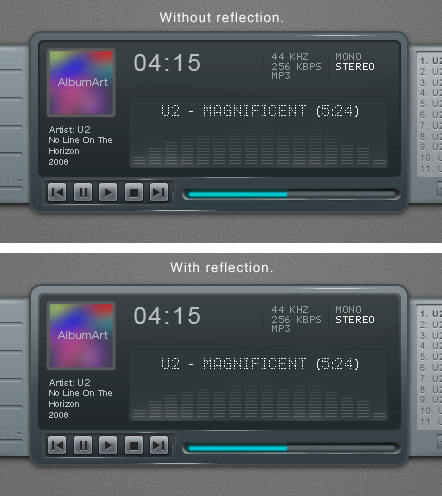
Step 69: Reflection
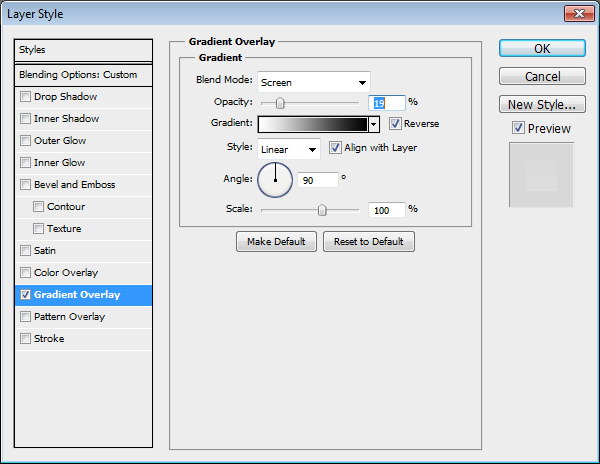
Let’s add reflection onto the surface of the mp3 player. Copy screen path (1). Click Adjustment Layer icon and select Solid Color. You can use any color here. Create another path covering top part of the screen and set it to Intersect (2). Change Opacity to 2% and Fill to 0%.

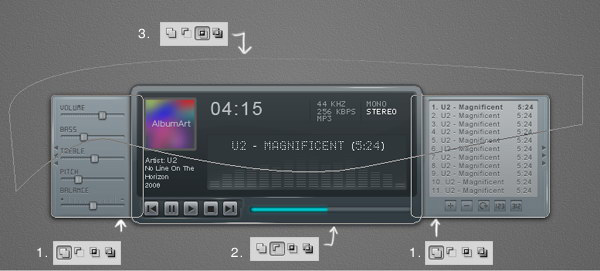
Step 70
Now we’ll create another reflection on outter side of the main window. Create new path covering top part of the main window (1). Click Adjustment Layer icon and select Solid Color. Subtract it with screen shape path (2). Intersect it with main window shape path (3).
Step 71
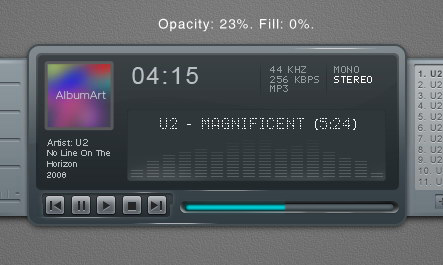
Set Opacity to 23% and Fill to 0%. Add following layer styles.

Step 72
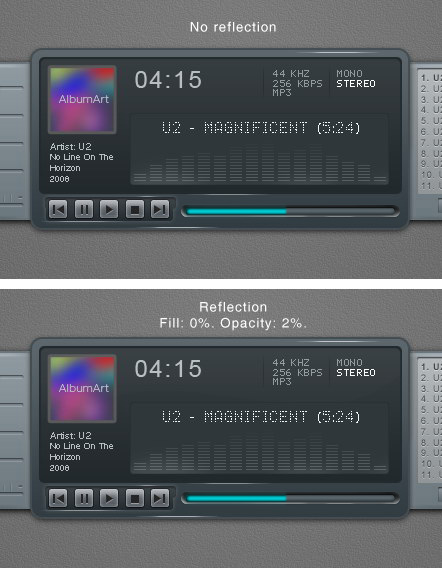
Below, you can see the difference with and without reflection.
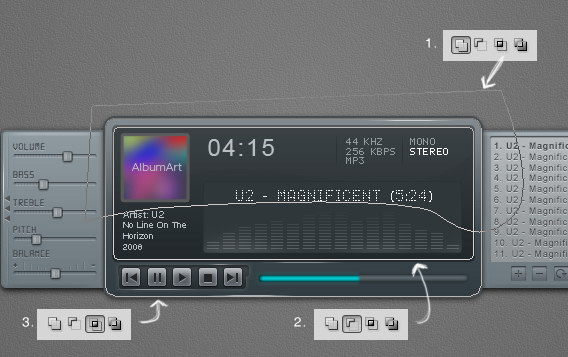
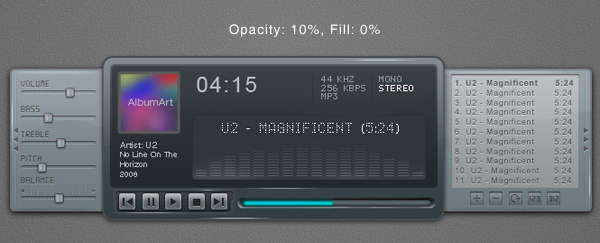
Step 73
Next we will add reflection on left and right window. Copy left and right window path, set their mode to Add (1). Click Adjustment layer icon and select Solid Color. Subtract path with the main window path (2). Create new path covering top part of the interface and set it to Intersect (3).
Step 74
Set Opacity to 10% and Fill 0%.

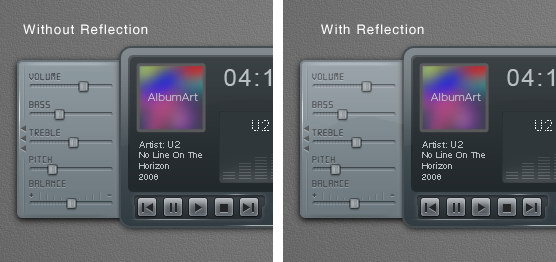
Step 75
Below, you can the difference with and without reflection. Very subtle but it gives more depth onto the shape.
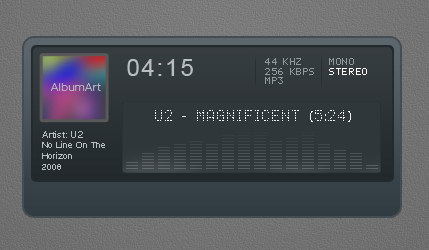
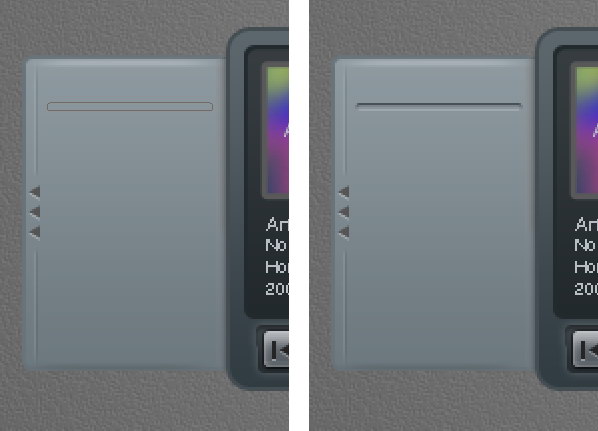
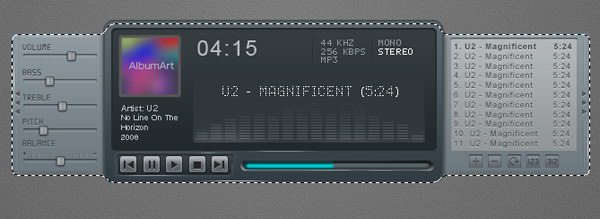
Step 76: Interface with Closed Playlist and Settings
Put all shapes and layer that create the mp3 player into a group folder. Duplicate the group and move the left and right window until they are closed.
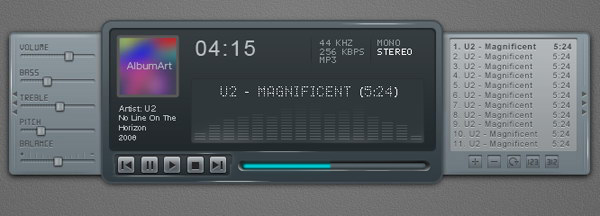
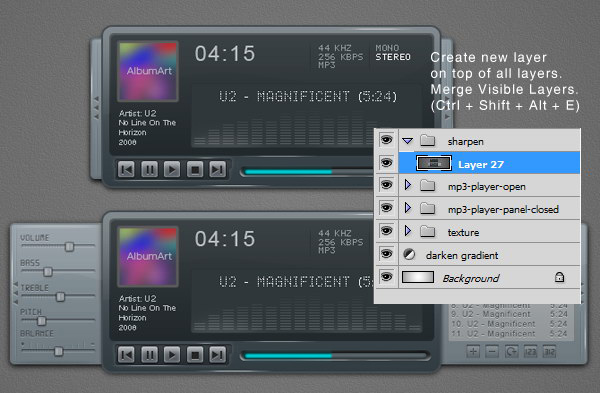
Step 77: Sharpening
We have tried to sharpen every pixel on the interface, we still need to sharpen it again. Create new layer on top of all layer. Hit Command/Ctrl + Shift + Alt + E to merge all visible layers. Now, we have exact duplicate of the image in one single layer.
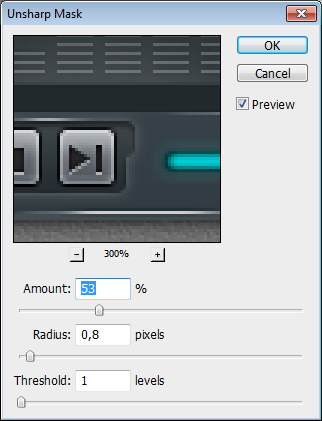
Step 78
Click Filter > Sharpen > Unsharp Mask. This filter will sharpen all the pixels on the layer.


0 comments:
Post a Comment