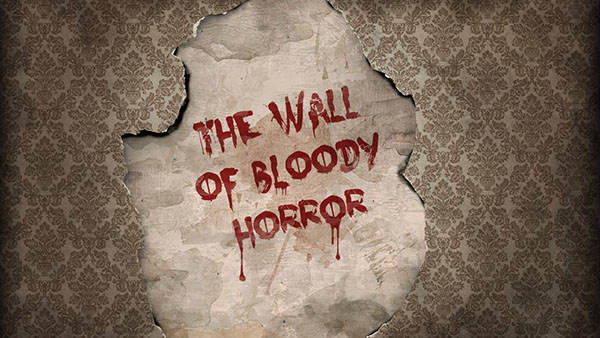
This tutorial will show you how to layer a couple of grunge and watercolor brushes, then use them with some textures to create a wall with a real vintage look. After that, we'll combine the text and some dripping brushes to add the writing on that wall. Finally I'll give you some tips on adjusting the lighting so that you can end up with an intense, vivid design.
This effect is inspired by the promotion images for the new season of American Horror Story: Freak Show.
Tutorial Assets
The following assets were used during the production of this tutorial.
- Nightbird font
- Crack 5 by pheliz-stock
- French Wallpaper Patterns 1 by sofi01
- Grunge brushes by anamcr
- Watercolours 3 PS 7.0 by Pfefferminzchen
- ConcreteBare0183 Image 3 - Medium 1600x1048
- PlasterWhite0080 Image 1 - Medium 1600x1064
- Drips 1 Brush Pack for Photoshop or Gimp
1. Modifying the Pattern
Step 1
Open the 35.jpg image from the French Wallpaper Patterns 1 pack, then go toImage > Adjustments > Levels. Click the Sample in image to set white pointicon, then click the peachy orange colored part in the image. This will set it along with any lighter points to white.

Step 2
Go to Image > Adjustments > Hue/Saturation, click the Colorize box, and then change the Hue to 32, the Saturation to 18, and the Lightness to 40.

Step 3
Go to Edit > Define Pattern, and type in a name for the pattern.

2. Patching the Crack Texture
Step 1
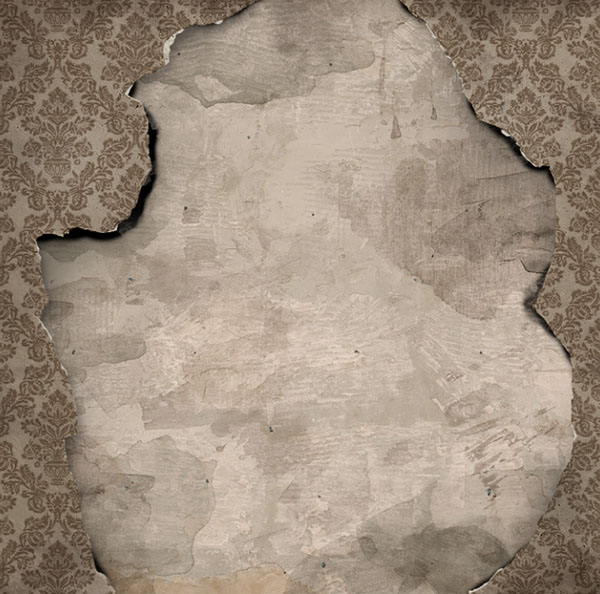
Create a new 1280 x 720 px document, then place the Crack 5 texture on top of theBackground layer. Resize it as needed, but for a result similar to the one in this tutorial, make sure to keep the top and bottom parts open at the ends of the document as shown in the screenshot below.
In order to get a neater result, we will need to get rid of the hole extending to the right of the image, which is what we'll be doing next.

Step 2
Pick the Stamp Tool, and a soft round 25 px brush tip. Press and hold theOption/Alt key, then click at the beginning of the part that you want to use as an edge for the hole to the right.

Step 3
Release all, then click and drag to use the part you sampled earlier to patch the hole. You can undo and resample a couple of times until you get a result you like. Don't fill the whole part yet, just make sure to create the edge.

Step 4
Now pick the Patch Tool, make sure that the Patch option in the Options bar is set to Normal, and that the Source button is clicked. Then, click and drag to create a selection around the remaining part of the hole.

Step 5
Click inside the selection and drag it down until you find a part of the wall you like, then release. This will patch that part pretty nicely.

Step 6
You can also use the Spot Healing Brush Tool to get rid of any other spots or parts you don't like, by simply painting over them.

Step 7
When done, go to Filter > Noise > Reduce Noise, and change the Strength to 10, the Preserve Details value to 37, the Reduce Color Noise value to 84, and theSharpen Details value to 75, and make sure that the Remove JPEG Artifact box is unchecked.

Step 8
Finally, go to Image > Adjustments > Hue/Saturation, and change the Hue to -64and the Saturation to -70.

3. Masking Out the Crack's Center and Adding the Concrete Texture
Step 1
Pick the Magnetic Lasso Tool, then click at the beginning of one of the crack's sides to start creating a selection. Drag slowly at the edges, and if you need to force it to add a point, click once where you want the point to be added, then continue dragging.
You can play around with the settings in the Options bar, like increasing theFrequency value if necessary.

Step 2
When you're done, you can use the Polygonal Lasso Tool, and click the Add to Selection icon in the Options bar, to add any left-out parts at the top and bottom of the image.
When the selection is complete, go to Select > Inverse.

Step 3
Click the Add layer mask icon at the bottom of the Layers panel. This will add a layer mask that will remove the center of the crack.

Step 4
Place the ConcreteBare0183 image right below the crack texture layer, and rename its layer to Concrete, then resize it as needed, making sure not to leave any empty areas.

Step 5
Go to Image > Adjustments > Hue/Saturation, and change the Hue to -12 and theSaturation to -20.

Step 6
Double-click the crack texture layer to apply a simple Drop Shadow effect using the values below:
- Opacity: 25%
- Distance: 10
- Size: 10

This will add the first layer of shadow to that part.

4. Enhancing the Crack's Color, Adding the Pattern, and Modifying the Edges
Step 1
Create a new layer on top of all layers, call it Fill Color, and change its Blend Modeto Color. Then set the Foreground color to
#968978, and use the Paint Bucket Tool to fill the layer with that color.
Step 2
Create another new layer, call it Pattern, and change its Blend Mode to Multiply. Then with the Paint Bucket Tool still active, choose the Pattern fill from theOptions bar's dropdown menu, and fill the new layer with the pattern you defined at the beginning of this tutorial.

Step 3
Command/Control-Click the crack texture's layer mask thumbnail to create a selection.
Select the Fill Color layer, then click the Add layer mask icon to apply the same layer mask to it. Repeat that for the Pattern layer as well.

Step 4
Place the PlasterWhite0080 texture on top of all layers, rename its layer to Edges, click the Add layer mask icon, and fill the layer mask with
Black.
Pick the Eraser Tool, and make sure that the Foreground color is set to
Black, and that the layer mask is still selected.
With a small soft round brush tip, start erasing some parts along the edges to show the masked texture back for those parts.

Not all the edges should be erased. A couple of areas around the crack should be just fine. This will make the final result look more realistic and interesting.

5. Grunging Up the Wallpaper
Step 1
Create a new layer on top of all layers, and call it Border 1. Change its Blend Modeto Multiply and its Opacity to 70%, set the Foreground color to
#524741, and then use any of the Grunge brushes to darken up the document's edges.
Step 2
Create another new layer, call it Border 2, change its Blend Mode to Linear Burn, and use a soft round brush to add another darkening layer to the grungy edges.

Step 3
Create one more layer, and call it Grunge Overlay. Change its Blend Mode toMultiply and its Opacity to 50%, then scatter some of the Grunge brushesrandomly over the wallpaper (the part that has the pattern).

Step 4
Create a new layer and call it Highlight. Change its Blend Mode to Soft Light, set the Foreground color to
#acacac, and use a soft round brush tip to highlight some areas of the crack's edges. Then, add the same previous layer mask to the layer just like you did for the Fill Color and Pattern layers before.
Step 5
You can also create another layer and call it Shadow, change its Blend Mode toMultiply, and use the same Foreground color to darken up any areas that need darkening along the edges. Don't forget to add a layer mask for this layer too.

6. Intensifying the Crack Edges' Shadow and Staining the Concrete Center
Step 1
Create a new layer on top of the Concrete layer, and call it Center Shadow 1. Change its Blend Mode to Multiply and its Opacity to 50%, set the Foregroundcolor to
Black, then use a big soft round brush tip to add some shadowing to the edges in order to create more depth.
Step 2
Create another new layer on top of the Center Shadow 1 layer, and call it Center Shadow 2. Change its Blend Mode to Linear Burn, and set the Foreground color to
#342915.
The first part of this step is to pick a round brush tip with a Hardness value of 70%, then create some dark, intense shadow areas below a few parts of the crack's edges. You can use the Eraser Tool to help you shape those shadows to match the shape of the edges that are supposed to be casting them.
The second part is to pick the Eraser Tool, and use the brush 24 from theWatercolours 3 PS 7.0 pack to erase parts of the outer edges of the shadows you created.

Step 3
Next, start creating new layers between the crack and the Center Shadow 2 layers, and change each of those layers' Blend Modes to Multiply, then choose shades of green and brown colors to add stains to the concrete center using the Watercolours 3 PS 7.0 brushes. Place those layers in a group and call it Center.

Step 4
The brushes and colors used in this tutorial from bottom to top are:
- Layer - Color - Brush
- 1 -
#998675- 28 - 2 -
#a6a497- 30 - 3 -
#a6a497- 29 - 4 -
#998675- 27 - 5 -
#342915- 29 - 6 -
#a6a497- 09 - 7 -
#342915- 22

7. Adding the Text
Step 1
Create the text using the font Nightbird, the font Size 99 pt, the color
#993133, and set the Tracking value to -25.
Step 2
Go to Edit > Transform > Rotate, rotate the text slightly, then hit Return/Enter to accept the changes.

Step 3
Create a new layer on top of the text layer, call it Drips, and set the Foregroundcolor to
#993133. Then add some of the Drips 1 Brush Pack for Photoshop or Gimp brushes to a couple of the letters you have. You can combine more than one brush for the same letter as well.
Step 4
Select both the text and the Drips layers, then go to Layer > Merge Layers, rename the merged layer to Text, and change its Blend Mode to Multiply.

Step 5
You can use the Watercolours 3 PS 7.0 brushes to erase some parts of the text if you like.

Step 6
Go to Image > Adjustments > Hue/Saturation, and change the Saturation to 10.

Step 7
Create a new layer on top of the Center Shadow 2 layer, call it Stain, change itsBlend Mode to Linear Burn, set the Foreground color to
#b3897c, and add the brush 28 from the Watercolours 3 PS 7.0 pack behind the text. You can modify some of its settings if you like, as shown in the next step.
Step 8
Open the Brush panel (Window > Brush), change the Size to 400, and check theFlip Y box, then add the brush.

8. Lighting and Final Touches
Step 1
Click the Create new fill or adjustment layer icon at the bottom of the Layerspanel and choose Levels. Make sure to place its layer on top of all layers, then change the Highlights value to 245.

Step 2
Click the Create new fill or adjustment layer icon again, but this time chooseBrightness/Contrast, and change the Contrast value to 10.

Step 3
Double click the Fill Color layer to apply a Gradient Overlay effect using the following values.
- Blend Mode: Overlay
- Opacity: 35%
- Style: Radial
- Scale: 150%
- Check the Reverse box
- Use the Black to White gradient fill.

This will make the effect look more vivas
Step 4
Pick the Dodge Tool, choose a soft round brush tip, and set the Range to Midtonesand the Exposure to 50% in the Options bar. Select the crack texture's layer, then start brightening up its edges a little bit.

Congratulations! You're Done
In this tutorial, we patched, modified, and masked a crack texture to create the base of a pattern-filled wallpaper.
Then, we added the fill color and pattern to the crack texture, as well as a couple of brushes to make it look more vintage and grungy. We used other brushes to add highlights and shadows, creating more depth and dimension.
Then we created the text, added some drips, and merged and blended both layers with the design.
Finally, we enhanced the lighting, and added some finishing touches to bring the design to life and make it look more vivid.
Please feel free to leave your comments, suggestions, and outcomes belo

0 comments:
Post a Comment