this newly discovered method of simulating a polarizing filter with Adobe Photoshop that's faster, easier, and more effective. Considered the most useful filter in photography, a polarizing filter makes almost any image look better by absorbing glare to reduce or eliminate reflections and darken skies.
Understanding how this polarizing effect works
Step 1
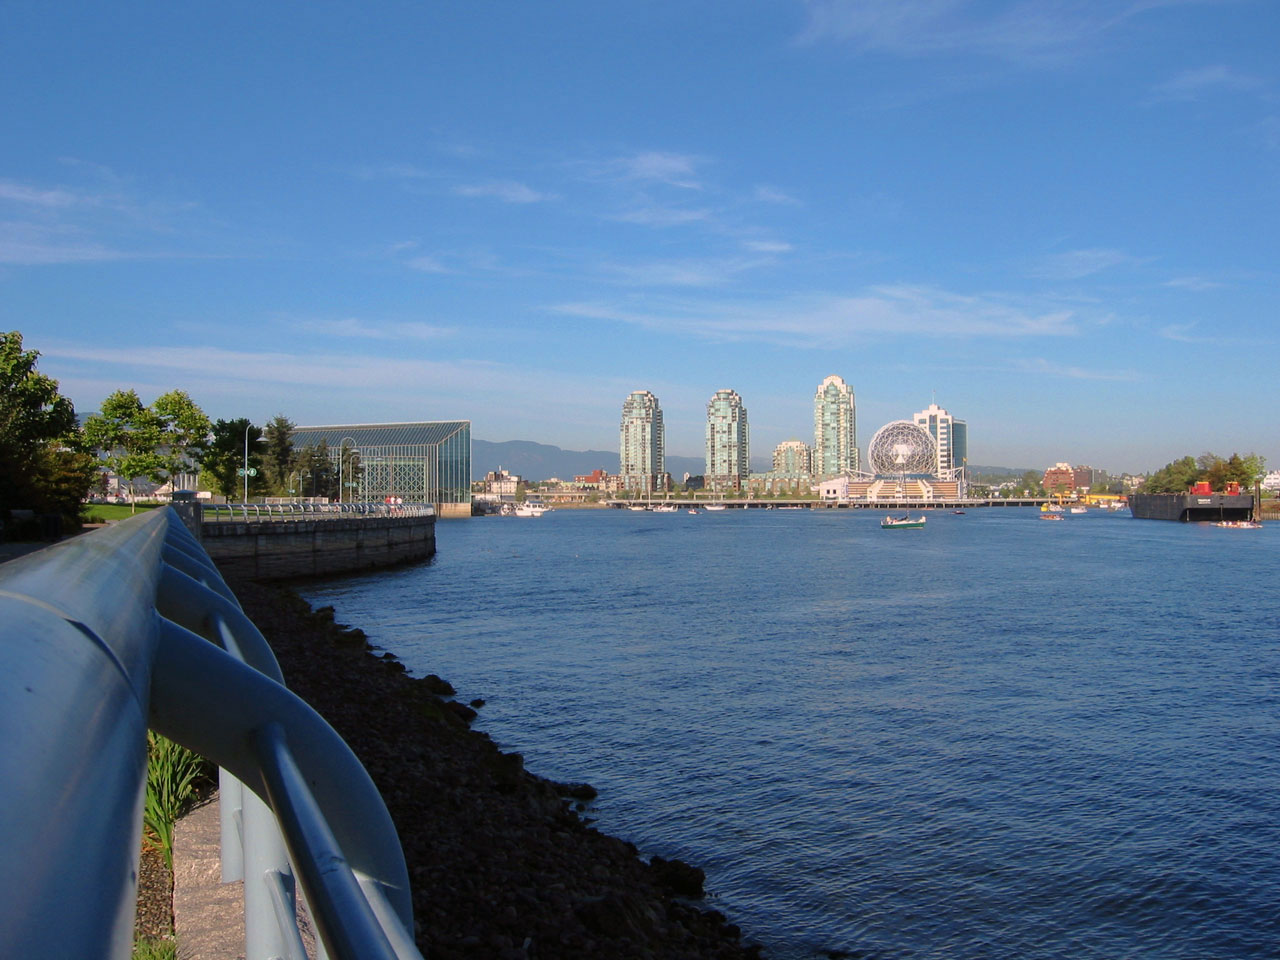
Download and save the following JPG file to your computer then open it inside Adobe Photoshop.
Step 2
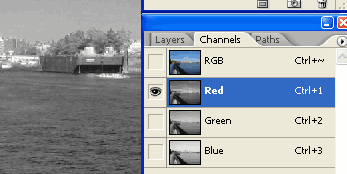
Once you have the photo opened inside Adobe Photoshop, look inside the Channels pallet (Window> Channels). Inside the Channels pallet, click on the each of the channels and notice the differences between the channels.
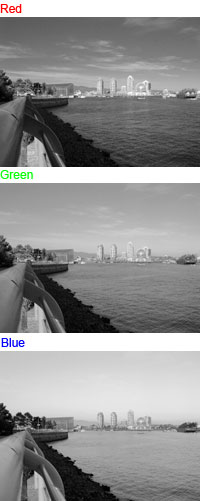
So the red channel's characteristics are similar to those characteristics of a polarizing filter (reduced reflections and darker blue skies & green vegetation), but how do we apply those characteristics to the image? In the next page, we'll teach you a fast and effective way of simulating a polarizing filter.
Applying the Polarizing Effect
To apply the characteristics of the red channel into the entire image, we need to replace the luminance of the entire image with the image from the red channel.
Step 3
Open an image you would like to work with or use the vancouver.jpg file we still have opened in Photoshop.
Step 4
Duplicate the current layer (Layer> Duplicate Layer or Ctrl+J).
Step 5
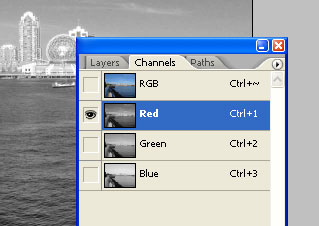
Go in to the Channels pallet (Window> Channels) and click to select the Red channel.
Step 6
With the red channel selected, create a selection of the canvas (Select> All or Ctrl+A) and copy the selection to clipboard (Edit> Copy or Ctrl+C).
Step 7
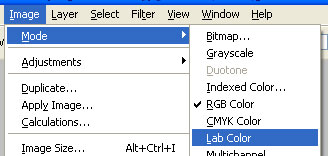
Before we paste the red channel into the Lightness channel, we need to convert the image into Lab Color (Image> Mode> Lab Color). When it asks "Changing modes can affect the appearance of layers. Flatten image before mode change?", select Don't Flatten.
Step 8
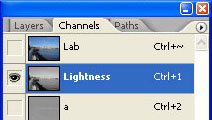
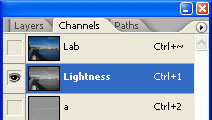
Go in to the Channels pallet (Window> Channels) and click to select the Lightness channel.
Step 9
Paste (Ctrl+V) the red channel that you have copied in your clipboard. The Lightness channel should be replaced with the image from the Red channel.
Fixing Reds
Because we took data from the red channel and used it as the luminance of the image, the lightness of the reds are not correct. We can't really fix this so what we're going to do instead is simply mask out the effect from the areas that are red. This causes the effect to only visible on areas that are not red.
Step 10
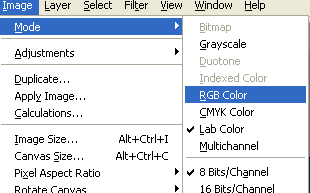
Now that we're done with applying the image from the red channel into the lightness channel, we can change the image mode back to RGB color (Image> Mode> RGB Color). When it asks "Changing modes can affect the appearance of layers. Flatten image before mode change?", select Don't Flatten.
Step 11
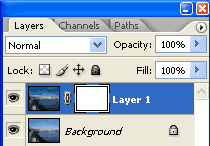
Select the top layer and add a layer mask (Layer> Layer Mask> Reveal All). Click on the thumbnail of the layer mask to ensure it has been selected.
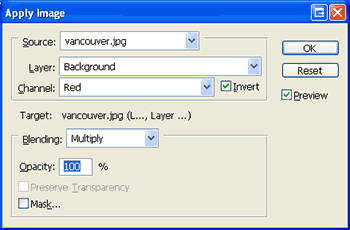
Step 12
With the layer mask selected, use the Apply Image tool (Image> Apply Image) with the following properties:
Layer: Background
Channel: Red
Invert: Checked
Blending: Multiply
Opacity: 100%
Step 13
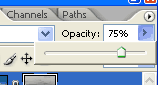
If you feel that the effect is too strong, you may reduce the opacity of the top layer to adjust the strength of the polarizing effect. To increase the effect, simply duplicate the top layer (Layer> Duplicate Layer or Ctrl+J).
Final Results

(Rollover the image with your cursor to see the image before the polarizing filter Photoshop effect was applied. )

(Rollover the image with your cursor to see the image before the polarizing filter Photoshop effect was applied.)


0 comments:
Post a Comment