Here Look the final Image of the current tutorial which is we are going to do in this tutorial.
Final Results

This Photoshop effect makes cool colors (ex. blue) darker and warm colors (ex. red) warmer. The results are glowing skin tones, dark grass and tress, and vivid colors.
Finding Cool & Warm Colors
Step 1
Open a photo you would like to edit. Or, you may use the photo used in this tutorial (from iStockPhoto). Step 2
The Lab color mode contains a chroma A channel that identifies the cool and warm colors. To access this channel, change the color mode to Lab color (Image> Mode> Lab Color)
Step 3
Now that we're editing in Lab color, we can grab the channel. But before we do this, we need to create a new layer (Layer> New> Layer or Shift+Ctrl+N) .
Step 4
After creating a new layer, we'll add the chroma A channel to the layer. With the new layer selected, use the Apply Image tool (Image> Apply Image) to set the following properties:Layer: Merged
Channel: a
Invert: Unchecked
Blending: Normal
Opacity: 100%
Blending and Tweaking
Now that we have our layer with the cool and dark colors defined, we can blend the layer into the image and adjust the results.Step 5
To blend the layer into the image, simply change the blending mode of the top layer to Soft Light.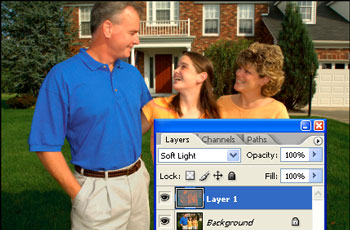
Step 6
We'll be using the Levels tool to adjust the effect. Open the Levels tool (Image> Adjustments> Levels or Ctrl+L). To increase the effect, move the black and white input sliders towards the center.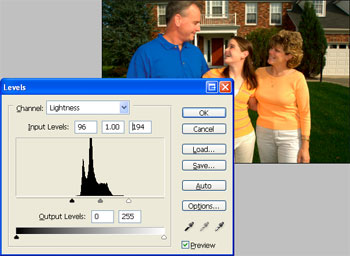
Step 7
Now that we're done editing, change the image mode back to RGB color (Image> Mode> RGB Color).
Step 8
This effect may cause some skin tones to be over saturated. To fix this, simply using the Hue/Saturation tool (Image> Adjustments> Hue/Saturation or Ctrl+U) and lower the saturation.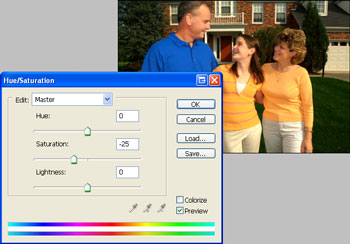
Final Results
Rollover the image below to see the before and after effect.


0 comments:
Post a Comment