Find out how you can create beautiful portrait paintings easily from any photo. This tutorial will show you how to color, shade, paint hair, and more!
Preview of Final Results

Create a Painting from a Portrait Photograph Photoshop Tutorial
I have to admit that making the image in this tutorial took me over 3 hours, but that was in the midst of taking snapshots with every step, writing notes on ever step, and making sure that I had a tutorial that could be copied for virtually any digital portrait. For someone who is following the steps, it shouldn’t take as long. The steps from beginning to end can be used for any digital portrait you choose to paint. The colors may need to be adjusted depending on the person of course, but the approach is the same.Tutorial Details
- Program: Adobe Photoshop 7
- Difficulty: Intermediate-Advanced
- Estimated Completion Time: 1.5 hours
Step 1
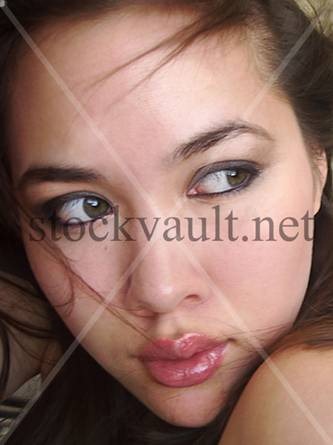
First you want to find a picture you want to work off of. I have always been able to produce a more accurate final product when working off a photograph. This picture was taken from stockvault.Step 2
Open up a new Photoshop file.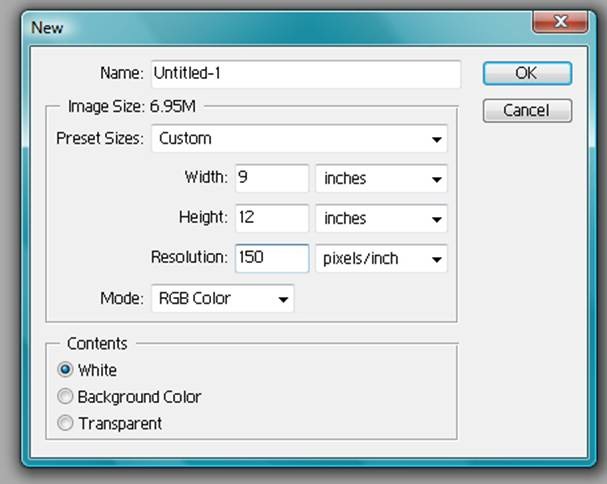
Step 3
For this next step I suggest either using a grid.Make a new layer titled “Outline” and draw the shape of the face and the main features with color # A23B03, using a hard edged brush and with pen pressure on (if using a pen tablet). In the preview image I have not shown the grid so that the outline can be more clearly seen.
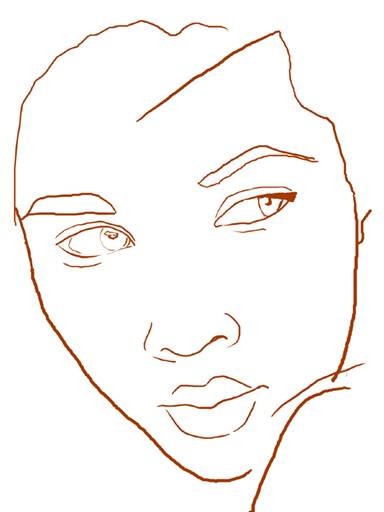
*Make sure that you have “snap to” under “view” unchecked, or else working with a grid is going to be a real pain!
*Also make sure that you have set your viewing preferences so that you can view the grid. This can be done under viewàshowàGrid or by pressing Ctrl + ”
Step 4
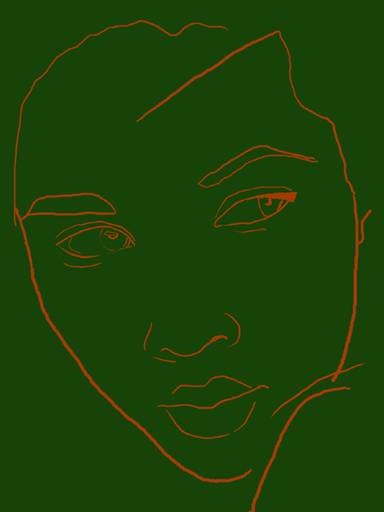
Now is the time to determine the look that you are going for. I really was inspired by the model’s green eyes and so based the picture off of a complementary color scheme, green and red. To accomplish this I started out with a green background.This green was accomplished using the color # 174208, applied with the paint bucket* tool to the background layer.
Step 5
With a brush* set on 400 pixels, splotch the background with black, but leave the majority the same green color as before. Then take the heal brush** and set the mode to multiply, and use it the blend the black out and into the green of the background. This will give a nice blended effect, without the plastic look you get with Gaussian blur.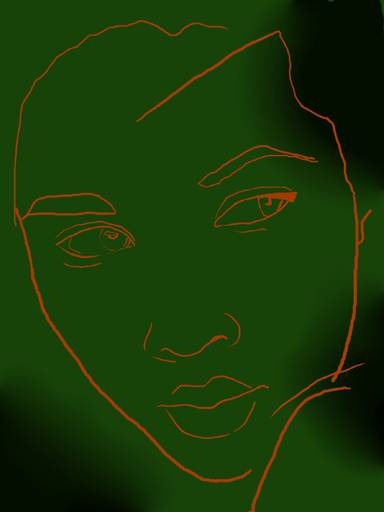
**Diameter 188 pixels, Hardness 100%, Spacing 25%
Step 6
Make a new layer and title it “Skin”. This layer will serve as the base for her skin tone. Take the paint brush* and block in the face area with color # E7B4B1. It is very important at this point, to have the face shape clocked in correctly, otherwise the entire portrait will be off.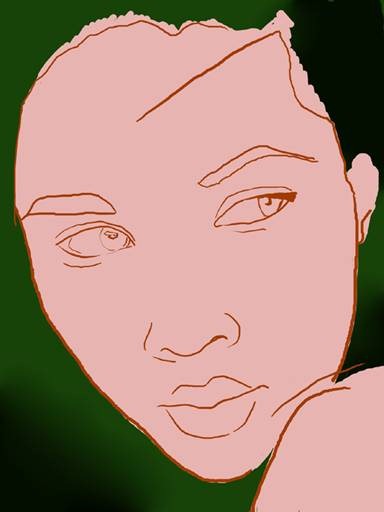
Step 7
Now that you have the basic structure of the face, make a new layer titled “hair” and place it below the skin. Block in the hair with color # 3D0502 using the same brush used on the skin. Next, make a new layer above the skin layer and title it “eyes”. Use a base neutral grey to shade the eye area* (#C1B3B0).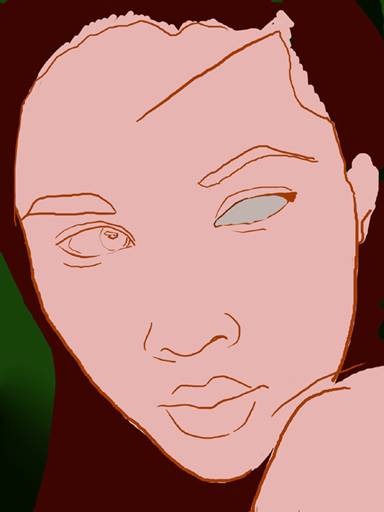
Step 8
After outlining the eye and tear duct area with a small brush* in color # 984340, use the dodge tool** to highlight the whites of the eyes. Make sure not to make them too bright, or again the eyes will look unrealistic. Use the dodge tool again, this time set to 6% opacity to add depth to the tear duct.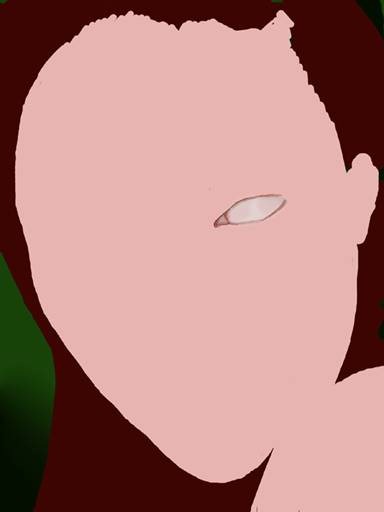
**11% exposure, 15 pixels, soft edged brush, mode set to highlight
Step 9
Outline the iris and pupil (using same hard edged brush as before) with color # 0D0302.
Step 10
Shade in the eyes. For this step, I created a gradient from dark (top of eye) to light (center bottom of the iris) using colors # 061302, # 061302, and # 547131. After doing this, change the bush to soft edged brush at 45% opacity. Brush the lower half of the eye with color # 497D88, concentrating the color on the bottom fourth of the iris. Adding this blue will make the eyes a more complex shade, and will add more depth.
Step 11
Now take the same dodge tool as before set this time to 5 pixels (change to shadow mode), and add the highlights to the eye. The more complex the highlights, the more realistic the eye will be. Try to avoid the manga-style big white highlight in the corner of the pupil, as it will make the eye look flat. If you wish to add more detail, take the green used to outline the iris set to 45% opacity, and make little lines in the eye, much like short, curved, and transparent tiger stripes. Be careful not to make them overpowering though.
Step 12
Use the paint brush* and color # 1E2207 to outline the eyes. The model has liner her waterline, but a little of the pink will still show above the darker line.
Step 13
Use the same brush and color as before to indicate the upper eyelid.
Step 14
Shade the upper eyelid with color # 586452. First block in the solid color, then take the dodge tool* and highlight the inner corner of the eye, the area right above her liner, and then out towards the outer corner. Take the burn tool** and add shadows to the area right below the line made to indicate the crease in the eye, the outer corner wing, and right on the liner in the inner and outer corners of the eye.To get the sparkle effect, go to FilteràNoiseàAdd Noise. Adjust the amount until satisfied with the amount of sparkle on the eyelid (make sure the distribution is set to uniform). Don’t add so much noise that it appears grainy.

**34 pixels, 32% opacity, soft round brush, midtones mode
Step 15
Underline the eye with the same grey color as before, and use the smudge brush* to soften the line.
Step 16
Draw the upper eyelashes using the same color and brush used for the liner*. The point here is to create the impression of eyelashes, not to paint each individual one. This can be done in long tapered sweeps with the base thickest, and the end tapering off to a soft point.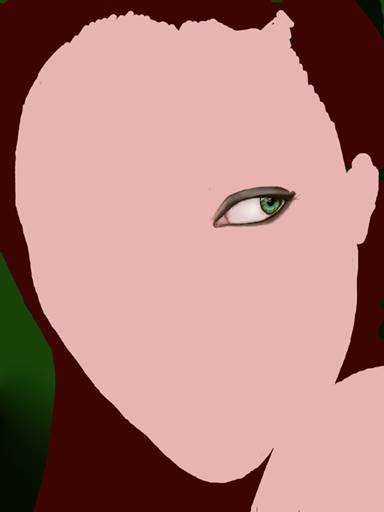
Step 17
Use the dodge tool* to bring out the highlights in the eye again. Sweep the brush over the bottom middle of the iris once. This will give the eye a glassy effect.
Step 18
Make a new layer and title it “eyebrows”. Just like the title says, this is where you will be drawing the eyebrows. But this is important-all shading of the eyelid and brow bone (right below the eyebrows) should be done on the “eyes” layer.Using a 64 pixel brush in normal mode (45% opacity) shade the area around the eye. A good color I recommend using is # CD9987. Next take a size 6, 80% opaque hard-edged brush (#552819) and indicate the eyebrows. I would suggest using a technique much like the one used for the eyelashes in this case.

Step 19
Fill in the eyebrows with a transparent brush* using the same color (or even a little darker) using long strokes in the center of the eyebrow, and shorter, softer strokes on the top and bottom. This will take a lot of layering to get the desired look. Then take the same brush and color #EEE1C8, and use it to highlight the brow bone. Sweep the light right under the middle of the brow bone, almost to the outer corner, and down to the crease in the eye. This will take some layering, but when done right it will both let light into the eye and make it look bigger.Once you finish this step, you are done with the eye!
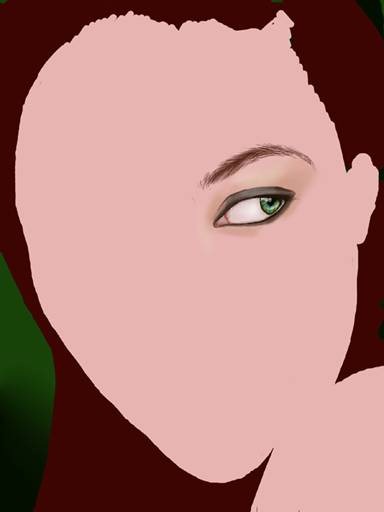
Step 20
Repeat the same steps as with the other eye and brow to create the second eye. Have also taken a small brush* and added a highlight to the inner corner of the eyes.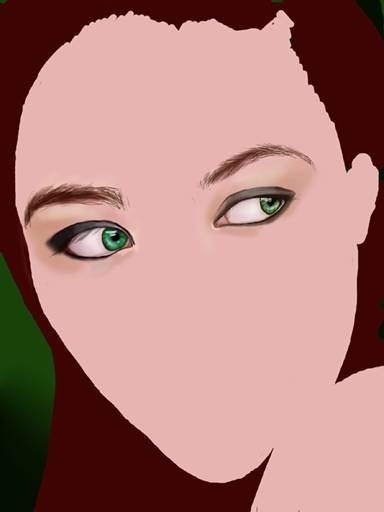
Step 21
Make a new layer above “skin” but below “eyes” and title it “nose”. This layer will actually contain most of the facial shading and coloring.Start working on the nose by blocking in the darks. This can be best accomplished by using a 56 pixel hard edged brush at 50% opacity (color #A76662).
Next, block in the midtones* and lights** using the same brush.
As you can see, I often turn the outline layer on and off, depending on what I am working on at the moment. Here, I wanted a little more guide as to where the nose is situate and the same in relation to the mouth, so I have turned it on. When the layer is turned on and where it is located at any given time (in relation to the other layers, above or below) is entirely up to you.
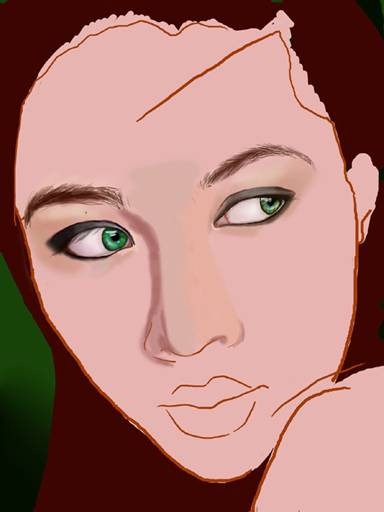
Step 22
Now brush* color #F0CCA1 over the entire layer. Layer the color up where there are the highlights of the face, such as on above the eyebrows, under the eyes, and above the mouth area. I have also taken the liberty of taking a transparent red (color #EA9382) and dusting** it lightly across the right cheek, mid forehead and chin. I used a lighter color pink on the left cheek (color #E7B4B1). This second cheek color is the base skin color we started out with, by using it again; it will help create unity within the work.I have also begun some basic definition on the nostrils. This can be done using short strokes and a 10 pixel brush at 45% opacity (hard edged brush) and color #753D1D.
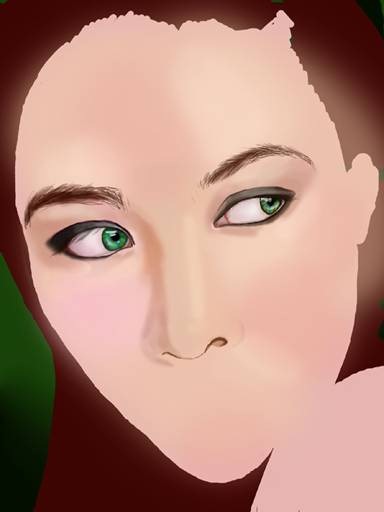
**350 pixels, 25% opacity, soft edged brush (this will take some layering on the cheeks and chin, try to leave the forehead to one layer)
Step 23
Now define* the darkest darks with color #753D1D.
Step 24
Finish sculpting the nose and face.For the nose, take an 85 pixel brush at 8% opacity, and layer on the darks (color #B27556). The darkest area will be around the left eye. Don’t forget the area underneath the nostrils, or the dark in the nostrils themselves. But something to note is that the darkness in the nostrils is NOT the darkest dark of the nose. This will avoid the gaping hole look that many portraits get when the nostrils are shaded to darkly.
Now time for the face.
What this will comprise of is lighting up the area above the right eyebrow, above the mouth area, and below the eyes with the dodge tool*. Next take color #B5836B and a 180 pixel brush (6% opacity, soft edge) and darken the temple area above the right eye.
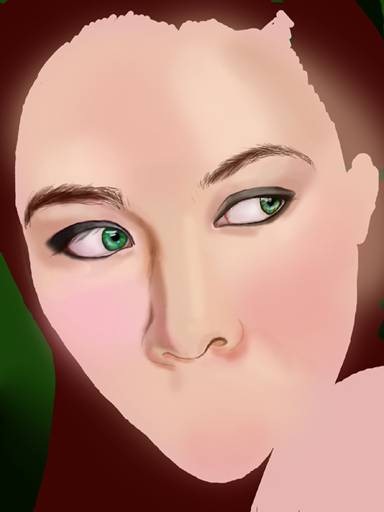
Step 25
Merge down the eyes layer onto the nose layer. This will allow the eyes to be seamlessly blended into the face. To do this, take the eyedropper tool and sample the area directly below the eyes. Then use a 45 pixel brush (20% opacity, soft edge) and blend the skin into the under eye area. The most important thing to remember here is not to get the color into the eye. If you do, they eyes will look hazy.Next take the eraser tool* and carefully erase the haze of dust that surrounds the face. This will make the image crisper, and will allow you to see the final image coming into play better.
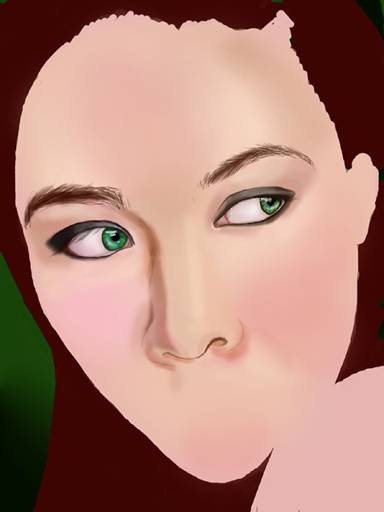
Step 26
This step is the final definition of the face. To do so, take the dodge tool* and run it in the highlight areas of the face three times (about 1.5 seconds in each area) as well as on the jaw line.Finally to add depth to the face, take color #BC8D72 and brush** it onto the left outer side of the face, using the picture as a reference. Then use color #BC8D72 to blend*** it into the face.
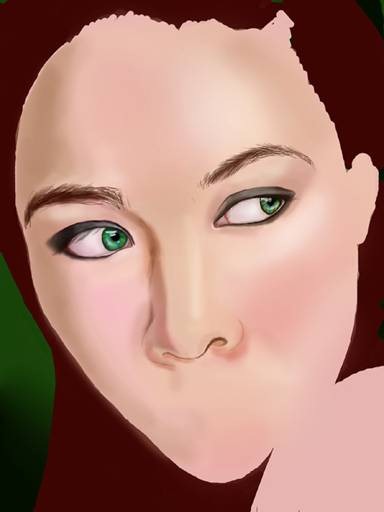
**102 pixels, 40% exposure (layering until desired effect is achieved), soft round brush
***Same brush as dark color
Step 27
Make a new layer above all other layers and title it “hair”.Take color #430704 and indicate the hair over the shoulder. This can be done with a 45 pixel, opaque, hard edged brush in a few short strokes.
We will come back to the hair later, but this added support will make finishing the picture easier.
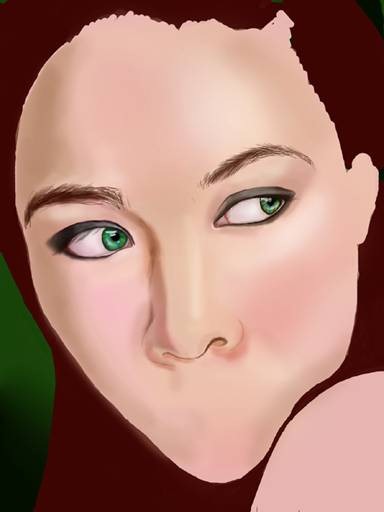
Step 28
Now we begin to work on the lips. Make a new layer above the nose layer. (You may want to turn on the outline you drew earlier to help you get the right shape for the lips in this layer. After the outline is drawn, the outline may be turned off again.)Begin with the top lip*, outlining the outer edge and then filling it in. Then take the same size brush and outline the bottom lip with color # B15A5C. Then use the eyedropper tool to pick up the upper lip color and fill in the bottom lip with this color (#CA7072).

Step 29
Use color # 762A2C to outline* the darkest parts of the bottom lip. This color will be mostly concentrated on the left side and between the lips.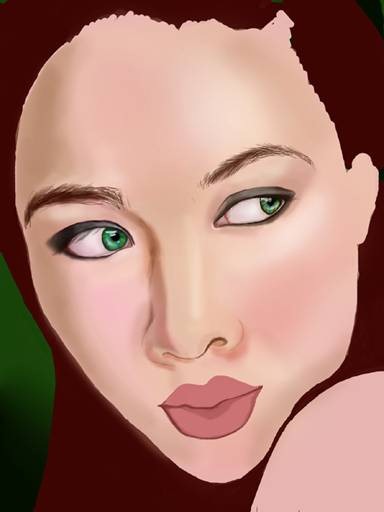
Step 30
Using the same brush as before, block in the shadow areas on the lips with color # B35E5F.
Step 31
Again using the same brush, take color # DA999A and indicate the highlights on the lips. You can then take the dodge tool (set to highlight mode) to brighten the highlights.
Step 32
Now for the finishing the lips use the burn tool* to darken the darkest parts of the lips. Again like when we were lining them, it will be mainly concentrated on the left side.If you wish to add lines to the lips, use the burn tool again, this time set to 11% exposure and switching between brush sizes 14 pixels and 5 pixels. This will allow for realistic and more detailed lips.
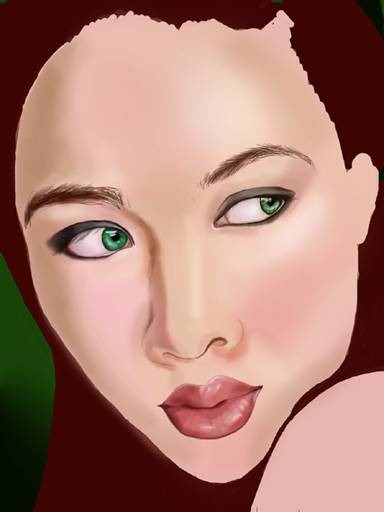
Step 33
The last thing we have to do with the lips is integrate them into the face. Without this, they will appear to be pasted one, and have no depth. It will also require another layer titled “mouth” above the “lips” layer.To begin, use color # DB8779 to define the little dip above the mouth*. The best way I have found to do this is in tens of layers. This will allow you to build up the area around the lips and create a soft edge. Using the same color and brush, work your way around the mouth concentrating the color on the left side of the mouth, and in a little hook shape at the right corner.
To finish off the little “hook”, take the burn tool (62% exposure, midtones mode, 35 pixels soft brush) and darken it until it is the same darkness as the crease between the lips.
And now, the lips are done!

Step 34
So moving on to the hair, actually create a new layer above the hair layer and title it “hair highlights”. Just like the title says, we are going to begin by highlighting the hair.This is both the simplest, and most time consuming part of the creation process, but when done right will make every portrait look very realistic.
Start with the area just above the shoulder. This is where most of the hair detailing will come in, just as it does in the photograph. Using long thin strokes make the impression of hair cascading over her shoulder. Remember, hair does not start halfway down the shoulder, it starts outside the frame. Because of this, every strand must begin at the outside and make its way over the shoulder. Make some of the strands shorter, tapering off the ends. Make sure that there is still some of the background color showing through the strands while you work.
Use the same process to indicate the highlights throughout the rest of the hair.
To define the hairline use short strokes that taper on both ends.
Use the hair to set the hair into the hairline a little by adding a short fringe in front, and hair crossing over it and into the background.
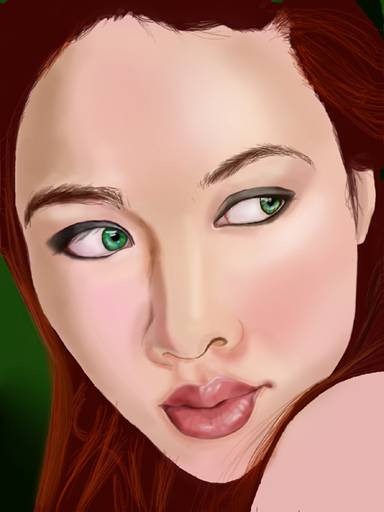
Step 35
The last step for rending the hair is adding the darks (color # 150201). This can be done using a large soft edged brush set to 70% opacity, and then using a 4 pixel brush for details around the shoulder and hairline.Once the hair looks finished, use a hard edged opaque eraser brush and fix up the lines, cleaning up the edges around the face.
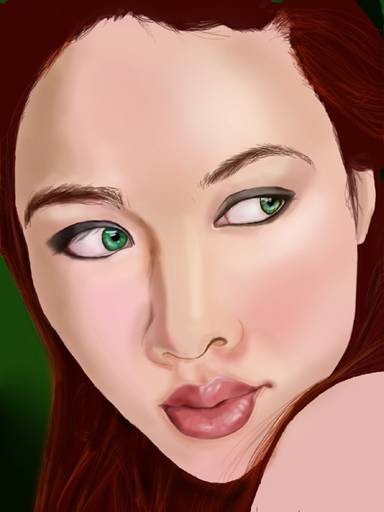
Step 36
And, you’re done! You can chose to take it further, adding detail to the shoulder* and adding wisps of hair in the face or not. How far you go is entirely up to you!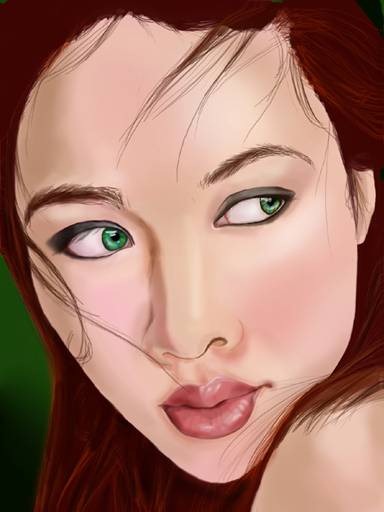
Lights- ECC7B6
Darks- CB9C81
The most important thing to remember about the shoulder is to leave a little bit of the pink skin base showing through.
Thank you for looking at this tutorial, I hope you enjoyed seeing how I create digital portraits, and that you learned a little about the process along the way!
0 comments:
Post a Comment