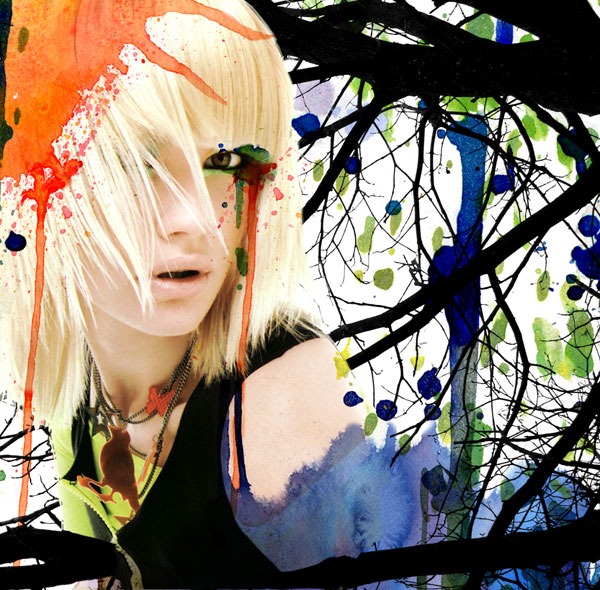
Watercolor is popular in fashion artwork because of its unpredictable, fluid and beautiful nature. It enhances models and products and gives any artwork a creative flair that almost everyone finds attractive. In this step-by- step tutorial I will show you how simple it is to create a dramatic fashion artwork with watercolor effects inspired by fashion illustrator.
First we'll look at the importance of choosing the right imagery and watercolor textures. Then we'll go through some basic but powerful techniques for our design composition: background image extraction, layer masks and adjustment layers.The tricks you'll learn here can be applied in any design that requires a stunning background to bring the person/product to life.
Preview of Final Results
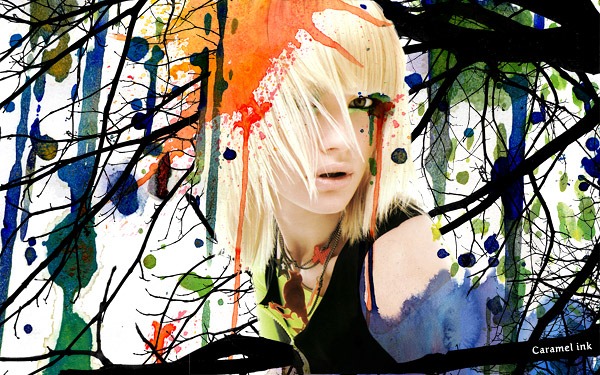
Watercolor Fashion Artwork Photoshop CS3 Tutorial
Tutorial Details
- Program: Photoshop Cs3
- Difficulty: Beginner
- Estimated Completion Time: 45 mins
Images Used
Step 1
Let's start by choosing our photo. The model's pose is crucial in a fashion artwork. An excellent fashion photo will have the model in a stylish and effortless pose. A well lit photograph goes without saying. For this tutorial I've picked this beautiful stock image from Katanaz.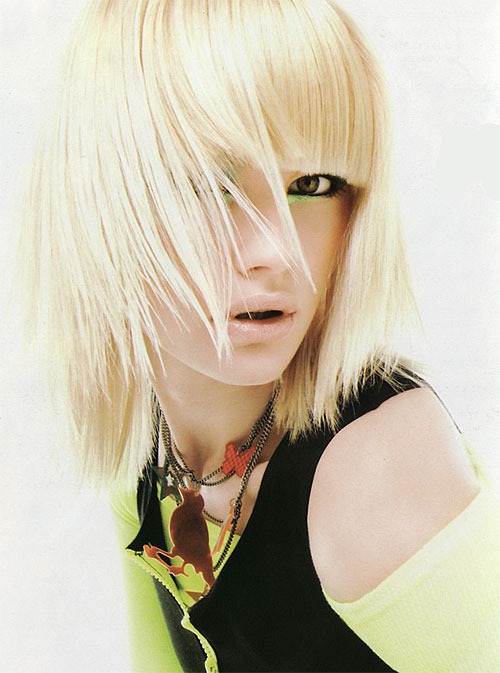
Step 2
Next brainstorm ideas for the background artwork. You should ask yourself “ What elements can I use to complement the model”. Even when doing an artistic background with watercolor splashes, you should have a theme and use design elements that will enhance the model/product. Here my inspiration came from the lovely bird necklace and the bright yellow and orange tones. They make me think of a forest in summer. Hence the trees and the summer color palette.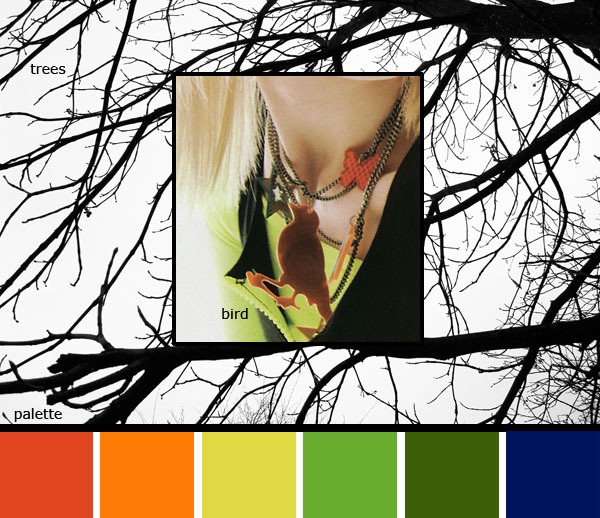
Step 3
We're now ready to begin our artwork! Let's say we create this artwork for a fashion website. The rule of thumb for a website is to have the width at 960px but we'll create our artwork larger so that people with wider screens can view more of the background. Create a new canvas of 1440 x 900 pixels, 72 dpi.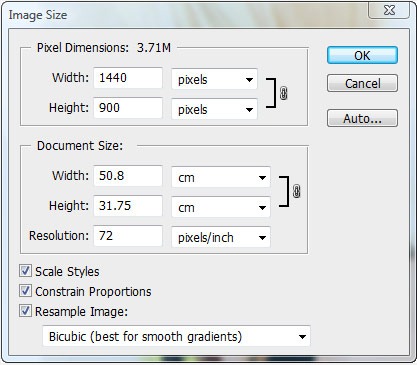
Step 4
Paste the picture of the model and rename the New Layer “model”. Resize (CTRL + T) the image proportionately to 45% of it's original size. Apply a default Filter > Smart Sharpen to sharpen the image.Step 5
Now let's remove the gray background behind the model. Use the Magic Wand Tool, Tolerance 10, click to make a quick selection on the left side background. Next hold Shift and click on the right side background to add it to the selection.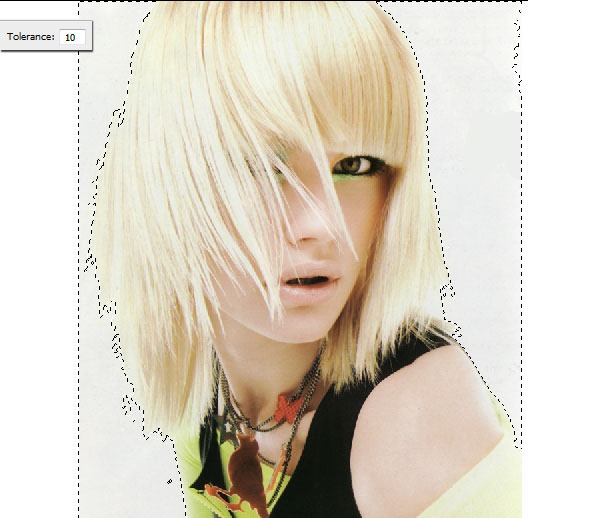
Step 6
Right Click on the canvas and choose Select Inverse from the drop down menu.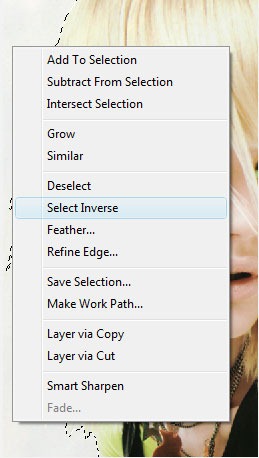
Step 7
With the Magic Wand Tool still selected click on Refine Edge. This will allow you more control to refine the edge of our selection. It is a quick and easy tool that you can use in most projects where you need to extract a background.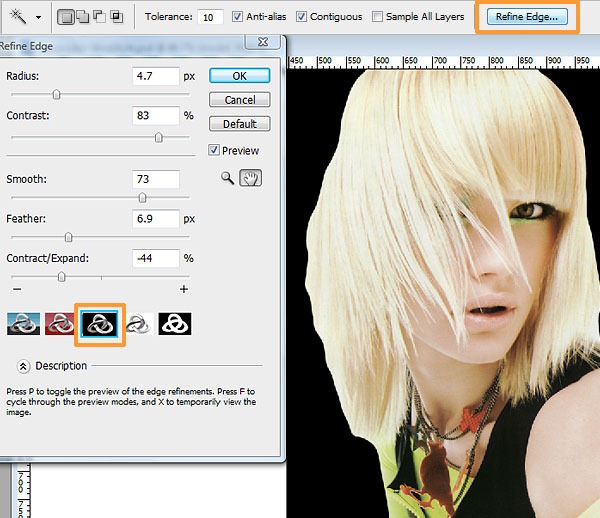
Step 8
Click on Add Layer Mask at the bottom of the Layers Window. As you can see the hair needs some work. The advantage with using a Layer Mask is that you can hide/un hide selected parts of your work to your heart's content without having to worry about losing your original image.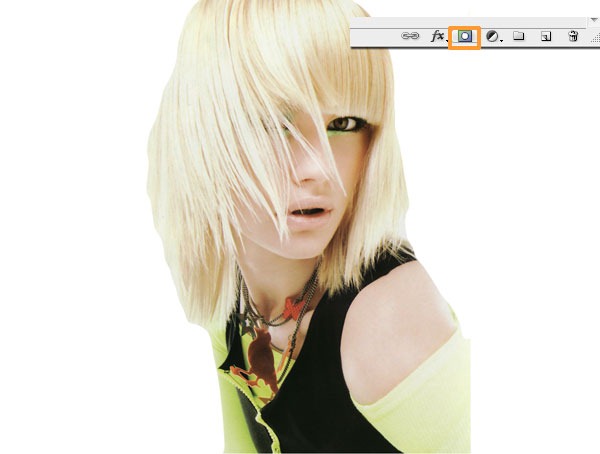
Step 9
We'll now use the Eraser Tool with a Stipple Brush (from the Natural Brushes Set) of size 8px to add in strands of hair.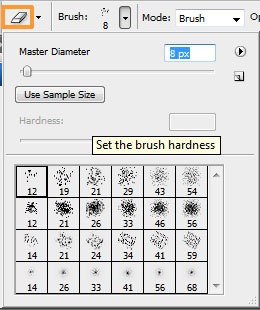
Step 10
Use the Brush Tool with the same Stipple Brush to extract areas of the background or part of the hair that you don't want to show. Use the Eraser & Brush Tools alternately until you are satisfied with the result.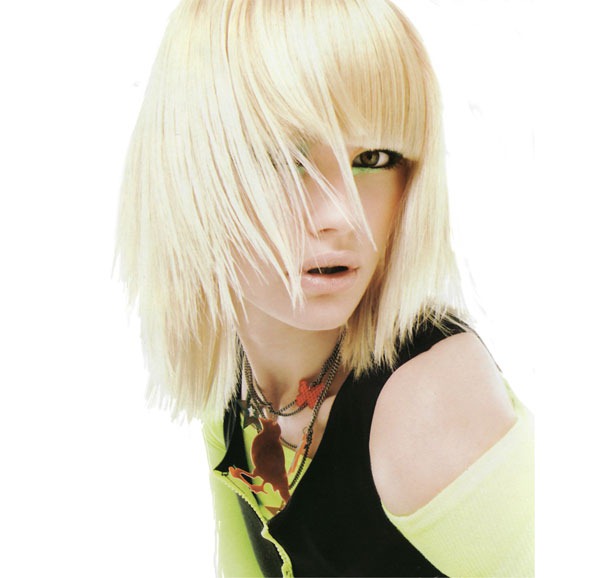
Step 11
Add the tree graphic into a New Layer “Trees”. Place this layer behind the “model” layer. Resize the tree graphic proportionately such that the width size is similar to the canvas.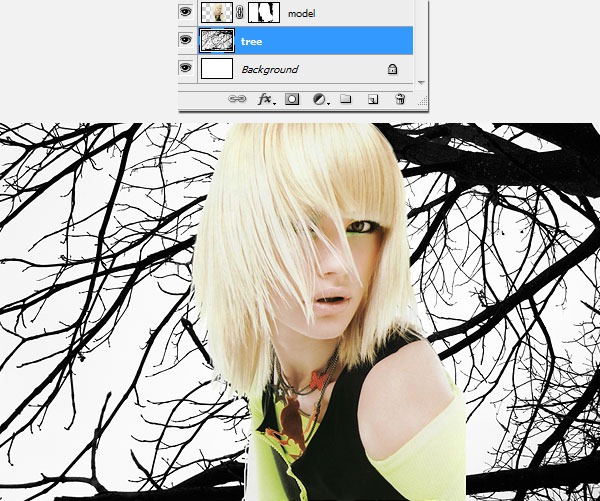
Step 12
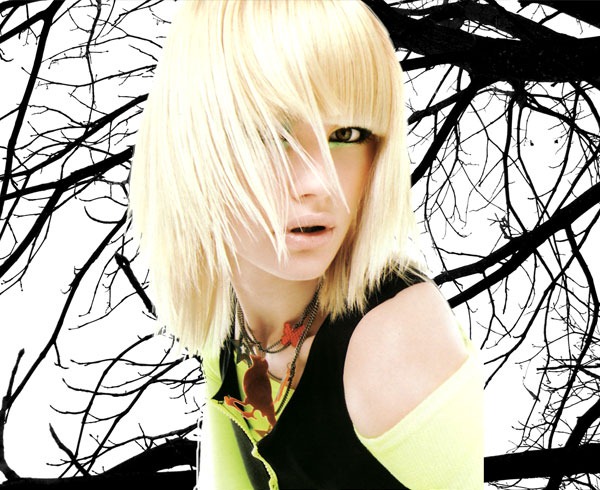
Now let's adjust the colors of the model and brighten her. Create a New Adjustment Layer > Levels.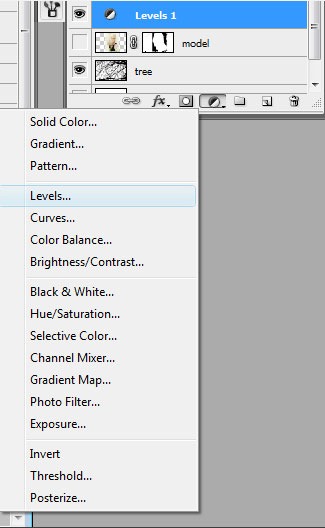
Step 13
Adjust the settings as below. To make the areas darker, move the left handle to the right and to make the light areas lighter, move the right handle to the left.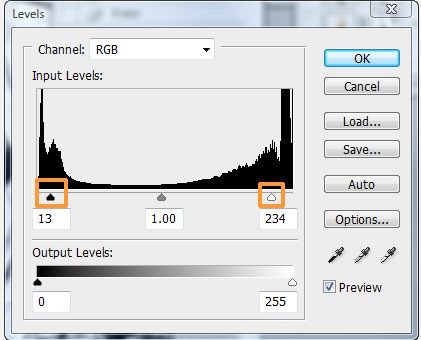

Step 14
Let's make the model blend in better with the background. Select the model's Layer Mask. Use the Brush Tool, choose a larger stipple brush of about 26px.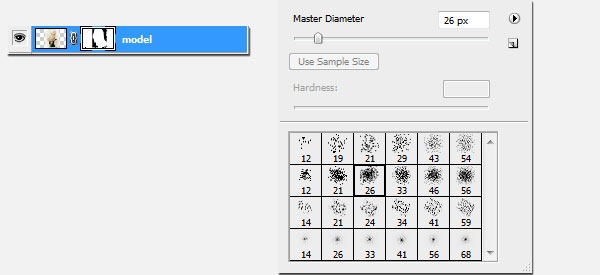
Step 15
Paint over areas like the cropped shoulder and let some branches show through as below. Keep the edges rough for the style.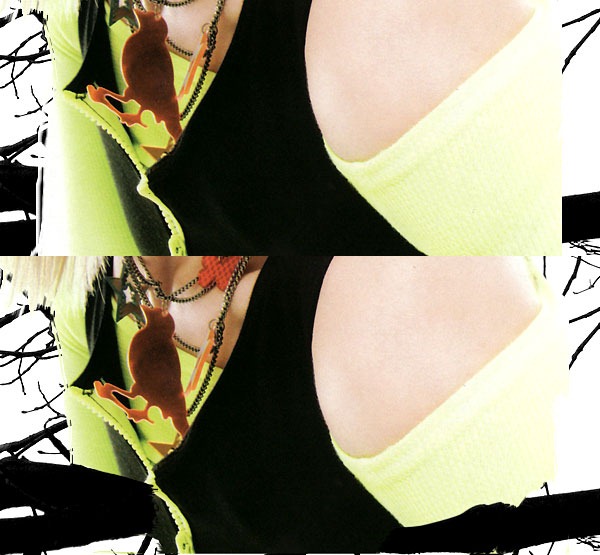
Step 16
Now the fun part, adding watercolor splashes! Select watercolor shapes that are long and fine as well as some small splatters (to look like leaves). This watercolor design is perfect for our summer forest theme.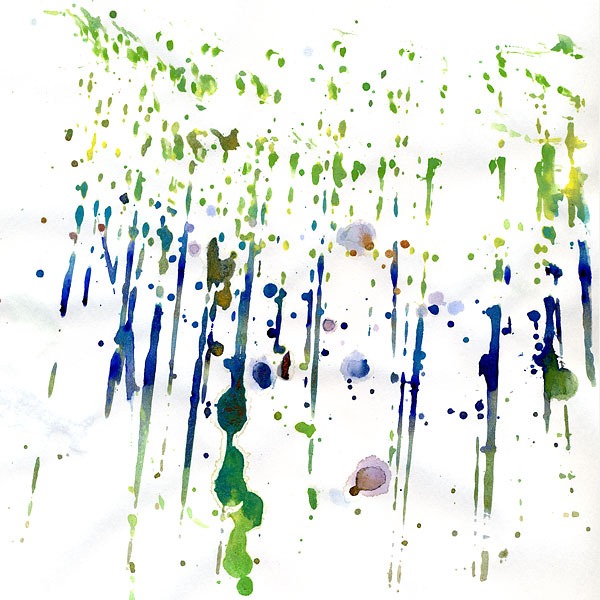
Step 17
Paste the image into a New Layer “watercolor 1” above all other layers. Resize it to 50%. Change the layer's blending mode to Multiply. Move the image around until you are satisfied with its position.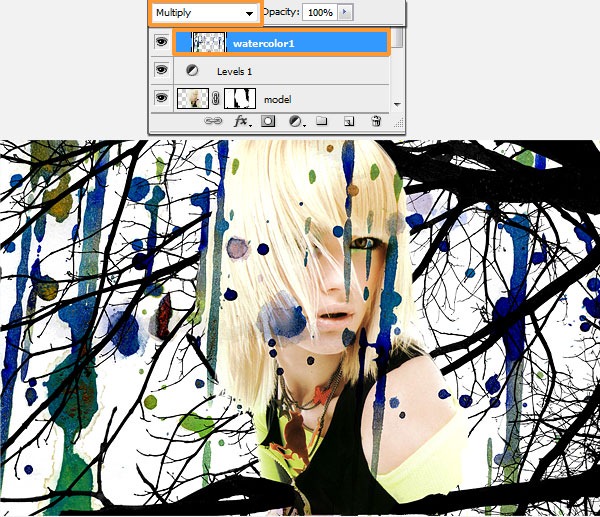
Step 18
Add a Layer Mask to “watercolor1”. Remove some of the watercolor drips in front of the model's face with a round brush, 90px.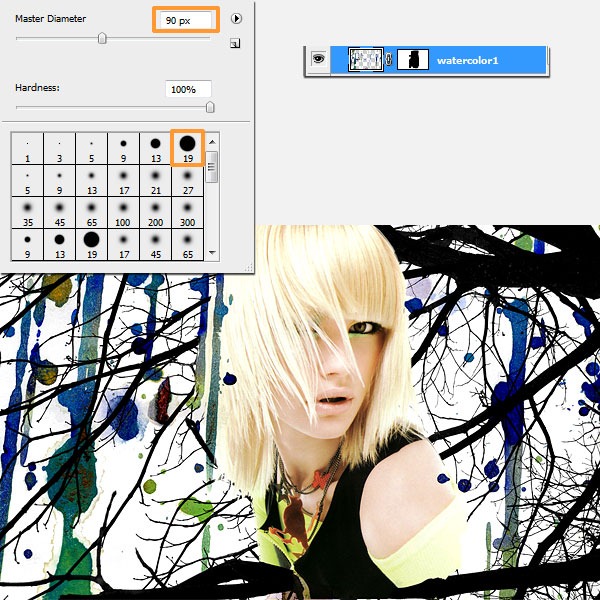
Step 19
Choose another nice watercolor texture. I've picked this orange watercolor because I find it very dynamic and vibrant. Let's place it on the model's head to look like an original hat or a splash of sunlight.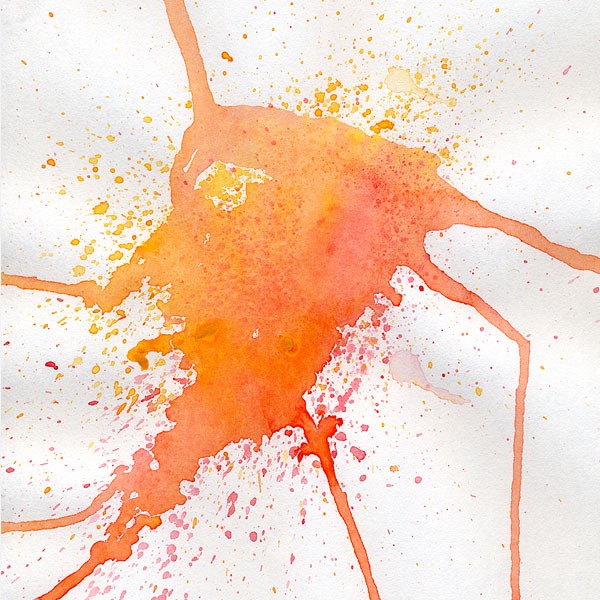
Step 19
Paste the orange watercolor image into a New Layer “watercolor 2” above “watercolor1”. Resize it to 15%. Change the layer's blending mode to Multiply. Position the splash above her head.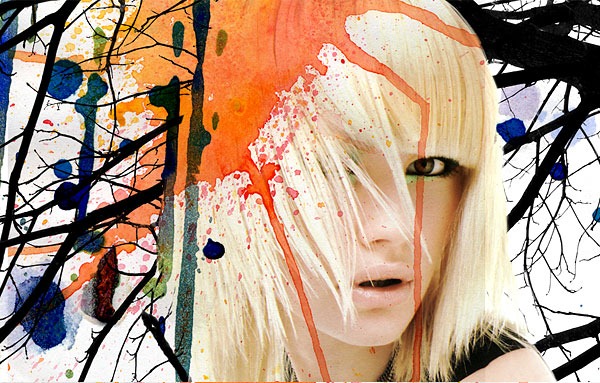
Step 20
Make this drip fall vertically. Copy and Paste the selected part on a New Layer “drip1". Make this layer invisible for now as we'll work on “watercolor 2” first.
Step 21
Follow Step 18 to remove the extra watercolor drips but this time use smaller brushes for the drips ends. Use the Smudge Tool to refine the ends.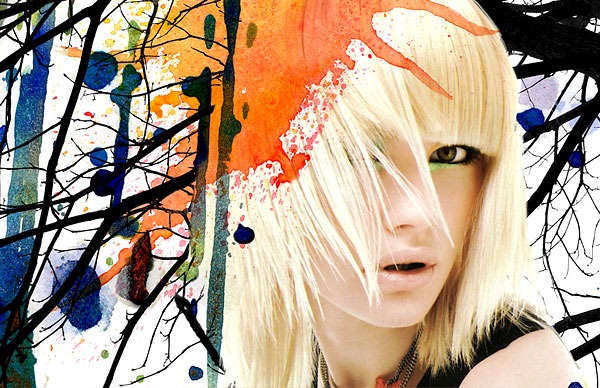
Step 22
Rotate “drip1” and position it as below. Add a Layer Mask to “drip1” and use the Brush Tool to remove the top overlapping watercolor.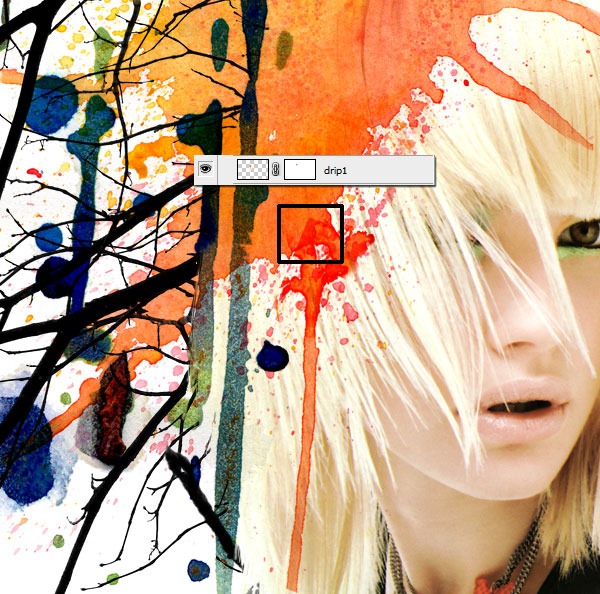
Step 23
Extend the watercolor drip. Copy layer “drip1” and call the New Layer “drip2”. Use the same technique as Step 22 to erase part of the overlapping watercolor.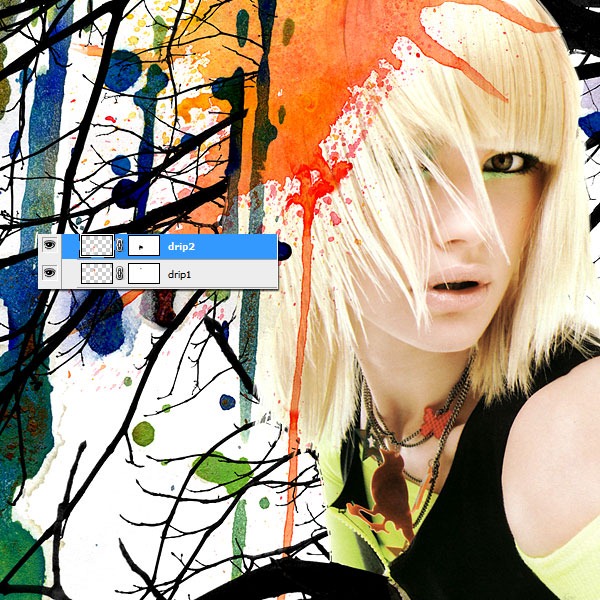
Step 24
Copy and Paste “drip1” and “drip2” into a New Layer “drip3” and move the drip over to her eye as below.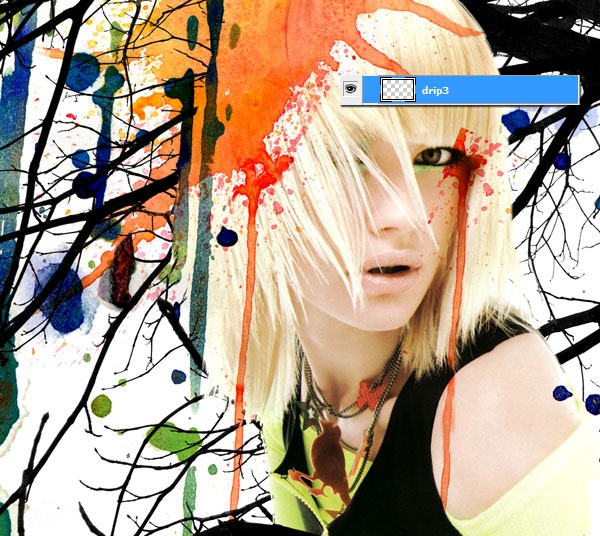
Step 25
Again use the Layer Mask technique to remove extra watercolor from her eye.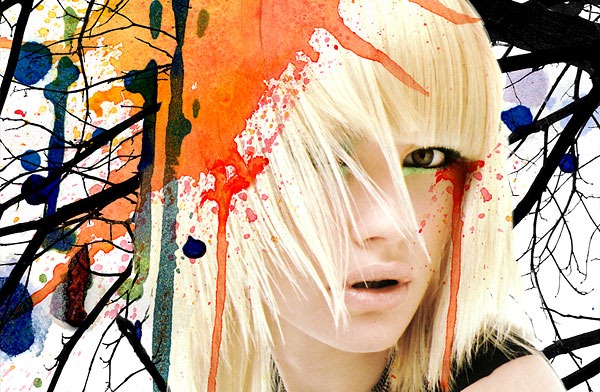
Step 26
The watercolor drips look like an extension to her eye shadows and I think they blend well with the rest of the artwork. Hence let's add another paint drip to her eye. Go back to the first watercolor stock image. With the Lasso Tool, quickly make a selection as below and paste it to an New Layer “drip4”. As you have noticed I'm mentioning the layer names everywhere. I'm doing this as a reminder for us to practice good naming convention by renaming each layer with meaningful names. Remember to regroup your layers in folders for easy access.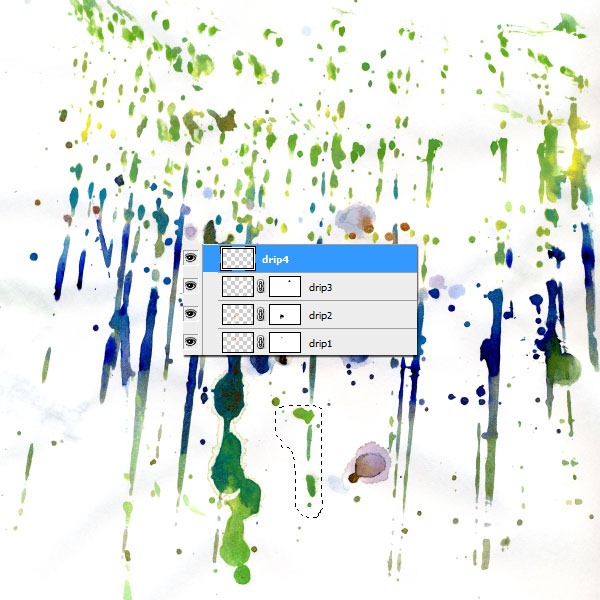
Step 27
Resize “drip4” and position it. Change the layer's blending mode to Multiply. Remove extra watercolor through the Layer Mask technique.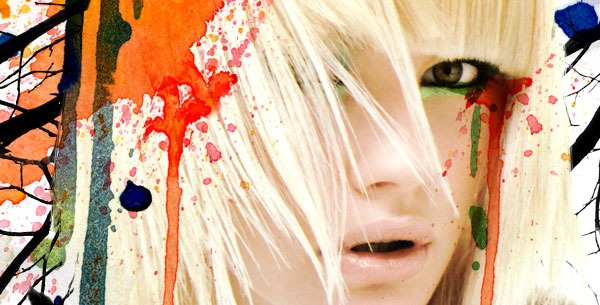
Step 28
Copy over another drip section into a New Layer “drip5”.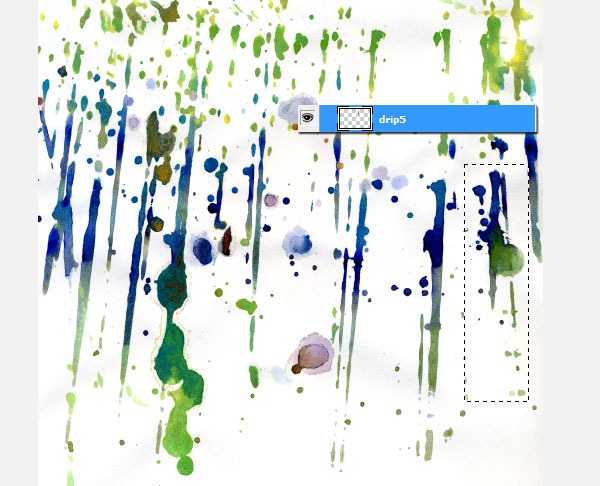
Step 29
Again resize “drip5” and position it. Change the layer's blending mode to Multiply. Remove extra watercolor through the Layer Mask technique.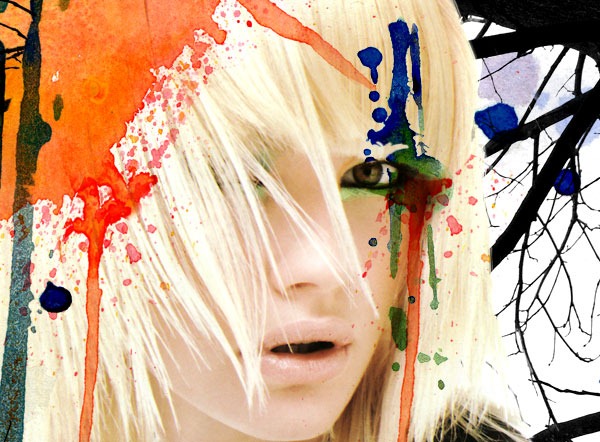
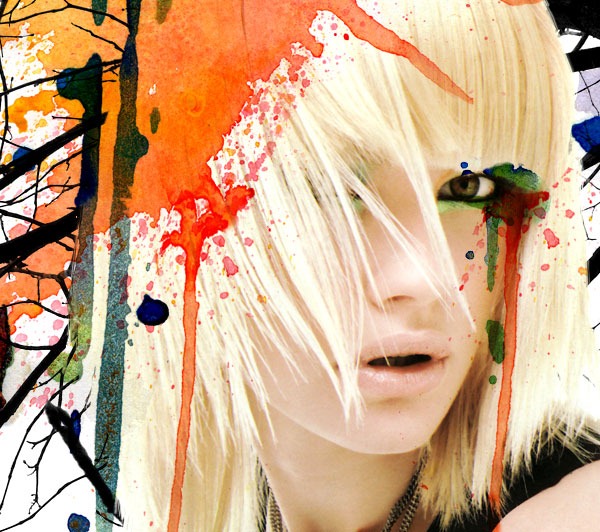
Step 30
Now that all the main elements are done. Let's take a look at the artwork as a whole and see what's missing.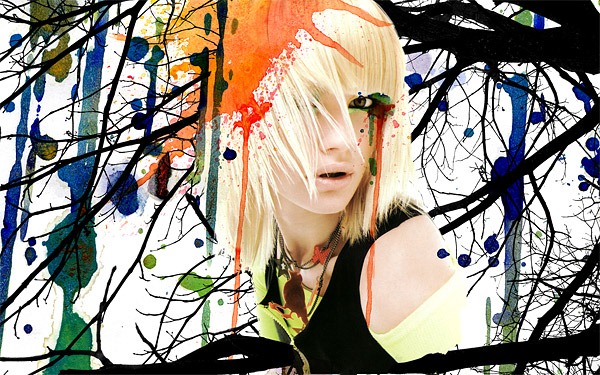
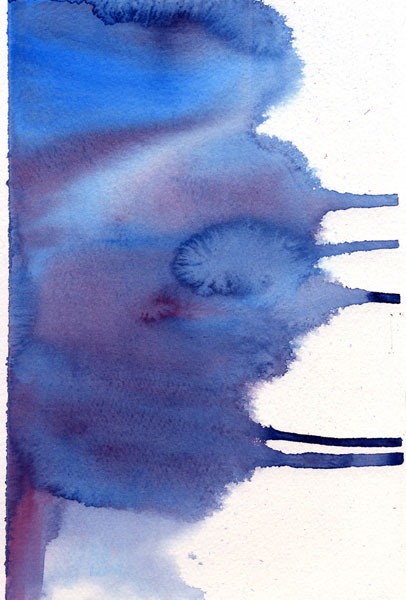
Step 31
Set the Layer's Blending Mode to Multiply. Use the Transform Tool (Ctrl + T) to resize the image to 41%, rotate the image 90 degrees anti-clockwise and right click select Flip Horizontal. Then rotate the image a bit to the right at an angle of 4.8 degrees such that the blue drip is aligned with the orange drip.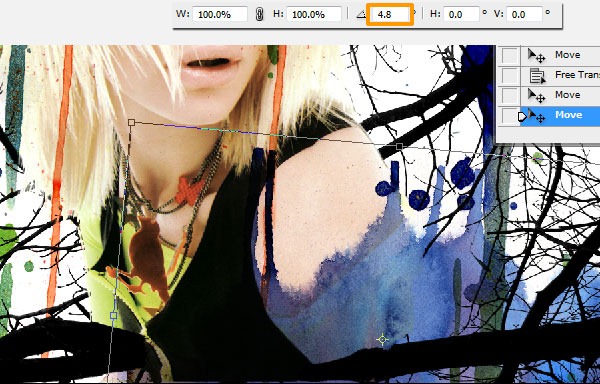
Step 32
Extract unwanted part of the watercolor through the Layer Mask technique until you achieve a similar result as below.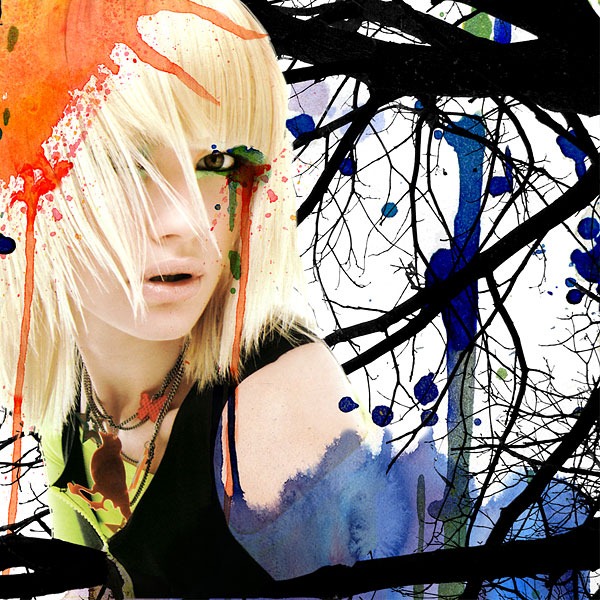
Step 33
Add some green splatters to represent leaves. Make another selection from the watercolor stock, see below. Paste it into a New Layer “watercolor4”.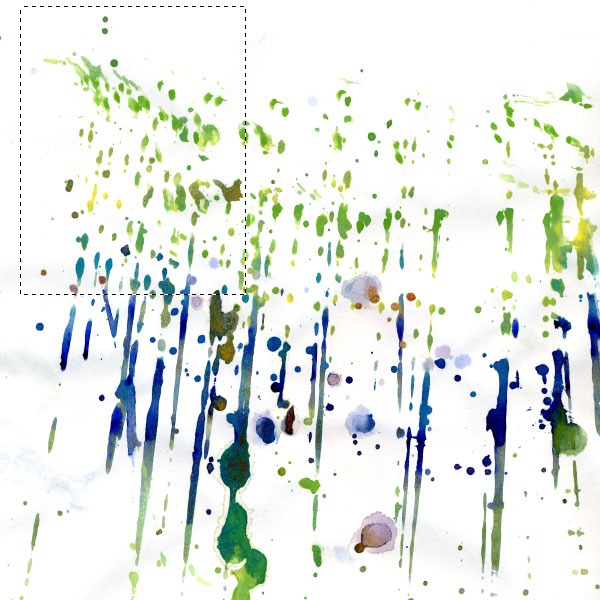
Step 34
Resize “watercolor4” by 50% and position it. Change the layer's blending mode to Multiply. Remove the watercolor spots on her arm through the Layer Mask technique.
Step 35
Add a big blotch of paint to represent a tree. Make selection as below. Copy and Paste it into a New Layer “watercolor5”.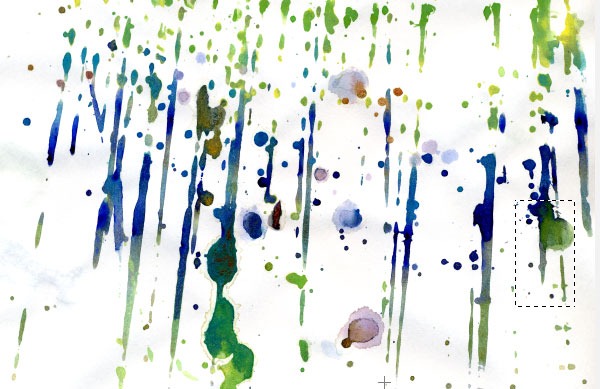
Step 36
Change the layer's blending mode to Multiply.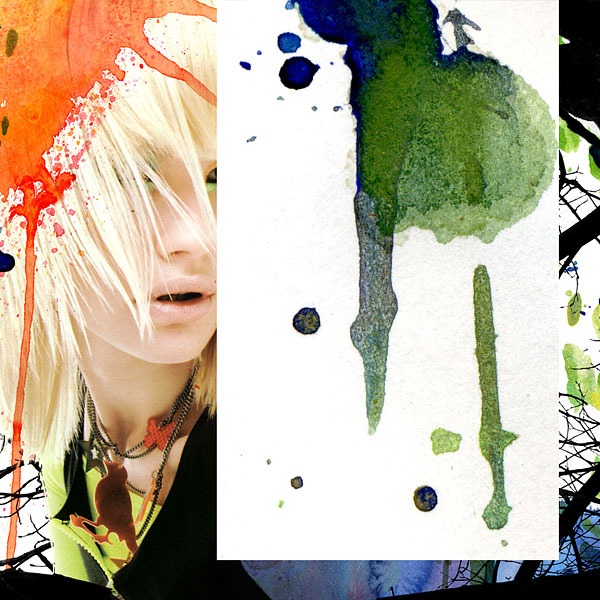
Step 37
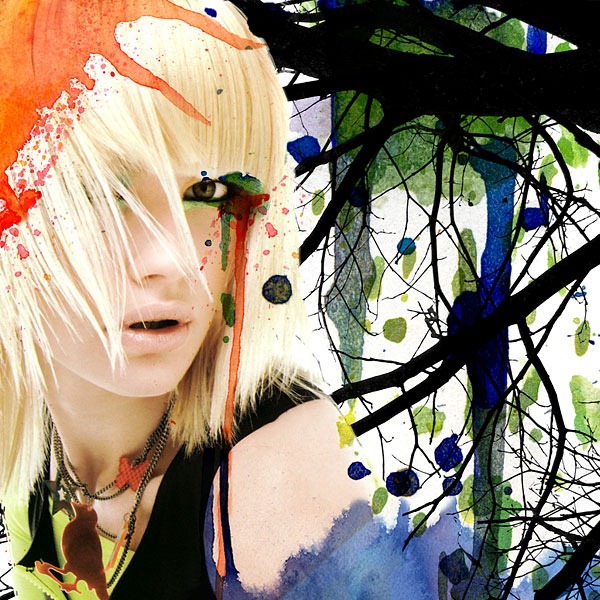
Lastly add a little splash of orange. Copy part of the orange drip (see below) and paste it (see below) into a New Layer “watercolor6”.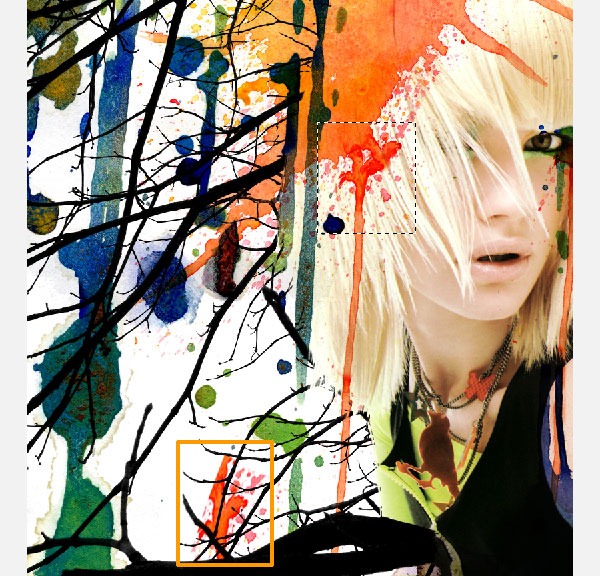
Step 38
Use the Layer Mask technique to remove the sharp edge on top of the splash.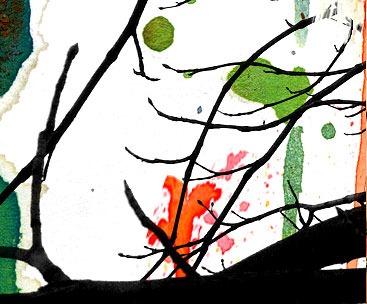
Step 39
Finish off by adding your brand or signature. Ctrl + T to Rotate the text to follow the slope of the branch.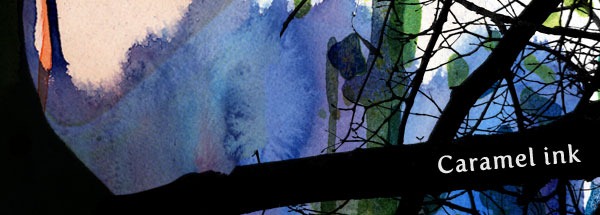
Final Version
I hope you've enjoyed this tutorial. Looking forward to your comments, ideas and versions of what you've learned here. Cheers!![watercolor-caramelink[1] watercolor-caramelink[1]](http://photoshoptutorials.ws/images/stories/FashionWatercolorArtwork_3192/watercolorcaramelink1.jpg)
0 comments:
Post a Comment