Learn how to draw a realistic t-shirt 100% in Photoshop! This detailed step by step tutorial will show you techniques on creating shapes, shading, embossing, and more.
Preview of Final Results

T-Shirt Drawing in Photoshop
Step 1
Start by making a new document 600 x 600 pixels document.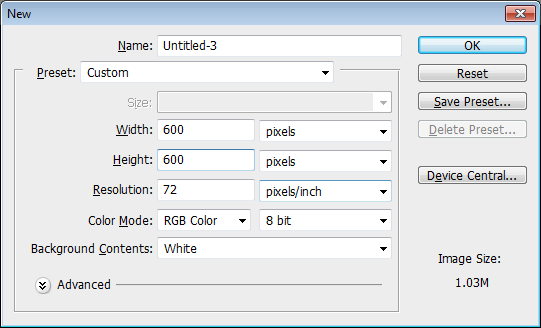
Step 2
Using Polygonal Lasso Tool (L key) to create a selection like the image below. I feathered the selection (Select > Modify > Feather) by 0.3px for smoother results.
Step 3
In the toolbar, click on the foreground color then set the color to #CFCDD0.
Step 4
Create a new layer (Ctrl+Shift+N or Layer > New > Layer)
Step 5
Fill the selected area with the foreground color you just selected. To fill, press Alt+Backspace or choose Edit > Fill.
Step 6
Select Burn Tool (O Key).Step 7
Use the burn tool on the indicated area shown in the image below.

Step 8
Choose Filter > Nose > Add Noise. Use the settings shown below.
Step 9
Using Polygonal Lasso Tool , create a selection like the image below. For smoother edges, feather the selection (Select > Modify > Feather) by 0.3px.
Step 10
Select the burn tool then burn the edges of the selection like the image below.
Step 11
Create a selection like the image below.
Step 12
Use the burn tool on the selected area. Repeat this for the other side of the shirt.
Step 13
Now we’ll add some shadows and highlights to the shirt. In the blue dots indicated below, use Dodge tool. For the orange dots, use the Burn Tool.
Step 14
Create a new layer (Ctrl+Shift+N or Layer > New > Layer)
Step 15
Using the Pen tool, create a path like shown below.
Step 16
Select the Brush tool then set the size of the brush to 2px. In the Paths palette (Window > Paths), right click on the path then select Stroke Path.
Step 17
Set the opacity to 20%.
Step 18
On the current layer, choose Layer > Layer Style > Stroke. Set the Stroke settings as shown in the image below. Don’t close the window yet!
Step 19
Enable the Drop Shadow style with the settings shown below.
Step 20
Repeat the above technique (Step 14-19) for the two sleeves.
Step 21
Create a new layer (Ctrl+Shift+N or Layer > New > Layer)
Step 22
Select the Rectangle tool (U) to make a label.
Step 23
Choose Layer > Layer Style > Drop Shadow and apply the settings shown below.
Step 24
Add the logo/text to your label.
Step 25
Make a selection on the left sleeve like the image below. For better selection, feather the selection (Select > Modify > Feather) by 0.3px.
Step 26
In the Layers palette, select the t-shirt layer.
Step 27
Choose Image > Adjustments > Brightness/Contrast and reduce the brightness by 10.
Step 28
Create a new layer (Ctrl+Shift+N or Layer > New > Layer)
Step 29
Using the Pen tool, create a path like shown below.
Step 30
Set your foreground color to white. Then, in the Paths palette (Window > Paths), right click on the path then choose Stroke Path.
Step 31
Here’s what the t-shirt looks like so far!
Step 32
Repeat steps 29 and 30 for the right sleeve.
Step 33
I added an abstract paint image on the t-shirt. You can add any image you like.
Step 34
Create a selection like shown below. Feather the radius (Select > Modify > Feather) by 5 pixels. Now choose Select > modify > Inverse.
Step 35
Create a new layer (Ctrl+Shift+N or Layer > New > Layer)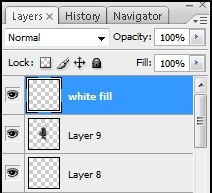
Step 36
Fill the selected area with white.
Step 37
Select the layer with the t-shirt artwork.
Step 38
Use the Eraser tool to erase the excess white areas.
Step 39
Change the opacity of the white fill layer to 30%.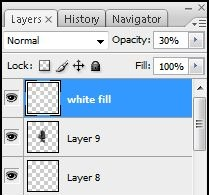
Step 40
Choose Filter > Blur > Gaussian Blur. Apply the settings shown below then click OK.
Step 41
Here’s what the t-shirt looks like so far.
Step 42
Select the Rounded Rectangle tool.Step 43
Create a rectangle then choose Edit > Transform > Rotate to rotate the rectangle.
Step 44
Right click on the layer >Blending Options >Drop Shadow and make next settings :
Step 45
Create a circle selection using the Elliptical Marquee tool like shown below.
Step 46
Press delete to remove the contents in the selected area.
Step 47
Create a new layer (Ctrl+Shift+N or Layer > New > Layer)
Step 48
Using the Pen tool, create a path like shown below.
Step 49
Select the Brush tool the set the options in the option bar as shown below. The option bar is located under the menu bar.Step 50
In the Paths window, right click on the path then choose Stroke Path.
Step 51
Use the Eraser tool to erase the tag as shown below so that it looks like it is looped around the fabric of the t-shirt.
Step 52
Choose Layer > Layer Style > Drop Shadow and apply the settings shown below.
Step 53
Select the layer with the t-shirt.
Step 54
Use the Elliptical Marquee tool to create a circle selection like shown below.
Step 55
Press the delete key to create a hole on the shirt.
Step 56
Here’s what the t-shirt looks like so far!
Step 57
You can add some text to the label if you like using the Text tool.
Step 58
Add a texture to the background. You can use any photo you like. I used a wood texture.
Step 59
Select the t-shirt layer then choose Layer > Layer Style > Drop Shadow then apply the settings shown below.
Final Results


1 comments:
I read your post and got it fine and informative. Keep share more like that. If anybody want to know more about T Shirt Printing, Bludog is the best option.
Post a Comment