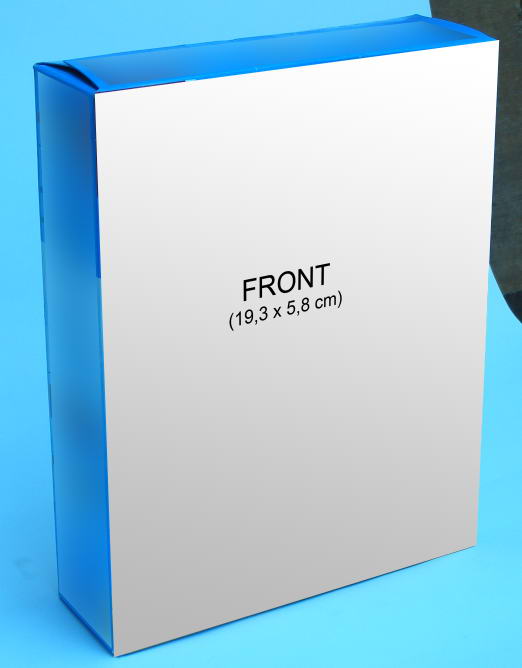
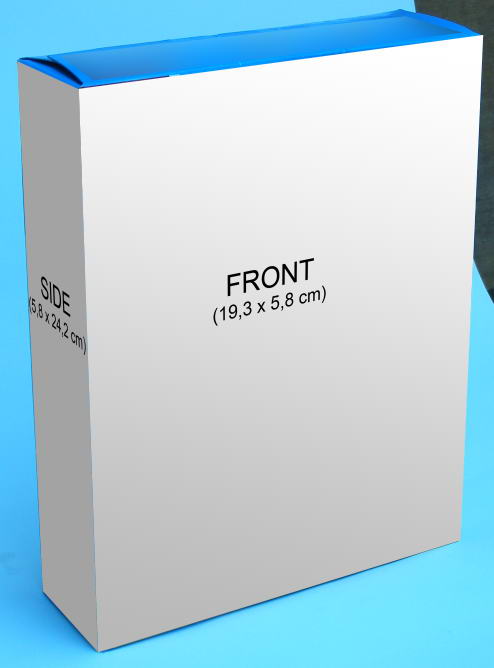
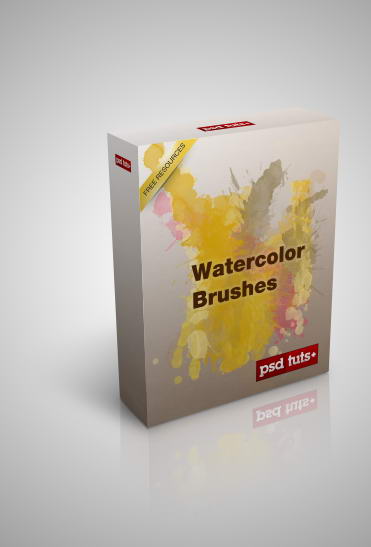
Final Product What You'll Be Creating
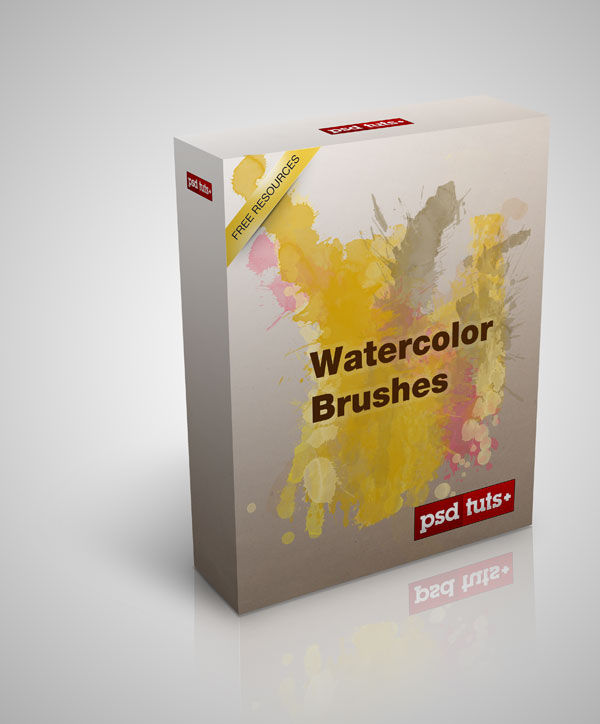
Actions can be used to quickly automate repetitive tasks. In this tutorial, we will demonstrate how to create an action that will automatically create a 3D software box from a flat template.




Video Demonstration
Take a look at this short video demonstrating what this action will do.Step 1: Create the Canvas
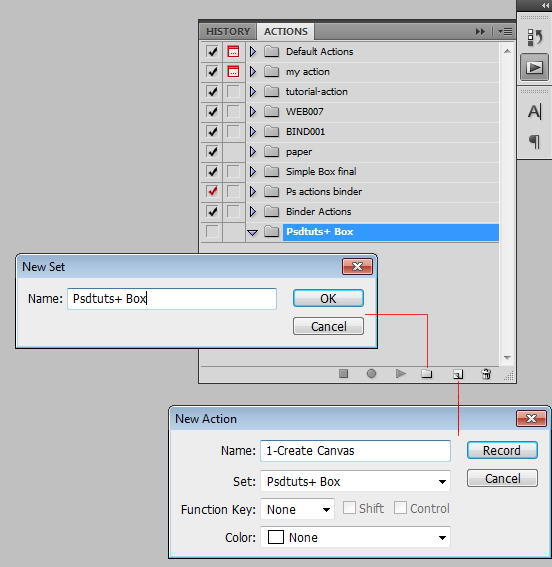
Our first step is creating an action to create the canvas template. Open action panel, click folder icon to create new set. Name it Psdtuts+ box. Click new icon to create new action and name it 1-Create Canvas. Click Record. Remember that you should not do anything that is not needed because Photoshop will remember that. Make sure to follow this tutorial closely.
Step 2
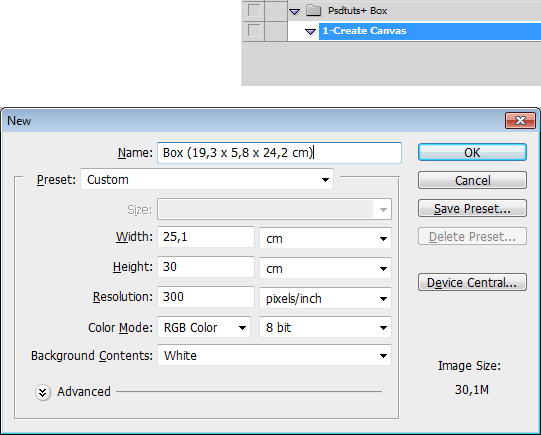
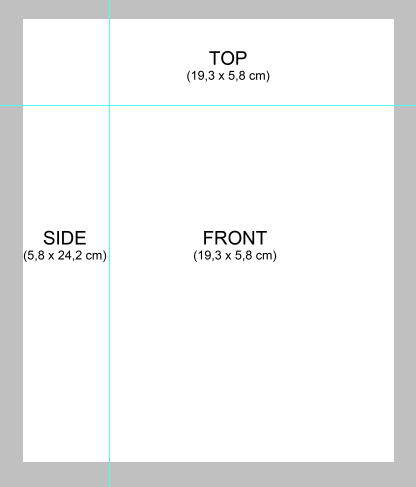
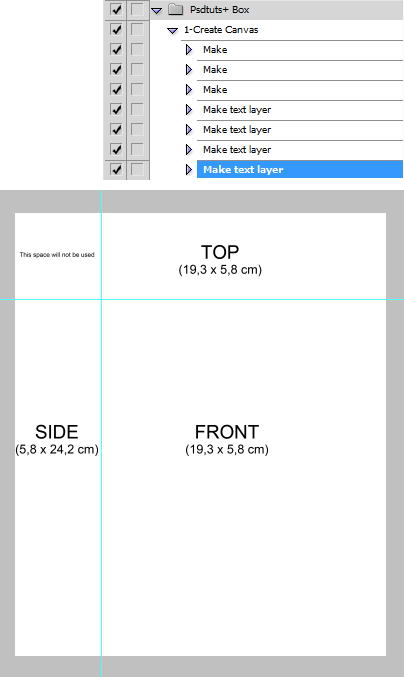
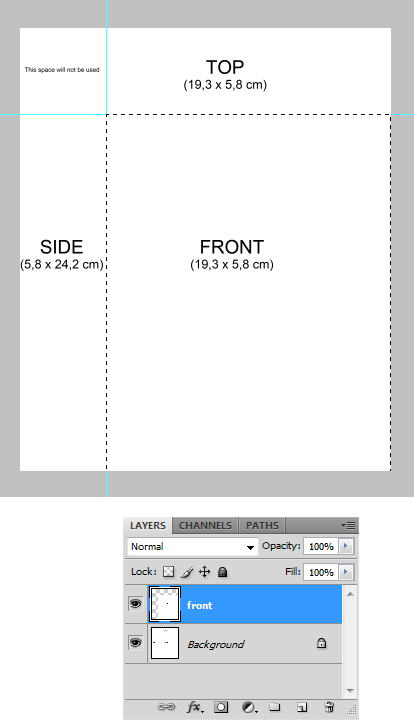
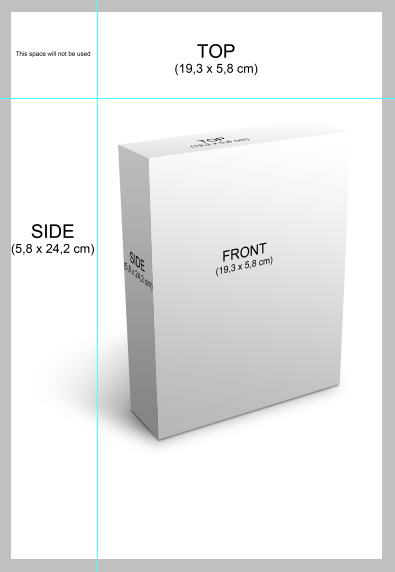
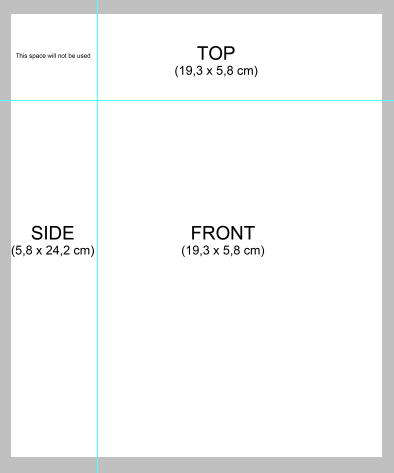
Our first step is creating the new file. Click File > New. The box dimension are 19.3 x 5.8 x 24.2 cm. For the canvas size, use 25.1 x 30 cm. Set resolution to 300 dpi, this will enable the final artwork to be printed.
Step 3
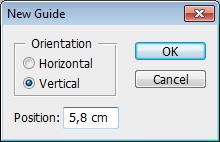
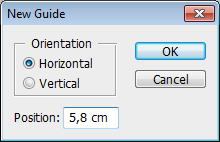
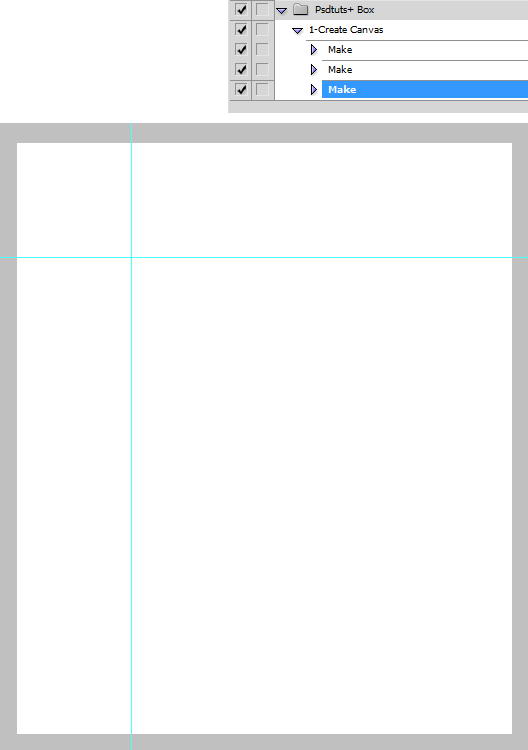
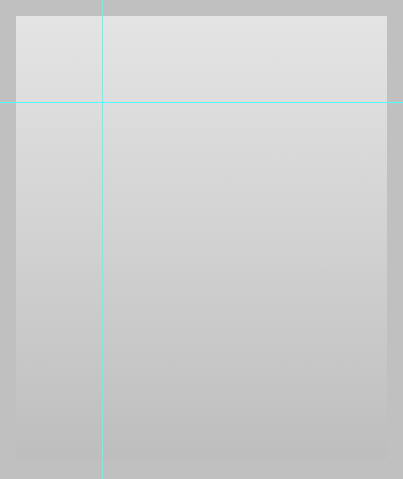
Create two horizontal and vertical guides. Click View > New guide with position: 5.8 cm. You will see that the actions list is updated.


Step 4
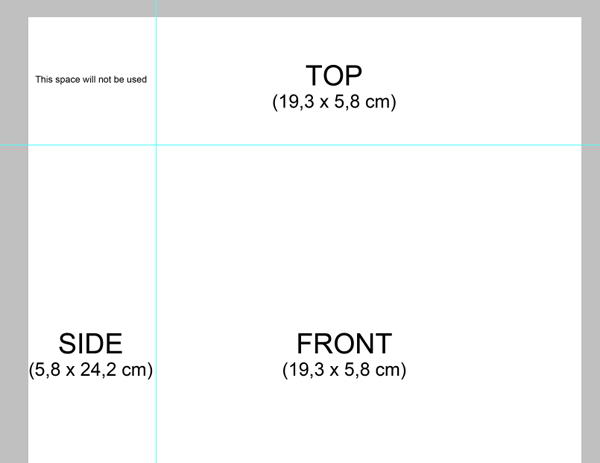
Add some information on the size of the template. We will not use space on top left corner, so add that as well. Because this action is intended to be used by many people, not for our personal use, we have to make sure that everything we do here can be done on other people’s computer. The same goes for adding text. Use font that available in every OS (PC and Mac). In this tutorial, I used Arial.


Step 5
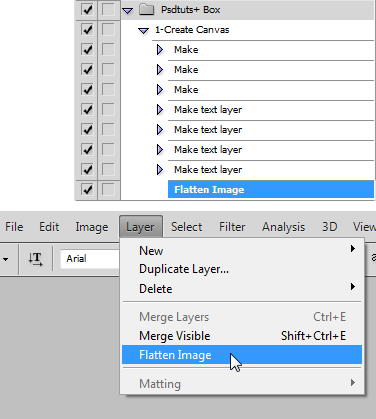
Let’s simplify the template and flatten all layers. Click Layer > Flatten Image.
Step 6
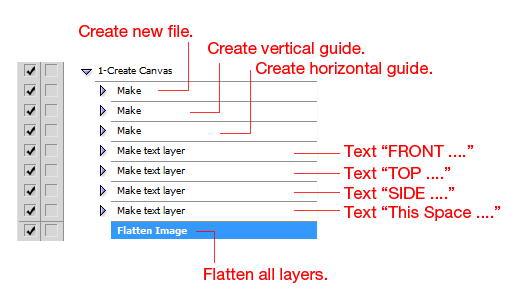
We’ve finished the first action; creating the box template. Press the Stop button. Below, you can see list of steps that we performed. I suggest you to test this action by clicking the Play button.
Step 7: Front Cover
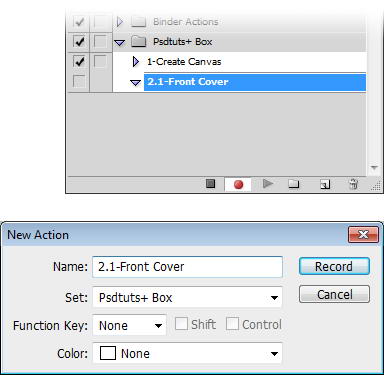
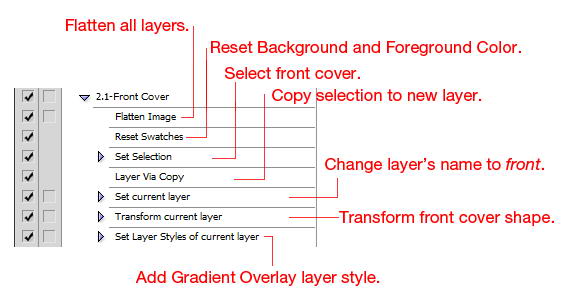
We’re done with creating the box template. Our next step is creating an action to automatically render the template into 3D. This takes lots of steps. We’ll simplify it by separate it into 8 smaller actions. Our first action will create the front cover. Click new action icon and name it 2.1-Front Cover. Click record button to start recording action.
Step 8
In practice, at this point the box design is possibly in some layers. So, our first step is to flatten all layers. The problem is now we only have one layer and Flatten Image command is not available. To fix this, press Stop button to stop the recording process, create new layer, press Record to continue recording, click Layer > Flatten Image. This way, we can record Flatten Image command and skip creating new layer. Next step is to reset foreground and background color to default, black and white. Use the rectangular marquee to select front cover. Hit Cmd/Ctrl + J to duplicate selection to new layer. Rename layer to front.
Step 9
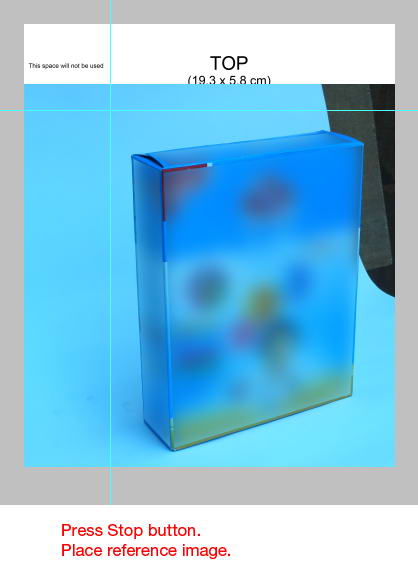
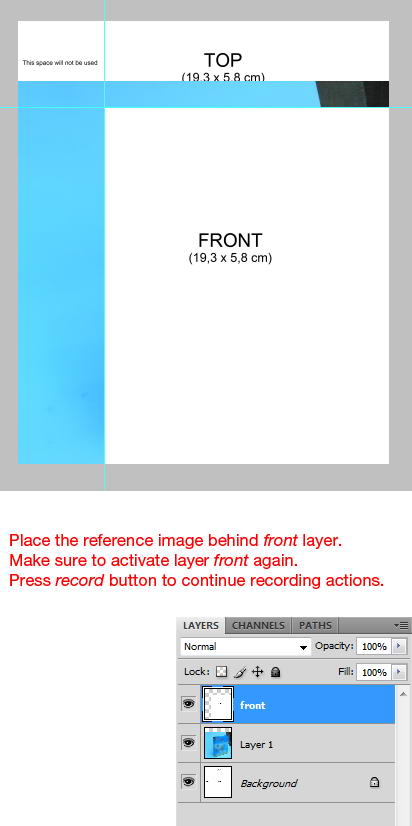
Press Stop button. Place a reference image onto the canvas. Move it behind layer front. Activate layer front. Press Record button to continue recording process.

Step 10
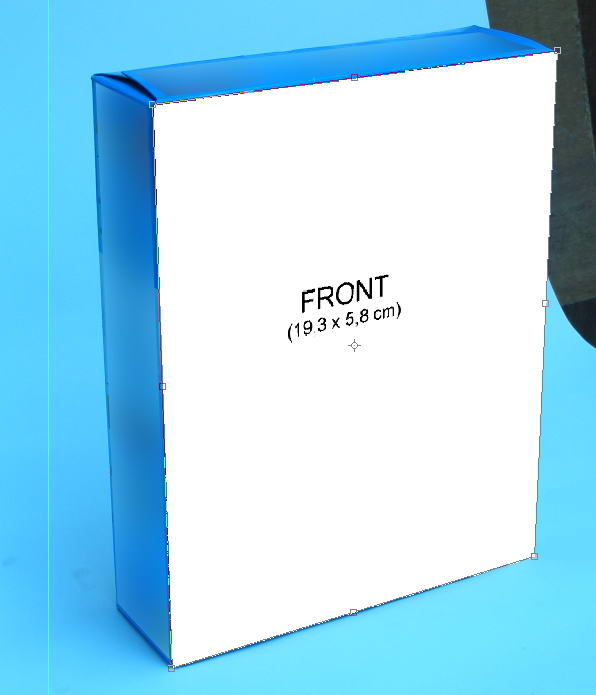
Press Cmd/Ctrl + T. Transform layer front until it fits the onto the reference image.
Step 11
Double click layer to open Layer Style dialog box. Add Gradient Overlay. Press Stop to stop the recording process.

Step 12
We’re done recording actions for front cover. This is the list of steps that we did. Make sure to test our action by running action 1-Create canvas and then action 2.1-Front Cover.
Step 13: Side Cover
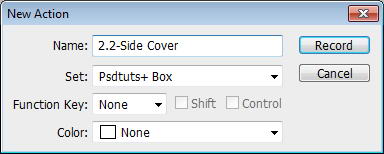
First, hide the reference image. Create a new action, name it 2.2-Side Cover. We will be recording the creation of the side cover.
Step 14
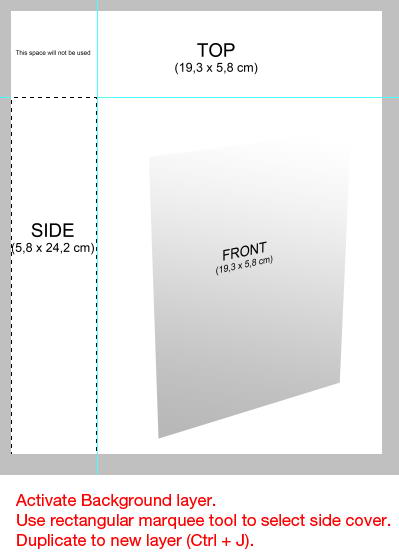
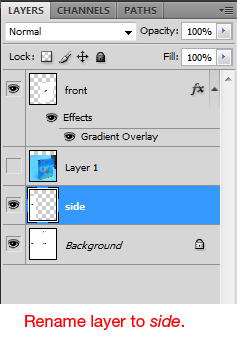
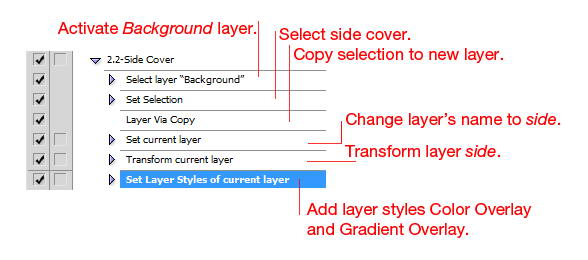
Activate Background layer. Use rectangular marquee tool to select side cover. Duplicate selection to new layer (Cmd/Ctrl + J). Rename layer to side.

Step 15
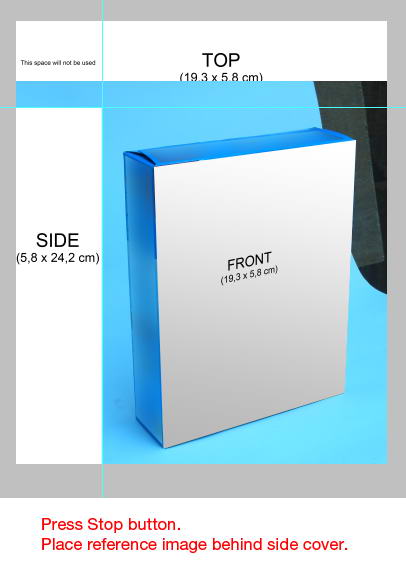
Press Stop, we don’t want this step recorded. Place layer side above reference image.
Step 16
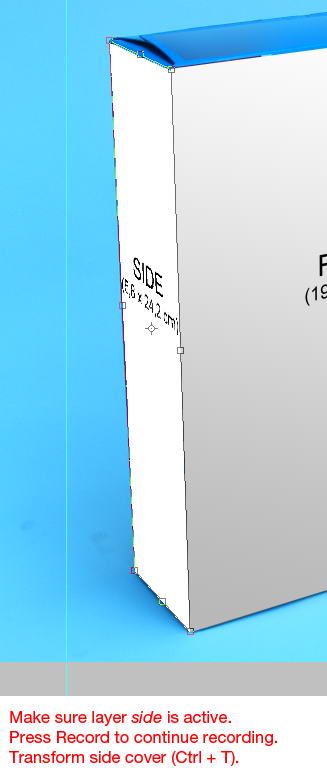
Make sure layer side is active. Continue recording. Transform side cover to perspective.
Step 17
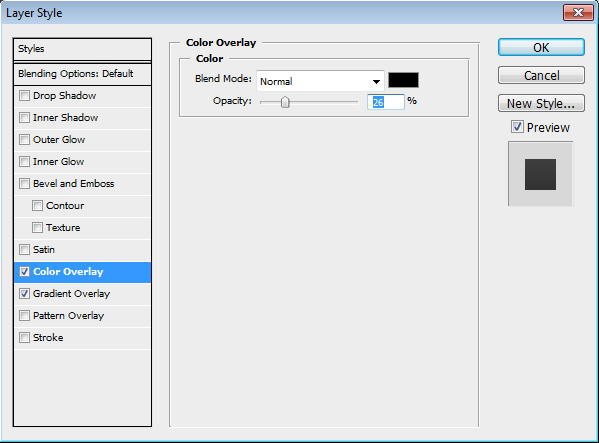
Add Gradient Overlay and Color Overlay. These layer styles will add some shades onto side cover.


Step 18
We’re finish with this part. Press Stop button. Take a look at steps we have recorded. Test the progress by running all the actions we have created.
Step 19
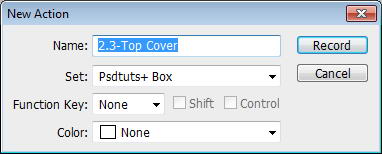
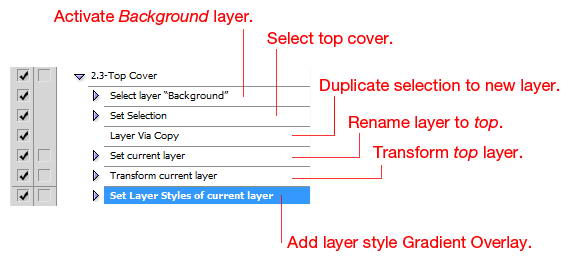
Hide reference image. Our next step is creating an action for top cover. Click new icon and name this 2.3-Top Cover. Click Record button.
Step 20
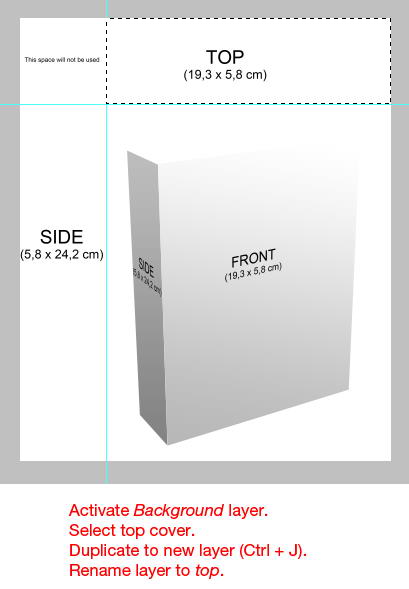
Activate Background layer. Select top cover, hit Cmd/Ctrl + J. Rename layer to top.
Step 21
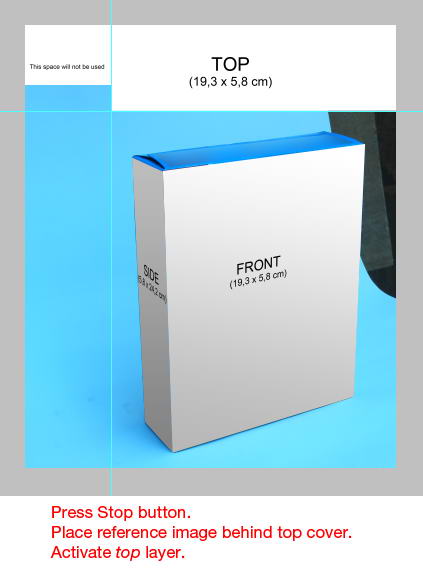
Press Stop button. Now place reference image behind layer top. Make sure to reactivate layer top and press Record button to continue recording.
Step 22
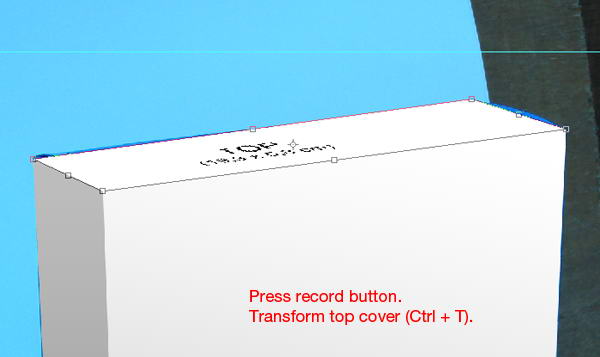
Hit Cmd/Ctrl + T and transform top cover.
Step 23
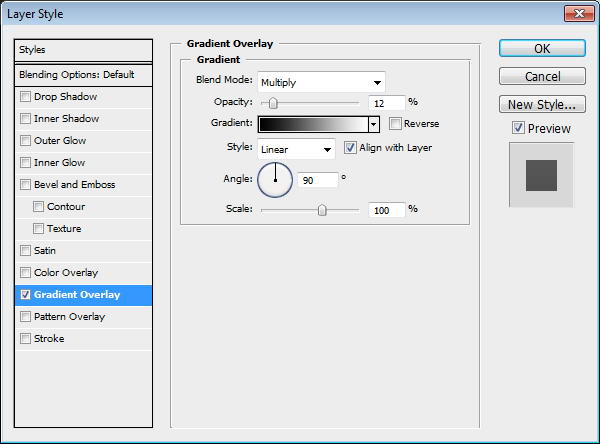
Add layer style Gradient Overlay. Press Stop button.

Step 24
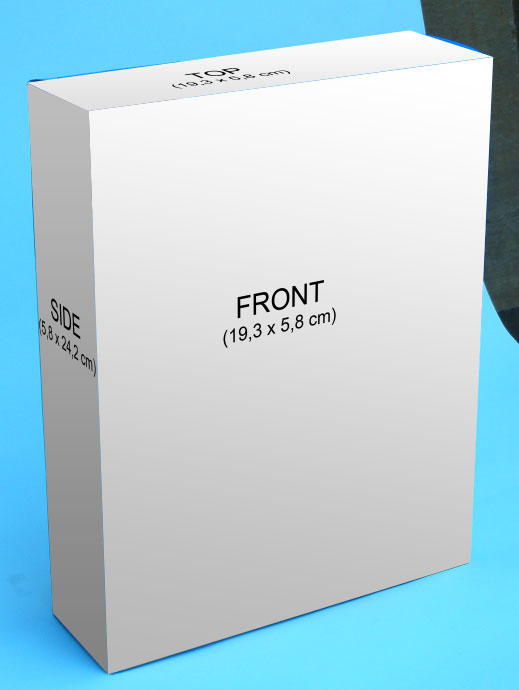
Below is the list of recorded steps. Don’t forget to test the progress.
Step 25: Shadow
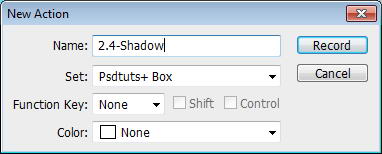
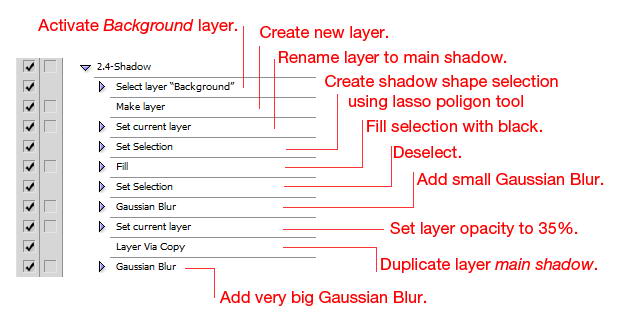
Hide reference image. Create new action, name it 2.4-Shadow.
Step 26
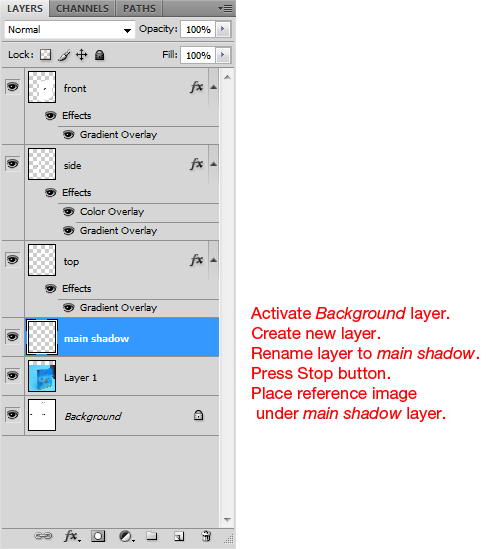
Activate Background layer. Create new layer. Rename layer to main shadow. Press Stop button. Place reference image under layer main shadow. Reactivate layer main shadow.
Step 27
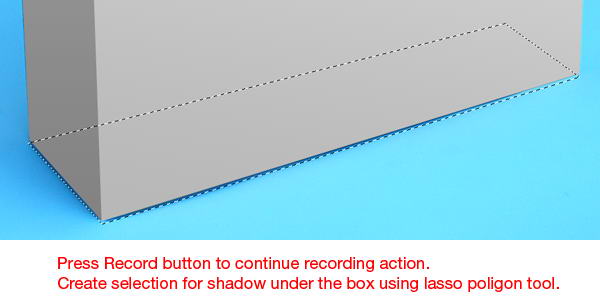
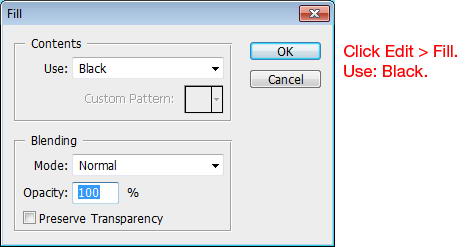
Press Record. If this is an ordinary illustration, we can just draw the shadow manually using brush tool. Because actions cannot record manual drawing, we need to use another method. Use polygon lasso tool to create selection in shadow shape, right under the box. Click Edit > Fill, Use: Black.

Step 28
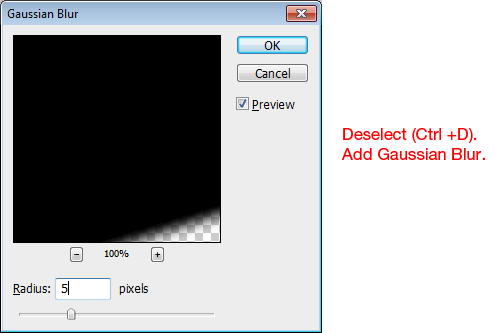
Deselect (Cmd/Ctrl + D). Click Filter > Blur > Gaussian Blur to soften the shadow.
Step 29
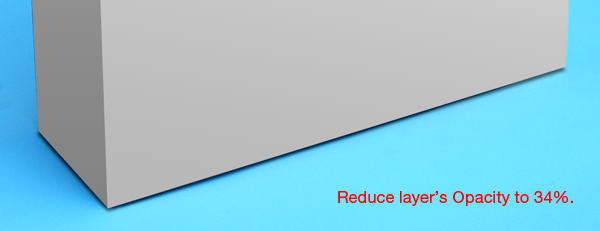
Set layer opacity to 34%.
Step 30
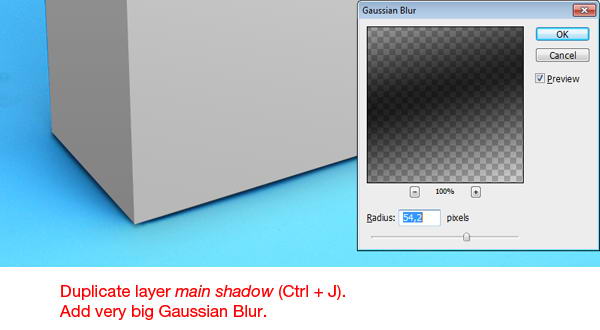
Hit Cmd/Ctrl + J to duplicate layer main shadow. Add another Gaussian Blur, this time use very big Radius. This will be the cast shadow on the floor.
Step 31
We’re done with this action. Press Stop to stop recording.
Step 32: Drop Shadow
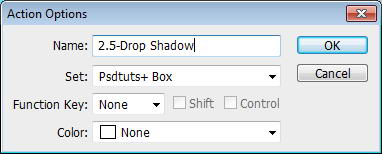
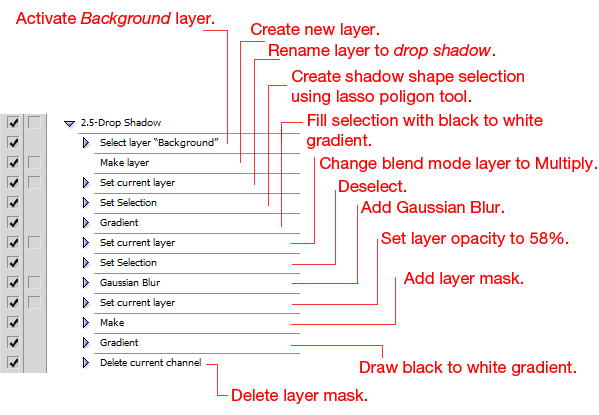
Create new action, name it 2.5-Drop Shadow.
Step 33
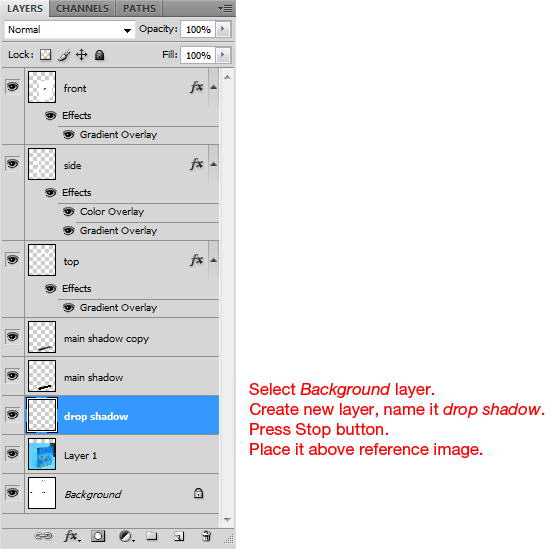
Select Background layer. Create new layer, rename to drop shadow. Press Stop button. Place layer above reference image.
Step 34
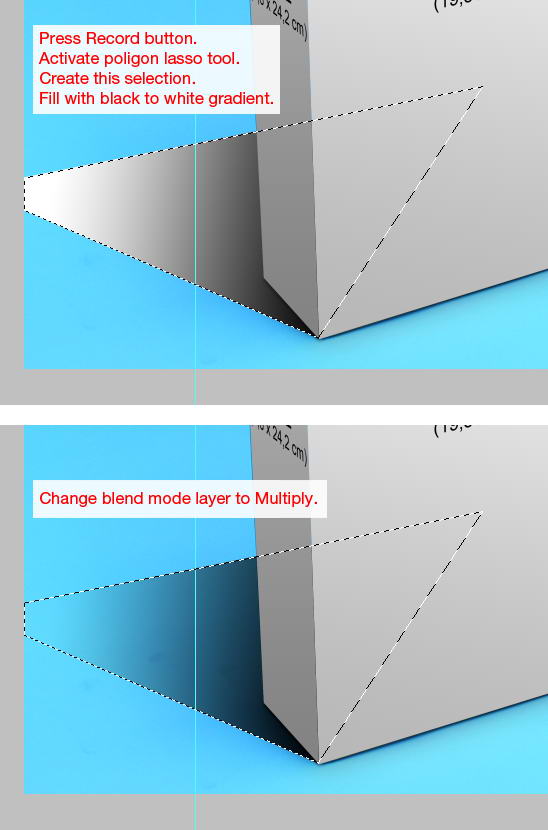
Press Record button. We need to create another shadow that goes behind the box. Use polygon lasso tool to create the selection and fill it white black to white gradient. Change layer blend mode to Multiply to hide lighter pixels.
Step 35
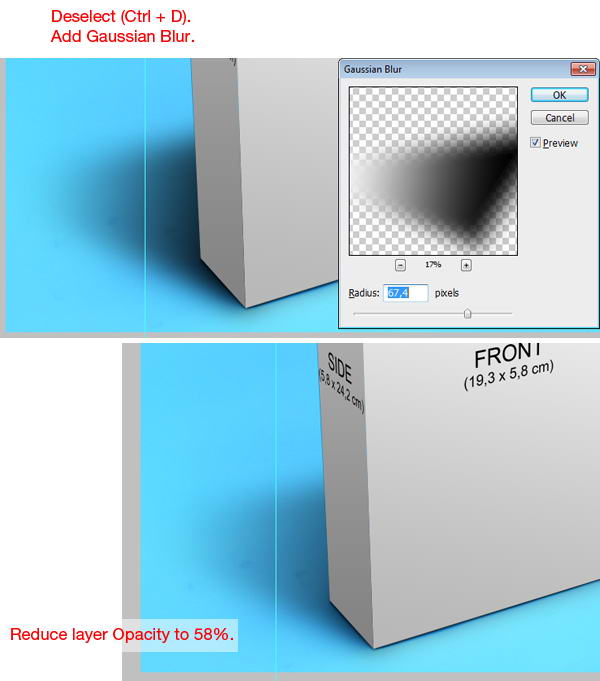
Deselect (Cmd/Ctrl + D). Add Gaussian Blur. Reduce layer opacity to 58%.
Step 36
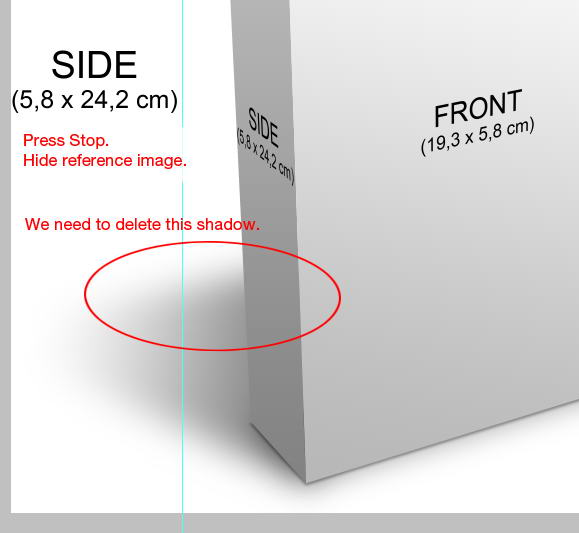
Press Stop and hide reference image, we no longer need it now. Below, we can see that there is too much shadow on the back. Again, if this is just another illustration we can simply use an eraser tool and delete it. Because Photoshop cannot record manual drawing, we will use another technique, masking. This will takes more time but at least Photoshop can record that.
Step 37
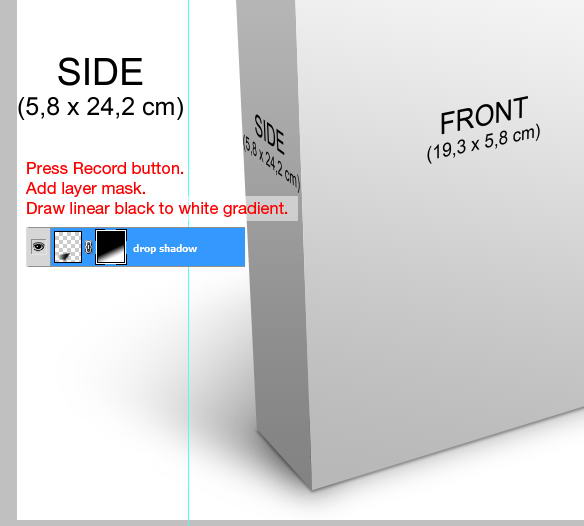
Press Record button. Add layer mask then draw a linear black to white gradient. Shadows covered with black will be hidden.
Step 38
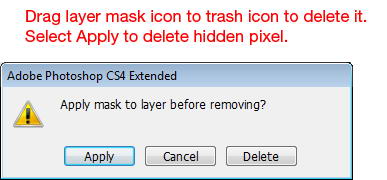
Drag layer mask icon to trash icon to delete it. Select Apply to delete hidden pixel. If you still not satisfied with the result, you can repeat this process. Add layer mask again, draw gradient, and then delete the mask.
Step 39
We’re done with this action. Press Stop.
Step 40: Cut Front and Side Cover
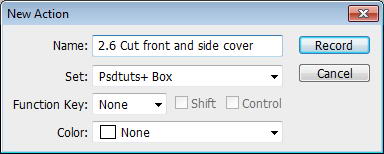
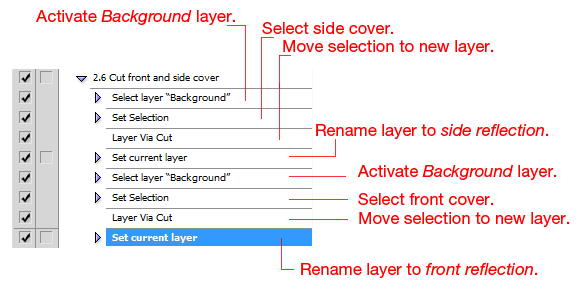
We will add a nice reflection on the floor. Create new action again. In this action, we will simply cut each reflection into separate layers.
Step 41
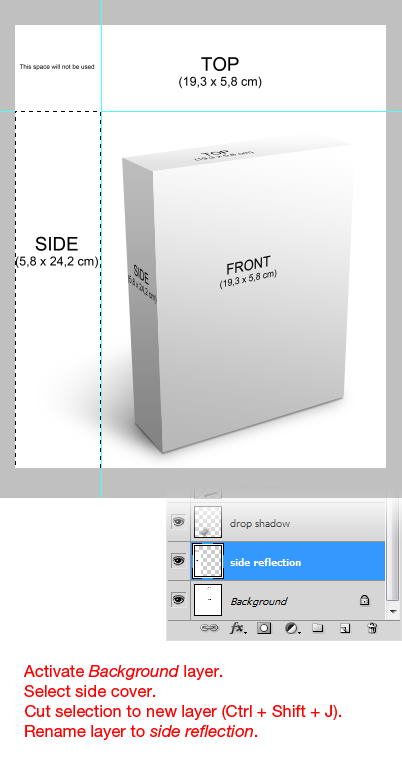
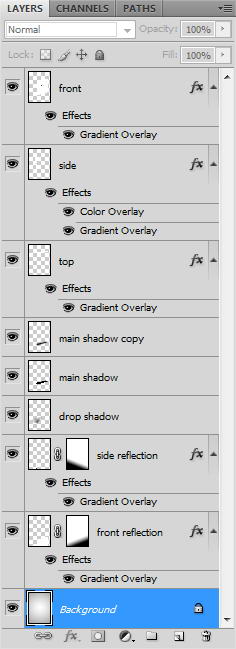
Activate Background layer. Select side cover. Cut selection to new layer by pressing Cmd/Ctrl + Shift + J. Rename layer to side reflection.
Step 42
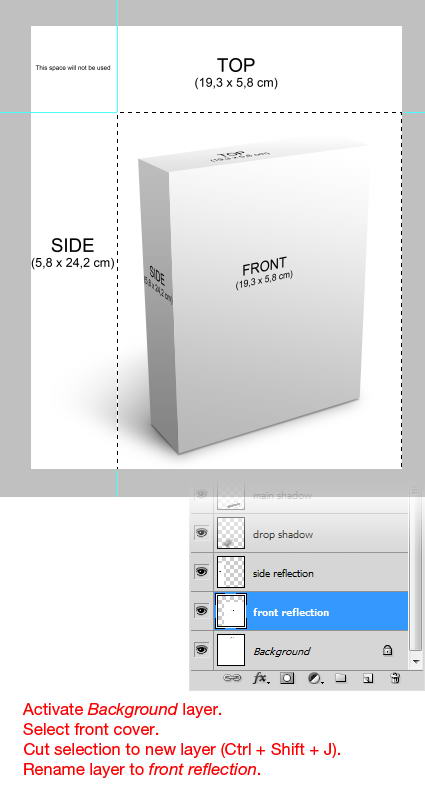
Activate Background layer. Select front cover, cut it to new layer (Cmd/Ctrl + Shift + J). Rename layer to front reflection.
Step 43
We’re done with the action. Press Stop.
Step 44: Create Front Reflection
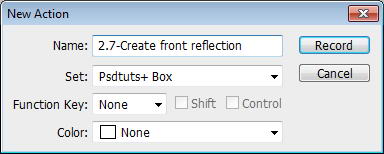
Next action is creating front reflection. Create new action.
Step 45
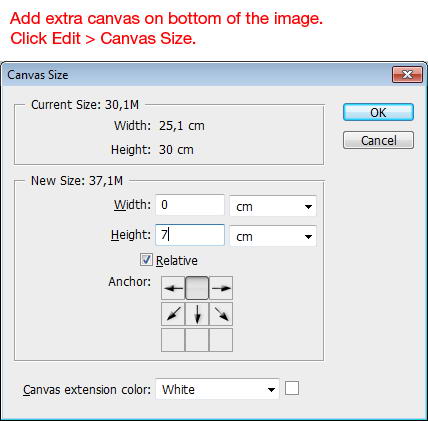
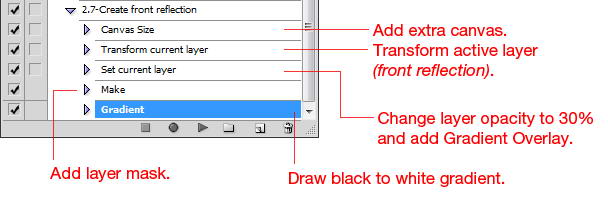
Our current canvas is too small for reflection. We need to add extra space. Click Edit > Canvas Size. Select top rectangle since we want to add canvas to lower part of the image.

Step 46
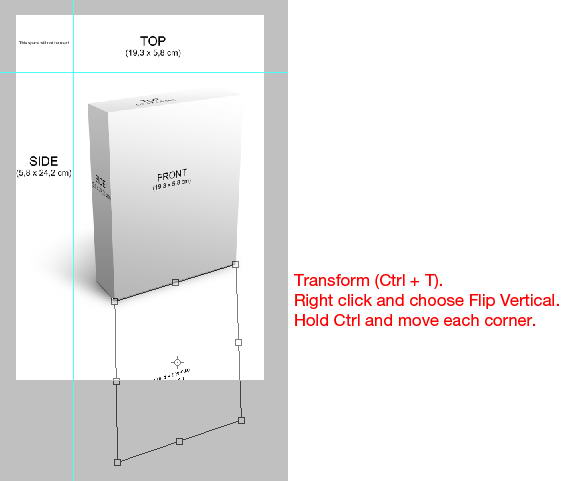
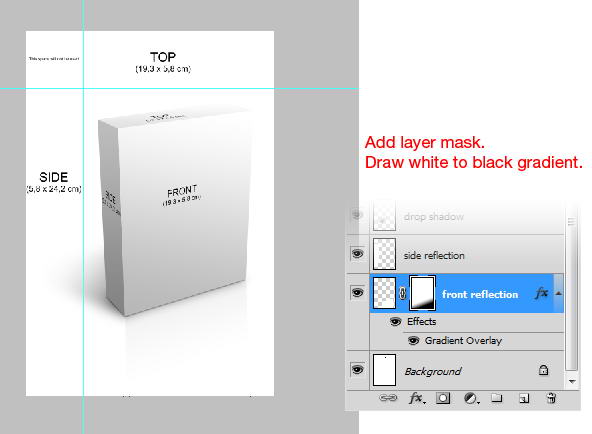
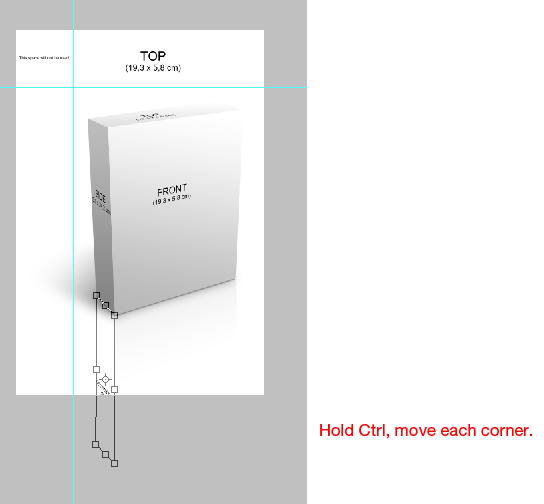
Remember that in our last action, layer front reflection is selected. So, we can directly continue to transformation. Hit Cmd/Ctrl + T, right click and choose Flip Vertical. Hold Cmd/Ctrl and move each corner. See picture below for reference.
Step 47
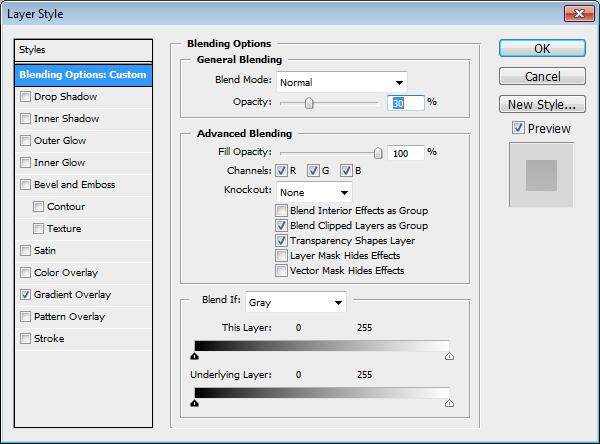
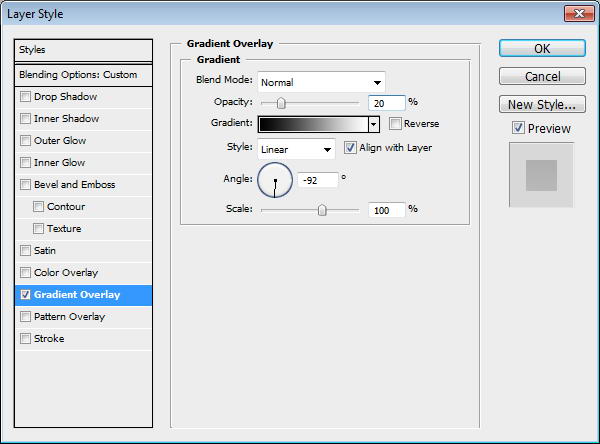
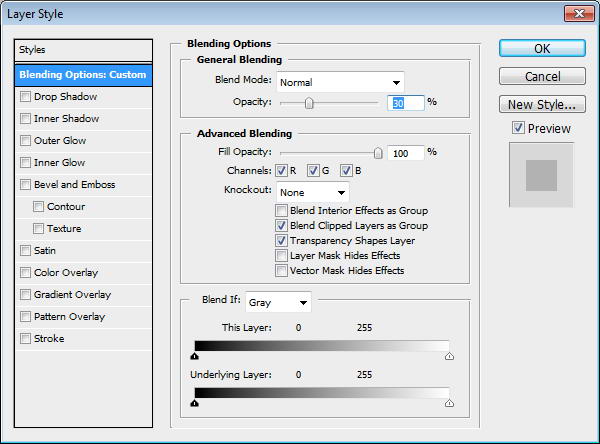
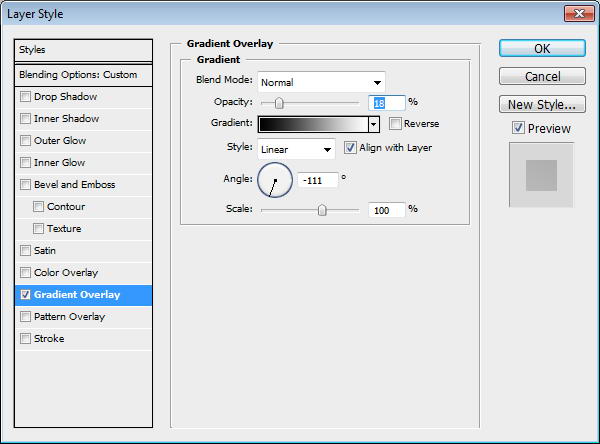
Double click layer. Set Opacity to 30% and add Gradient Overlay.


Step 48
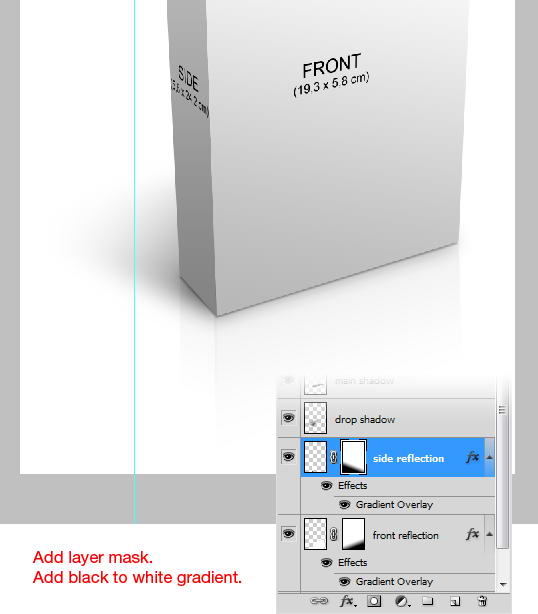
Add layer mask. Draw white to black gradient until front reflection fading gradually.
Step 49
Press Stop button. We’re finish with this action.
Step 50: Create Side Reflection
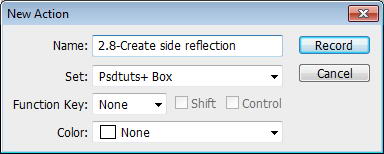
Create new action. Click Record.
Step 51
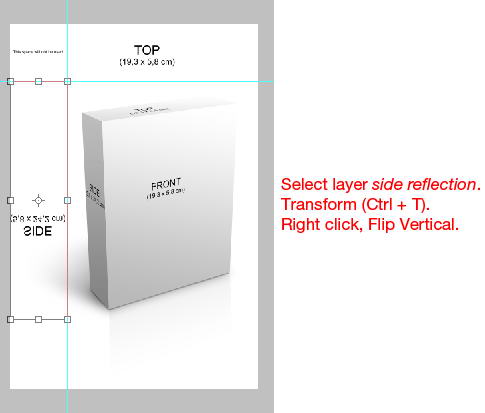
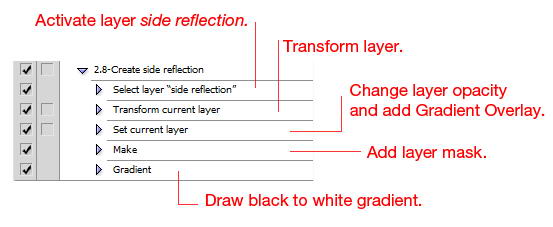
Remember that in our last action, active layer is front selection. So, we need to select side reflection to activate it. Perform similar transformation process.

Step 52
Set layer opacity to 30% and add Gradient Overlay.

Step 53
Add layer mask. Draw gradient to gradually fade the reflection.
Step 54
Press Stop. Let’s review our action.
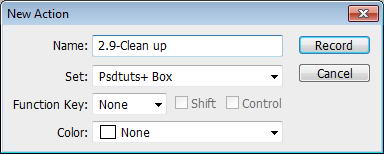
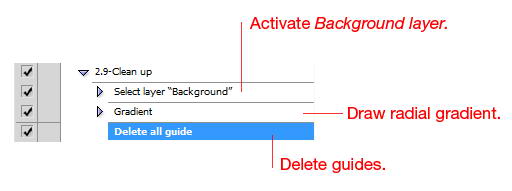
Step 55: Action 2.9-Clean up
Create new actions. This will be our last action.
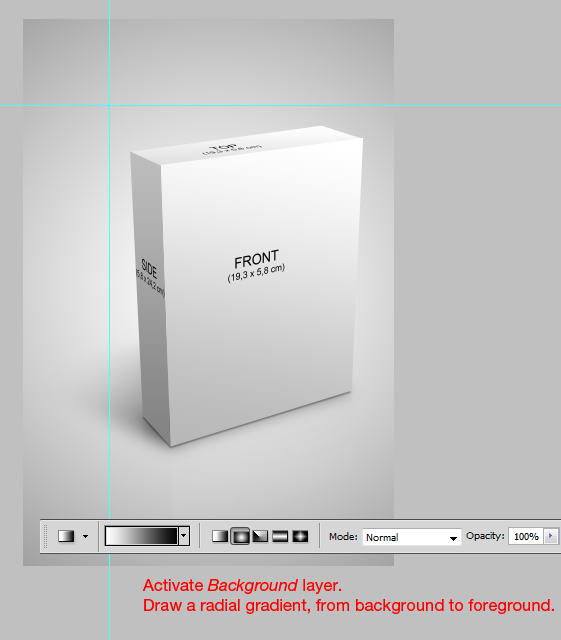
Step 56
Select Background layer. Draw a simple black to white radial gradient.
Step 57
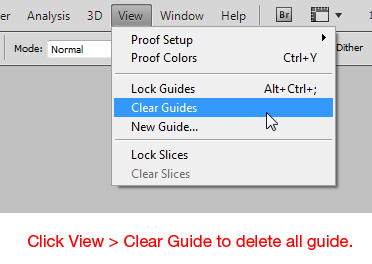
We don’t want the user distracted by thin guides on the workspace. Click View > Clear Guides to remove them.
Step 58
This one is short.
Step 59: Combining All Steps Into One Big Action
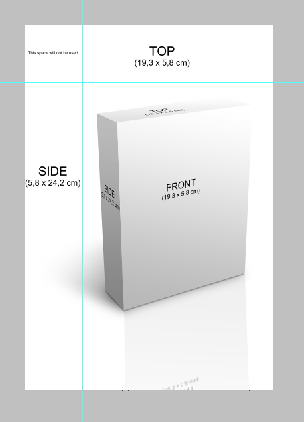
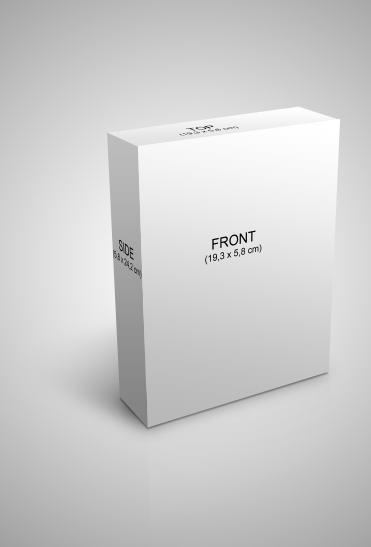
Let’s simplify the action. Create new set. Alt-drag action 1-Create Canvas to duplicate it. Create new action and name it 2-Render. We won’t record any command so press Stop button. Alt-drag list of commands from action 2.1. Alt-drag list of commands from action 2.2 and put it under previous list. Keep doing this until every command is in one giant action. If you test the action by running first action then second action, you will get image below.


Step 60: Create Product Box for Psdtuts+ Texture Pack
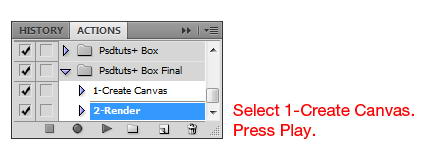
We’re done with the action. Now, we’ll use this action to create a simple Psdtuts+ texture pack box. With the help from our action, designing process is much easier. Select action 1-Create Canvas and press Play button to automatically create cover template.

Step 61
Let’s fill Background with a simple gradient.
Step 62
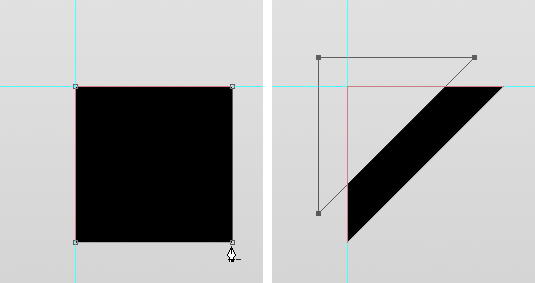
On top left corner of the front cover, draw a square shape. Use pen tool and click its right bottom corner to delete it. Duplicate the shape, hit Shift + Left Arrow and Shift + Right Arrow a few times to move the shape. From the option bar, select subtract icon. We will have a ribbon shape.
Step 63
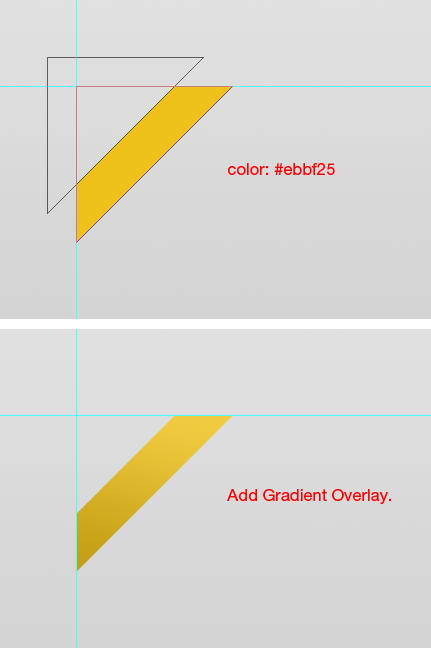
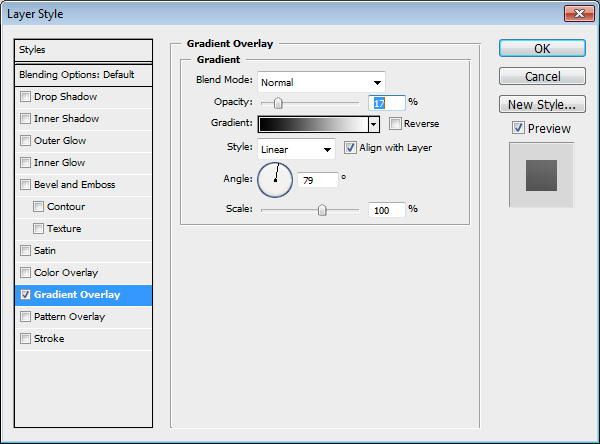
Change its color to #ebbf25. Add Gradient Overlay.

Step 64
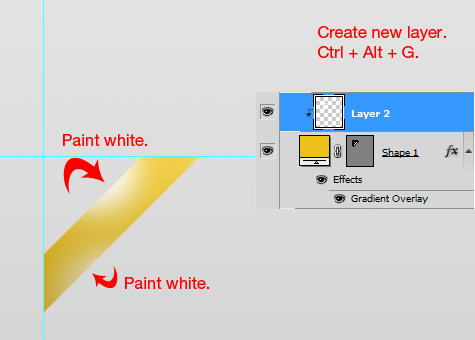
Create new layer, hit Cmd/Ctrl + Alt + G to convert it to clipping mask. Paint white on indicated areas to add depth.
Step 65
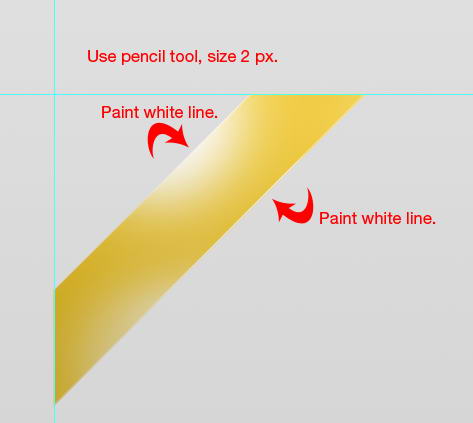
Use pencil tool, size 2 px to draw a straight line on some part of the ribbon.
Step 66
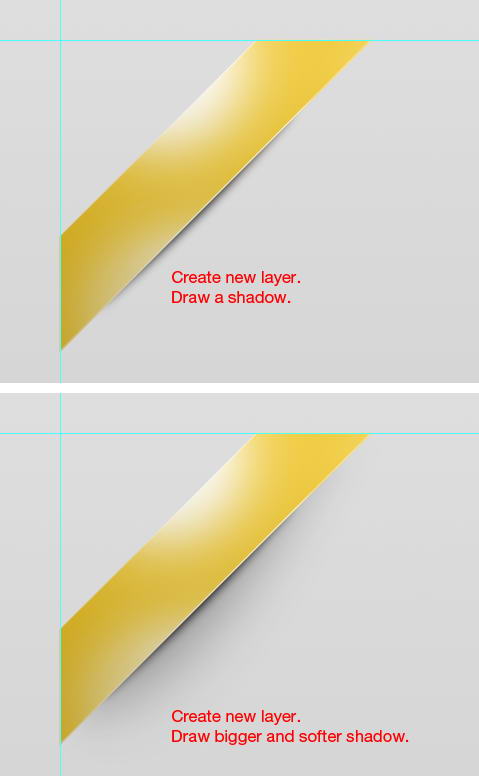
Create new layer and place it under the ribbon. Draw a shadow. Create another layer and draw softer and bigger shadow.
Step 67
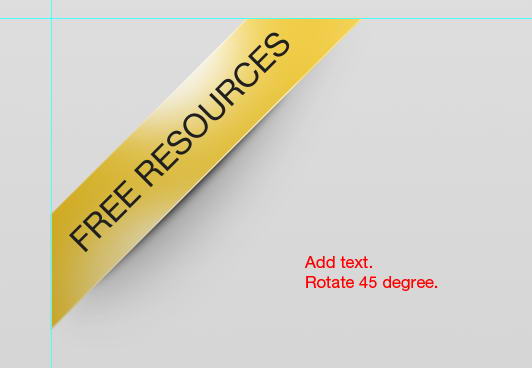
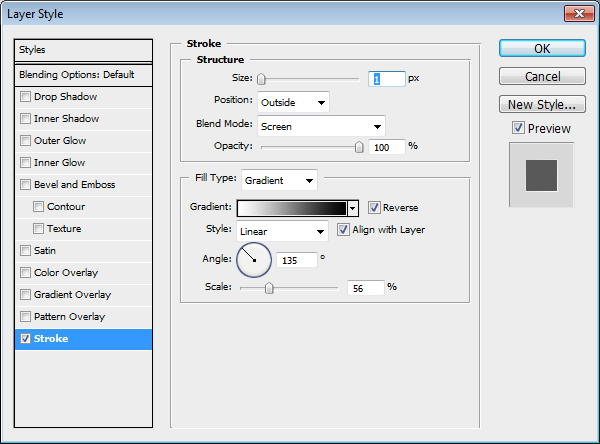
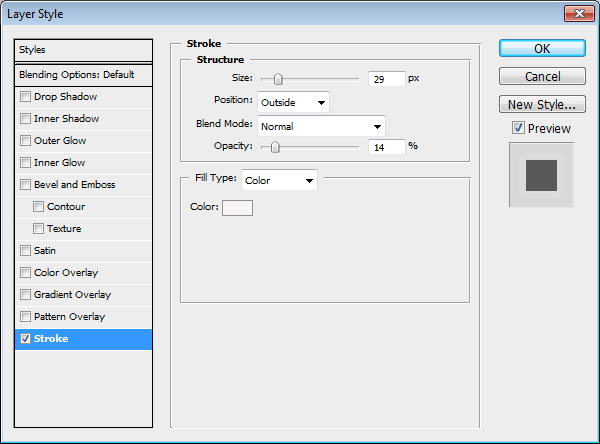
Add some text on it. Give it layer style Stroke.

Step 68
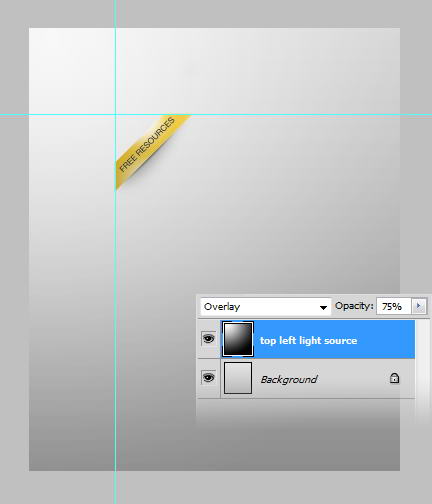
Create new layer and draw a white to black radial gradient from top left. Set blend mode to Overlay.
Step 69
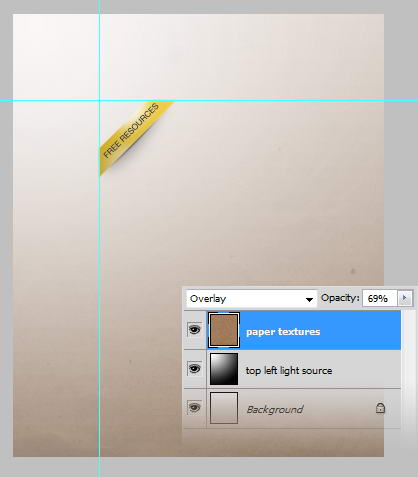
Let’s add some texture. Here, I’m using a nice texture from Vandelay Premier. Set blend mode to Overlay and reduce its opacity.
Step 70
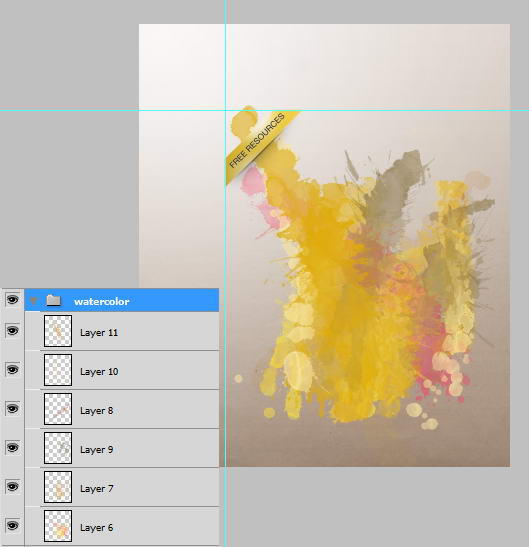
I use premium watercolor brush from Psdtuts+ to create some splatter. Place the splatter under the ribbon to get a nice 3D effect.
Step 71
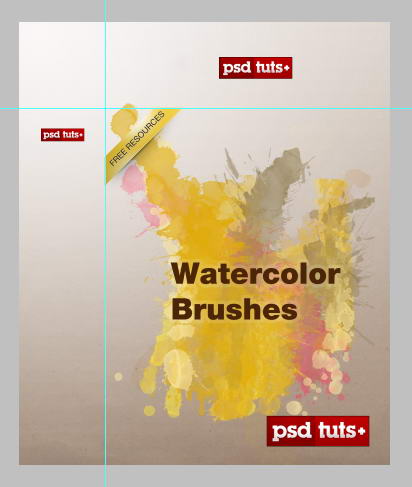
Add some logos to each cover. Add text and give it some Stroke to keep it stand up.

Step 72
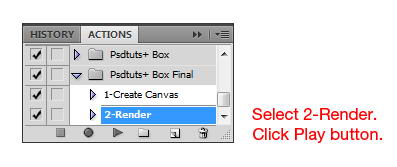
Select action 2-Render and press Play button. Wait for a few seconds or minutes, depends on the speed of your computer.
Step 73
It’s magic! You’ve got yourself a 3D product box. Congratulations!
Final Image
That’s it. I hope this tutorial inspires you to create something cool automatically using actions.
0 comments:
Post a Comment