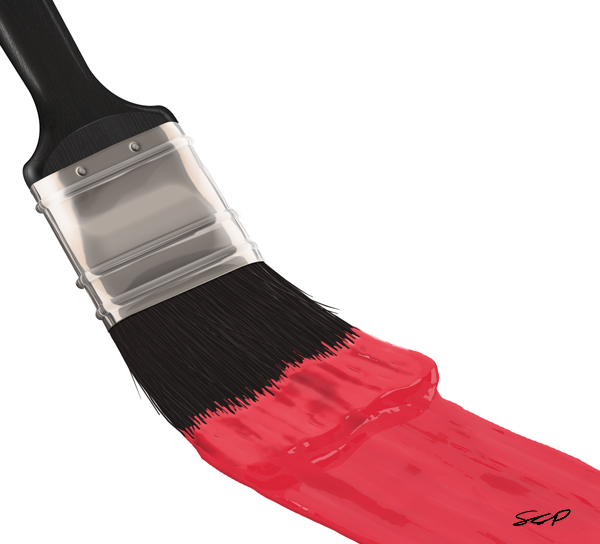
Final Product What You'll Be Creating
tutorial we will demonstrate how to create a realistic-looking paint brush using layer styles, clipping masks, and the not-so-commonly-used blend if sliders. Let’s get started!
Tutorial Assets
This tutorial uses a custom created pattern. Download here:Step 1
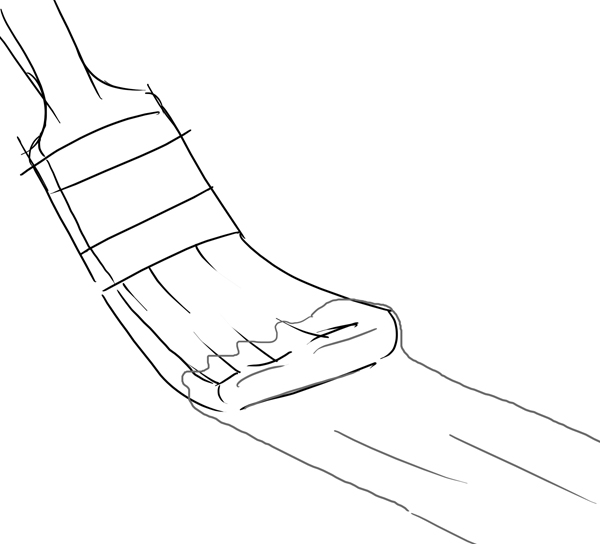
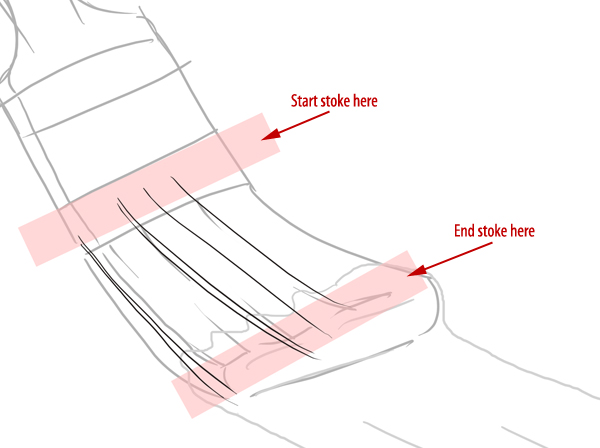
Create a new document (2400px x 2175 px). Sketch out a scene of a paintbrush.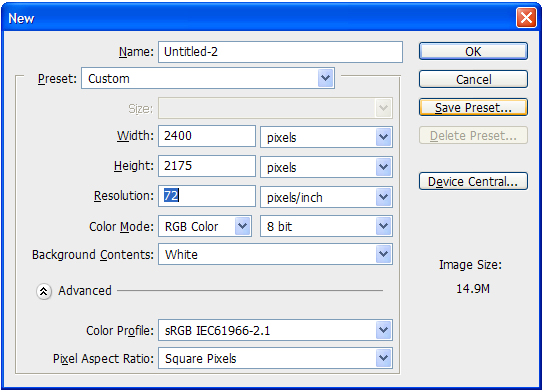
Step 2
This step is optional, but I’ve added some additional visual guides to help me draw the bristles.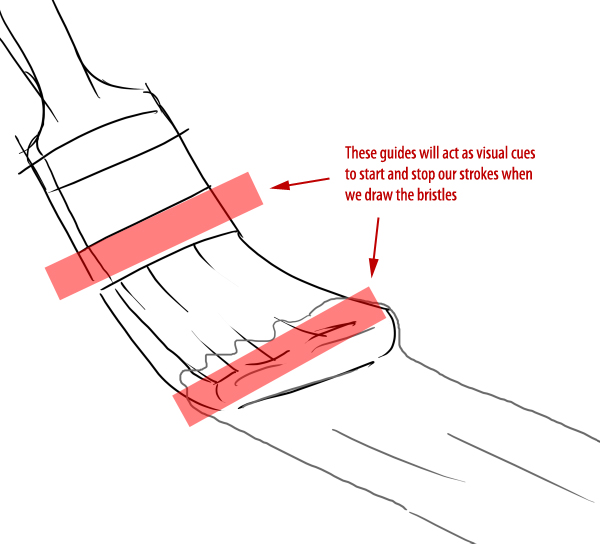
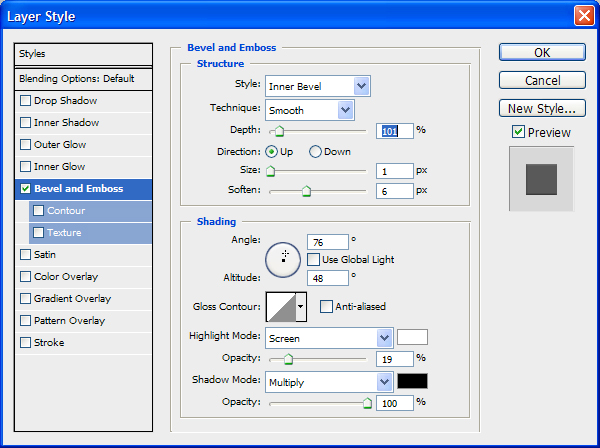
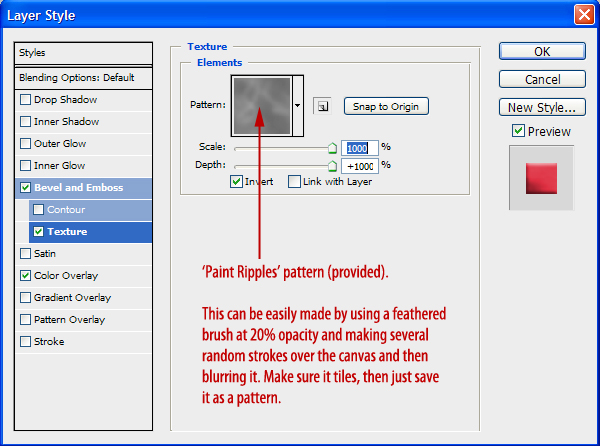
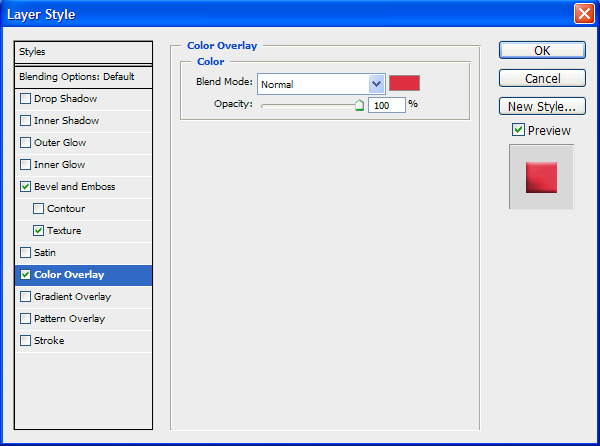
Step 3
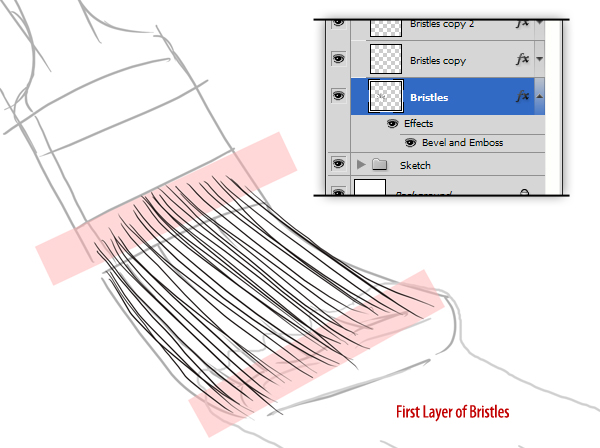
Before we start drawing bristles, create a New Group called “Bristles.” Inside this group, create a layer called “Bristles” and add the following Layer Style.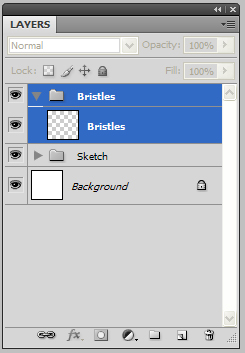
Step 4
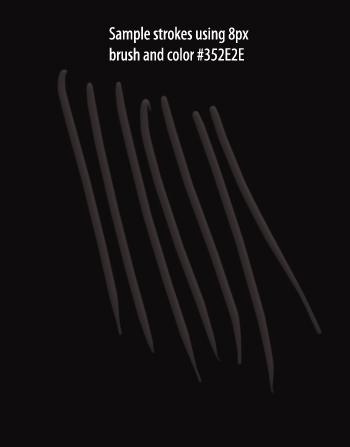
Duplicate the empty layer 5 times. Since we are making a lot of bristles, we are going to be drawing them on five separate layers. If we tried to draw them all on one layer, the strokes would blend together and ruin the layer style that’s applied. Select the bottom-most layer in the “Bristles” group and, with a small brush, start drawing lines using the guides and sketch as references.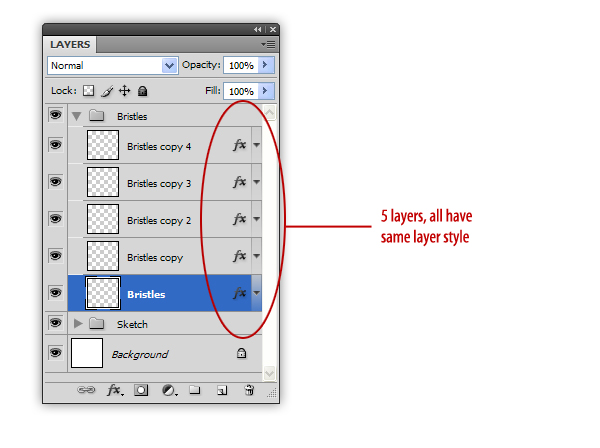
Step 5
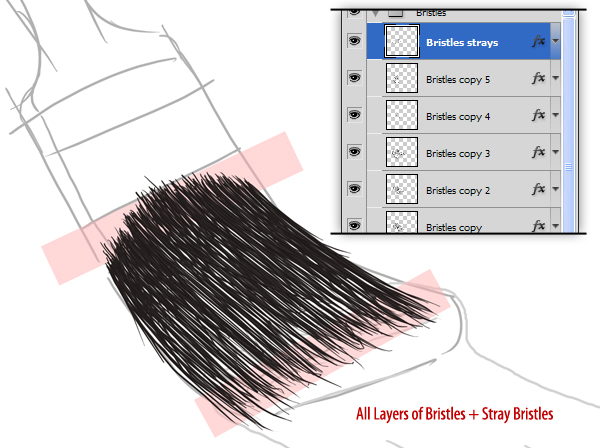
Continue drawing bristles on the remaining four layers, adding some variation and stray bristles as you go. Feel free to add more layers as you see necessary.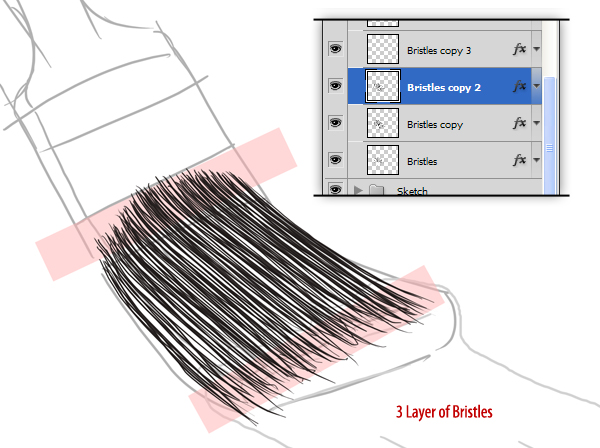
Step 6
When you’re done, you’ll notice there are still several gaps in the brush. To fix this, create a new layer called “Black out” below the “Bristles” group and paint in a dark gray color (#1B1919) to fill all gaps.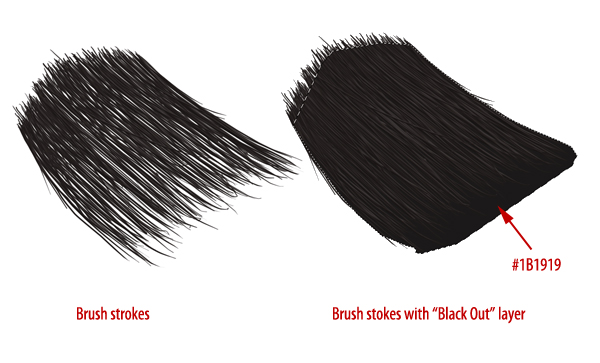
Step 7
Next, we want to add some paint to the bristles. Before we add the obvious paint to the tip of the brush, we want to make it appear that bristles have ‘absorbed’ some of the paint. To do this, create a New Layer called “Inside Paint” below the “Bristles” group. Next, use the Brush Tool to add a blob of color as shown.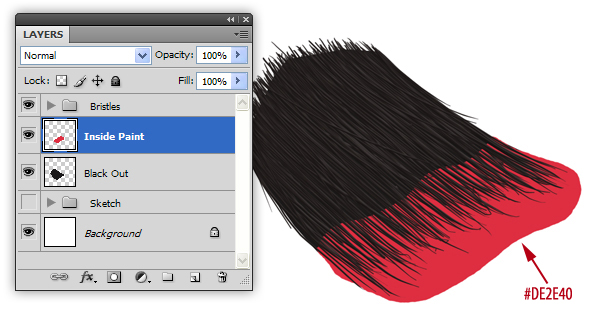
Step 8
To create the effect that the bristles have ‘taken’ the paint, use the Smudge Tool, set to 100%, to push the paint on to random bristles.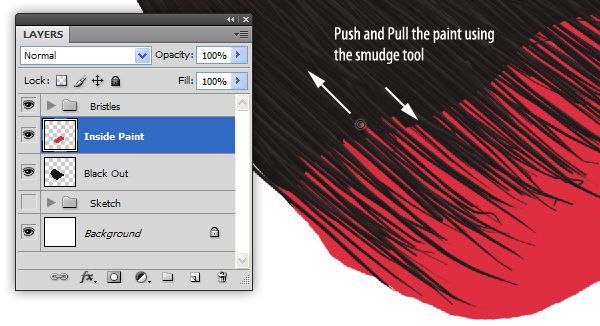
Step 9
Now, we can add the paint on top of the bristles. Create a New Group called “Outside Paint” above the “Bristles” group and use the brush tool to add another blob of the same color to the tip of the brush. Use the same technique with the Smudge Tool to push the color on to random bristles.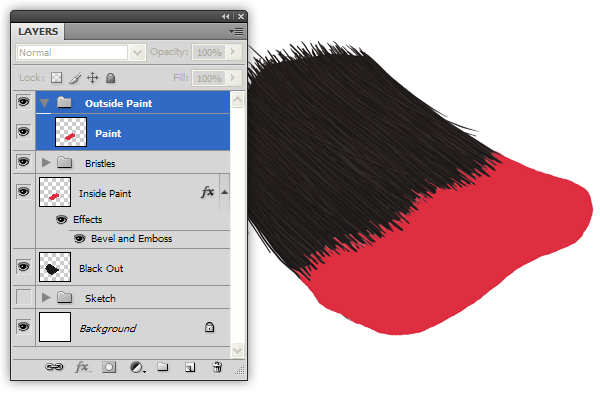
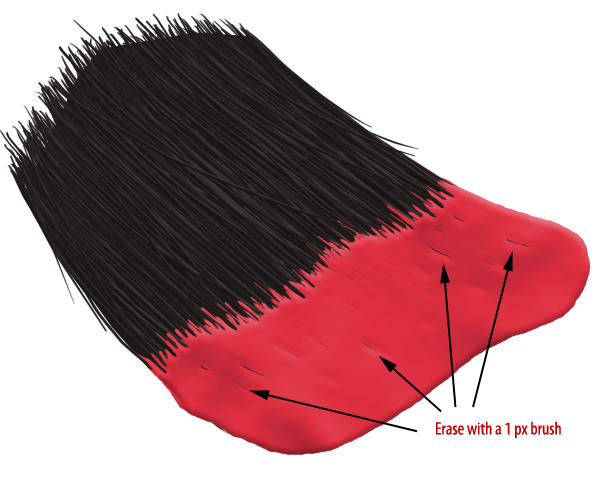
Step 10
To give the paint some variation, add the following Layer Styles. As an optional step, you can use the Eraser Tool (E) set to 1 px to erase lines from the paint. This will give the illusion that some bristles are showing through the paint.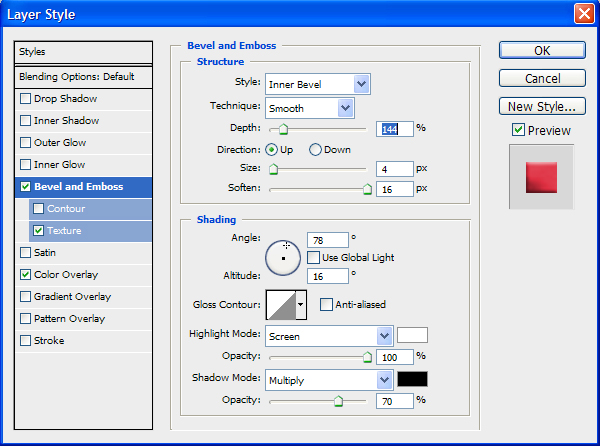
Step 11
Next, we want to merge the layer effects to that layer. To do this, Right + Click on the “Paint” layer and choose “Create Layers” (this will convert the layer styles in to their own layers). Now, just select all the new “Paint” layers and merge (Command/Ctrl + E).
Step 12
Use the Dodge and Burn Tools to add some more variation to the paint. Make sure to dodge and burn in the direction of the bristles.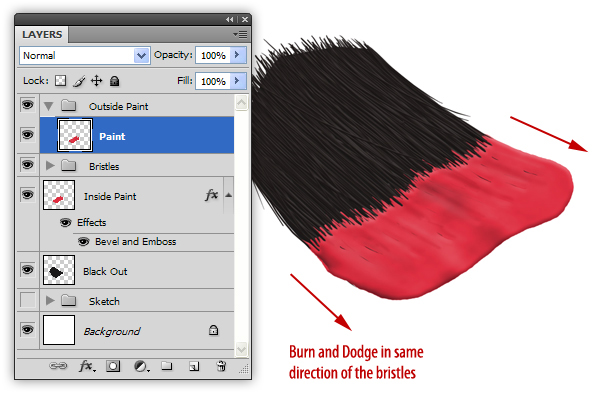
Step 13
Next we are going to add the streak of paint. Create a New Layer called “Streak.” Use the Brush Tool to add a streak of paint using the same color of paint that is on the bristles.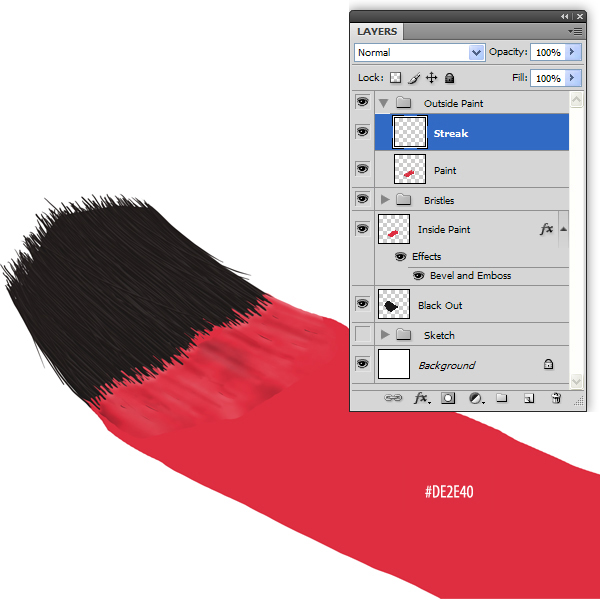
Step 14
Use the Dodge and Burn Tools to add some subtle variation to the streak. When you’re done, merge this layer with the “Paint” layer. Rename the layer to “Paint.”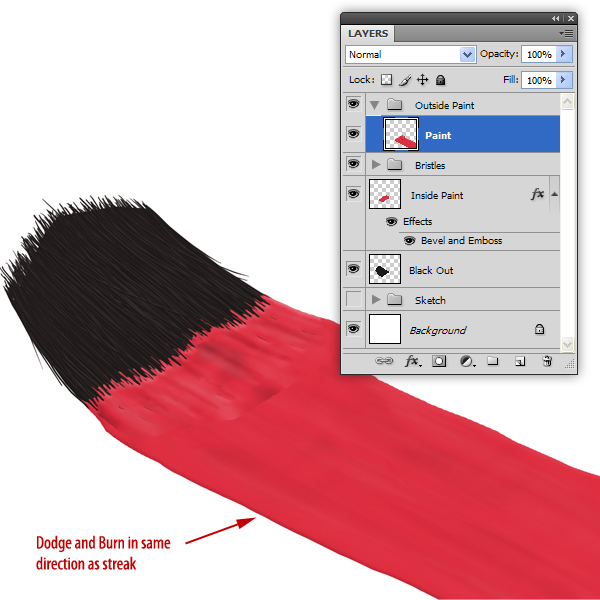
Step 15
Now, we are going to give the paint that wet look. To start, create a New Layer called “Highlights 1″ and make this a clipping layer (use Alt + Click on the Layers Panel).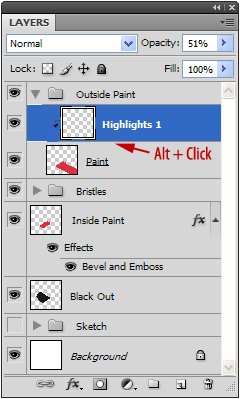
Step 16
Now, draw in some white highlights as shown. Set this layer’s opacity to 11%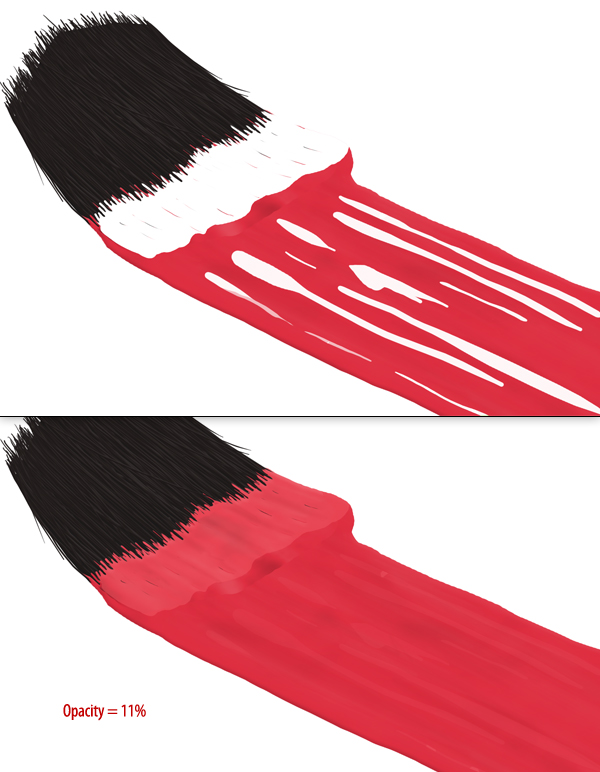
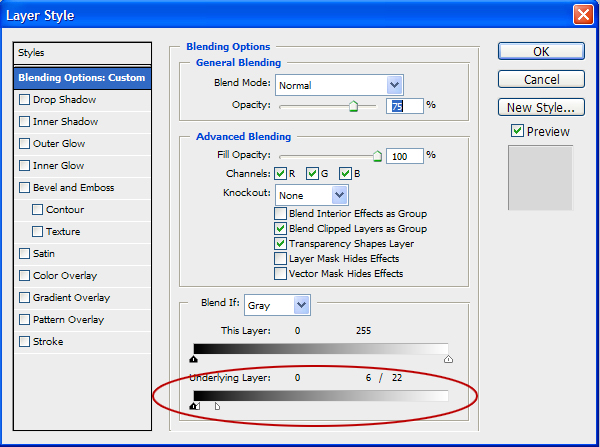
Step 17
Open the layer’s Layer Styles and adjust the “Blend If: Underlying Layer” sliders as shown.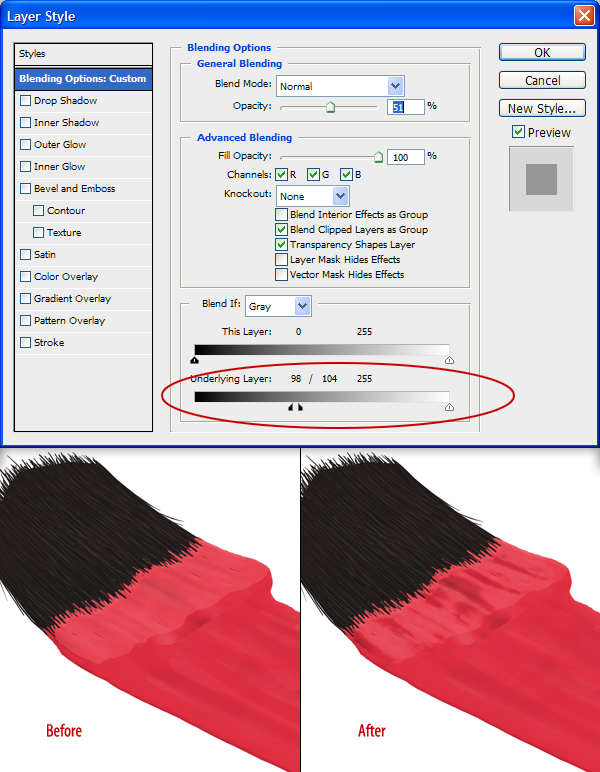
Step 18
Next, we are going to do the same with a darker color. Create a new clipping layer called “Lowlights” and use a darker red to paint in some lowlights.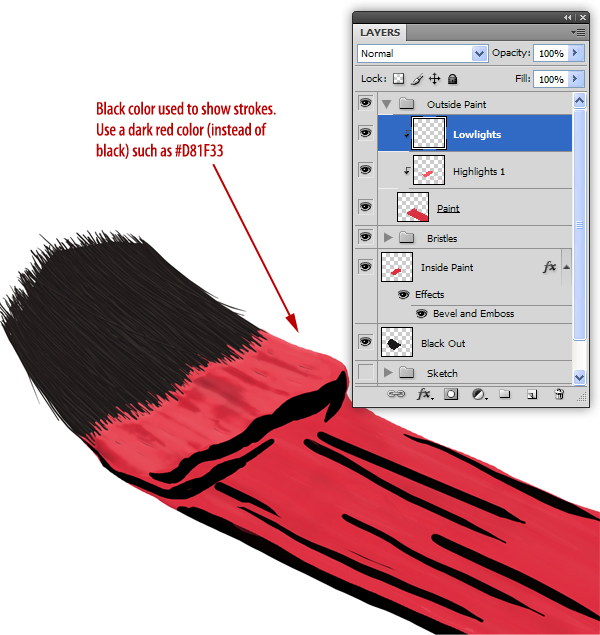
Step 19
Set the “Lowlights” layer’s opacity to 72% and open the Layer Styles to adjust the Blend If sliders as shown.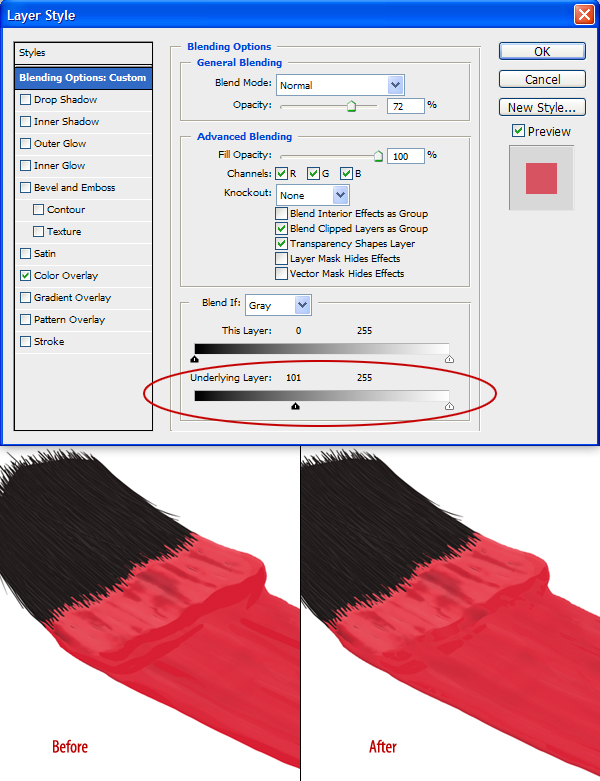
Step 20
We can keep using this technique of adding highlights and adjusting its Blend If sliders to complete the ‘wet’ look of paint (I used this technique to add 3 more highlights).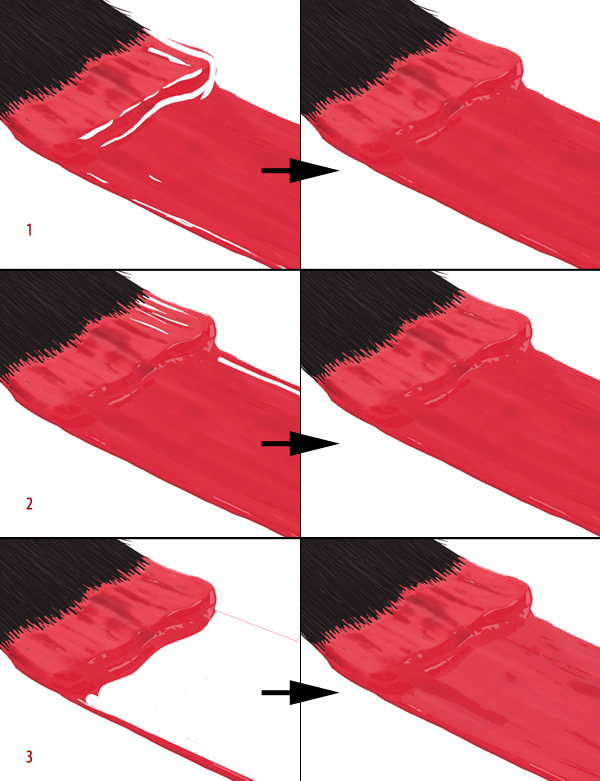
Step 21
Now that the bristles and paint are done, we can create the rest of the brush. Hide all layers associated with the paint and bristles. Next, create a New Group called “Handle”. Inside that group, create 2 new groups called “Metal” and “Grip”.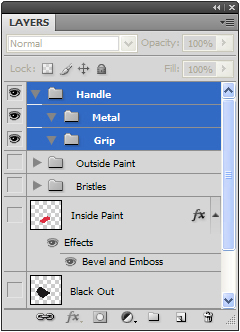
Step 22
In the “Metal” group, create a New Layer called “Metal Band.” Using the sketch as a guide, create the shape of the metal band that holds the bristles in place. I found it easier to create the brush’s handle upright. It may help to go back to the sketch and create a copy to rotate it so that the brush is standing up.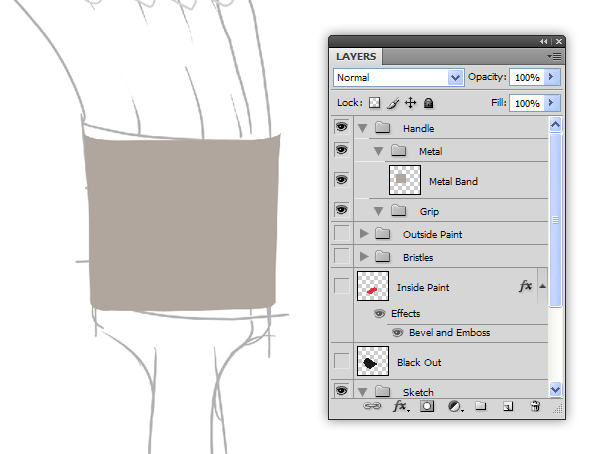
Step 23
Create a New Layer called “Bevels” and draw in some bevels. You can use the Pen Tool if you wish, but I just used the Brush Tool.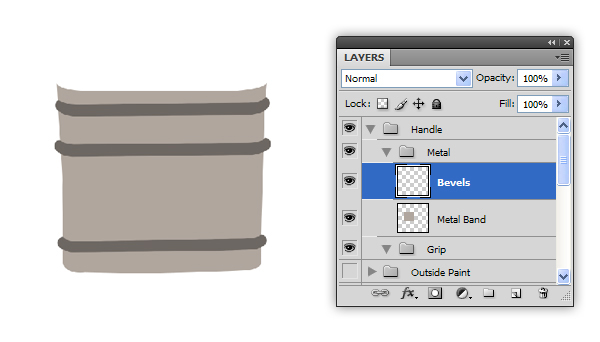
Step 24
Use the “Bevels” layer to make a selection (Command/Ctrl + Click the thumbnail). Use this selection to Cut (Command/Ctrl + X) the “Metal Band” layer. Also cut out some holes for rivets. All of these cuts will give us more edges for the Bevel and Emboss effect in the next step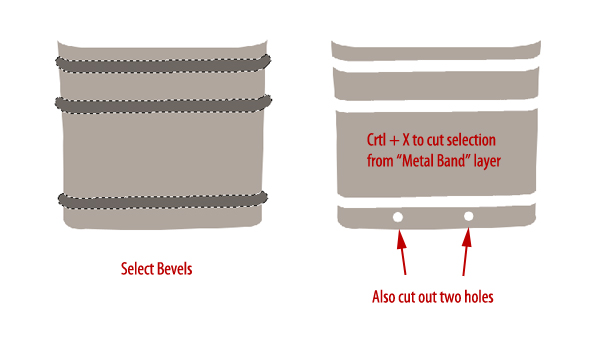
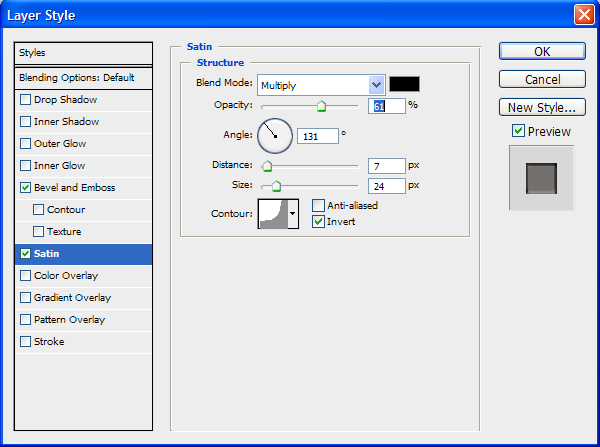
Step 25
Add the following Layer Styles to the “Metal Band” layer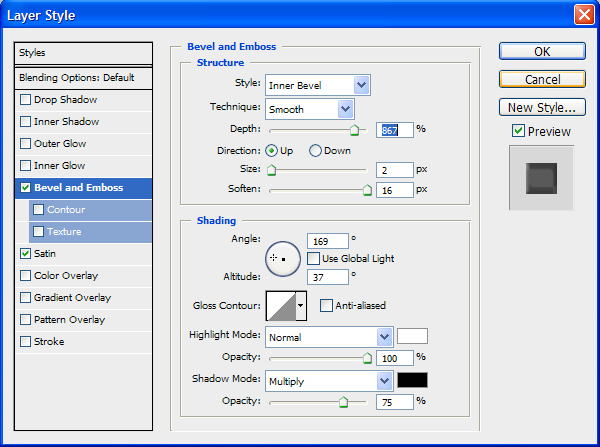


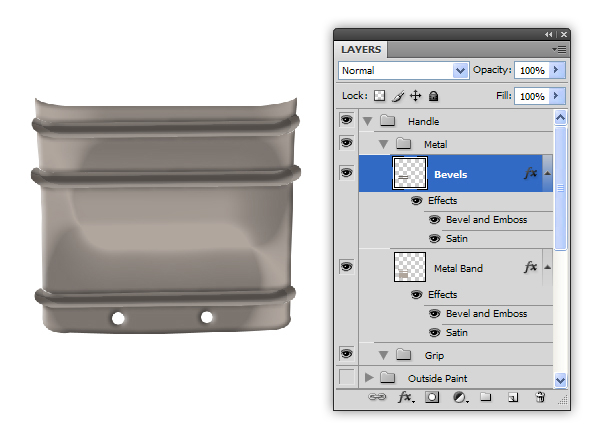
Step 26
Next, create a New Layer called “Rivets.” Add a small circle at each opening on the metal band and add the following layer styles.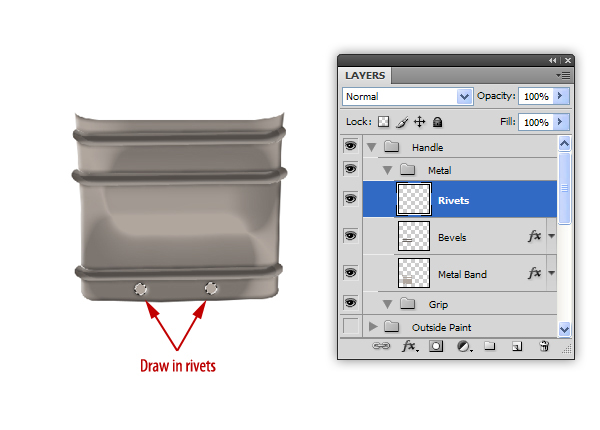

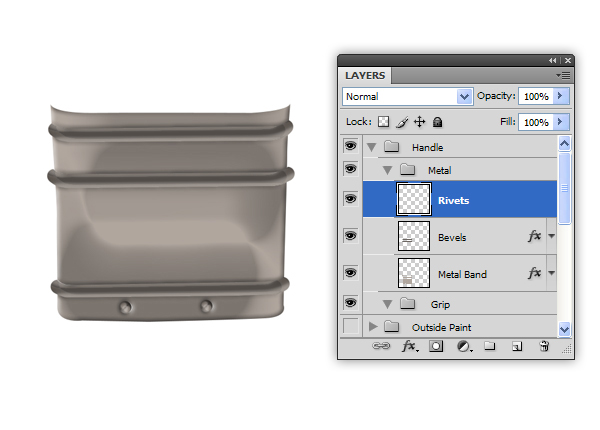
Step 27
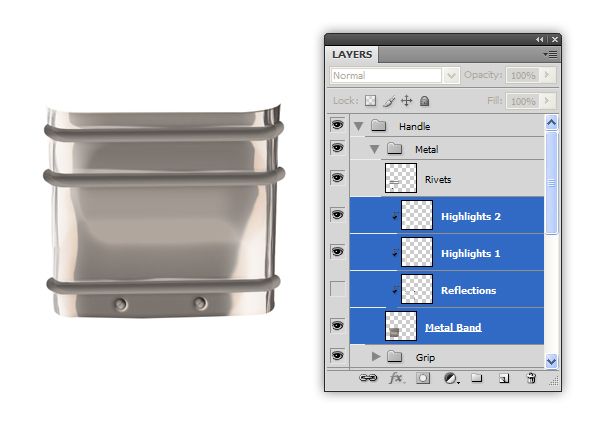
Now, to make the next few steps easier, merge the “Rivets” and “Bevel” layers together. Next, merge the layer styles to the “Metal Band” layer.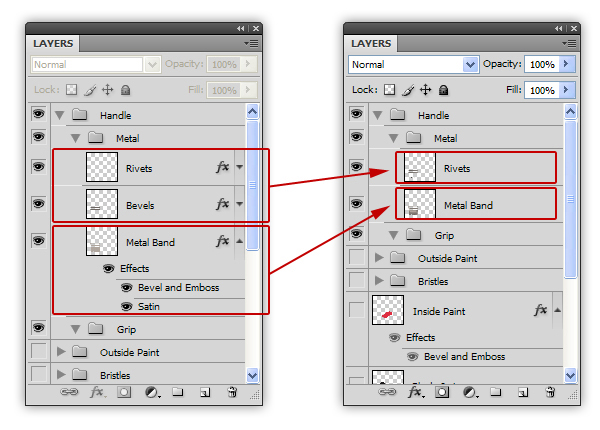
Step 28
Create a New Layer called “Reflections” and make this a clipping layer to the “Metal Band” layer. Use a dark color to draw in several lines to create the illusion of a reflection.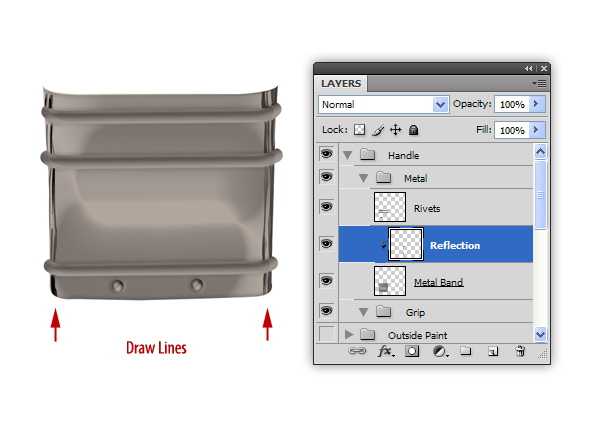
Step 29
Create another clipping layer called “Highlights 1.” Using a lighter color, draw in some highlights as shown. Use the Burn Tool to give the color some variation and the Blur Tool to soften some of the highlights.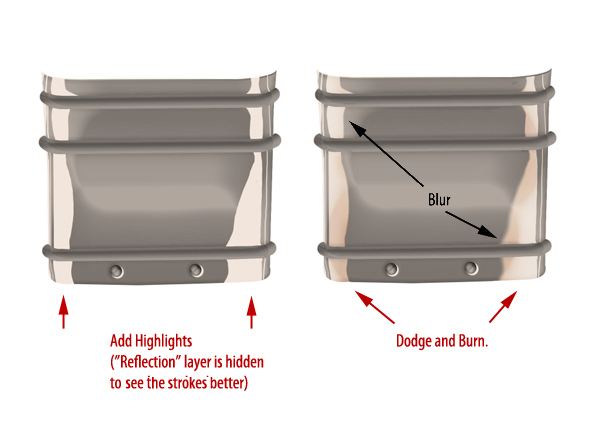
Step 30
Create another clipping layer called “Highlights 2″ and using the same techniques from the previous step, add some additional highlights.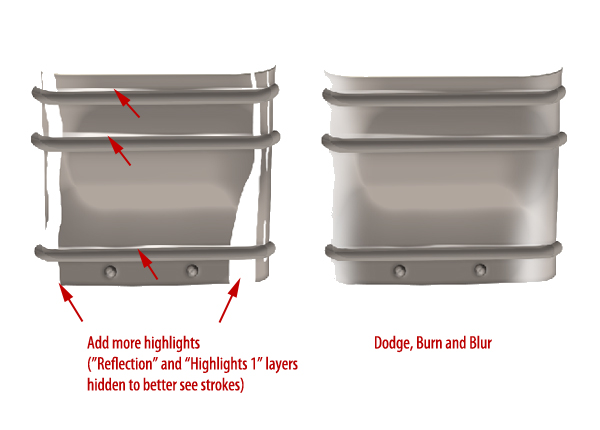
Step 31
Now that we’ve added reflections and highlights as clipping layers to the “Metal Band” layer, we will use the same techniques to add reflections and highlights to the bevels. After this is done, add any additional details as you see fit.
Step 32
Create a New Layer called “Grip” inside the previously created “Grip” group. Draw the shape of a brush handle and fill with black. Give this some noise (Filter > Noise > Add Noise) with a setting of 10%.
Step 33
Before we finish the grip, rotate and skew the “Handle” group in to position in our scene. Unhide the “Sketch” and “Bristles” group to help with the positioning.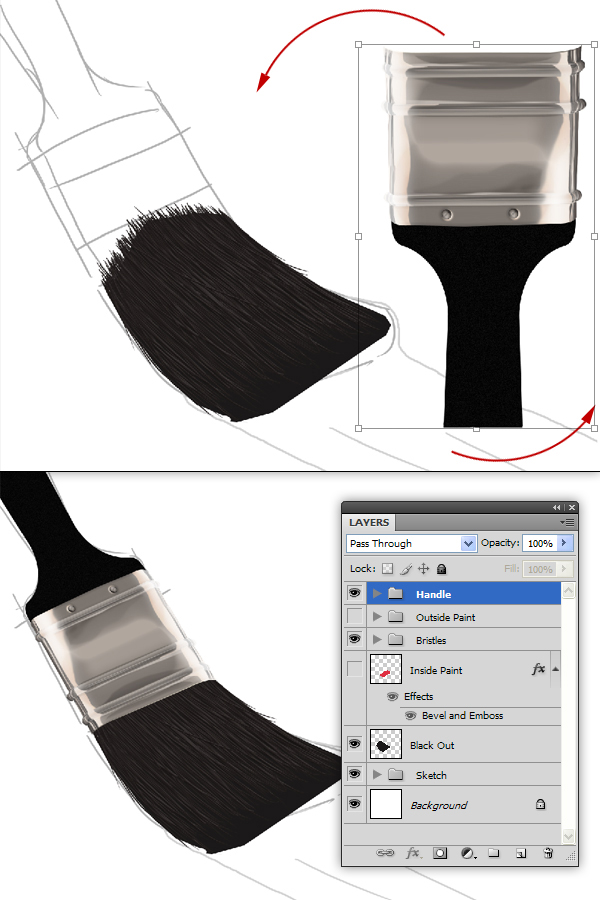
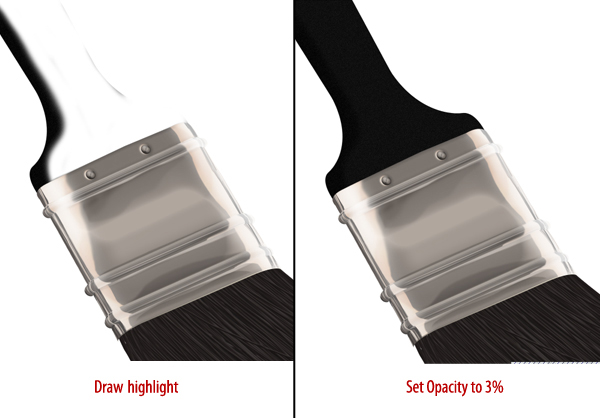
Step 34
Now, we are going to start texturing the grip. We will do this with a series of clipping layers. Create a new clipping layer to the “Grip” layer and, using a soft brush, paint a portion of it white (see image below). Set this layer’s opacity to 3%.
Step 35
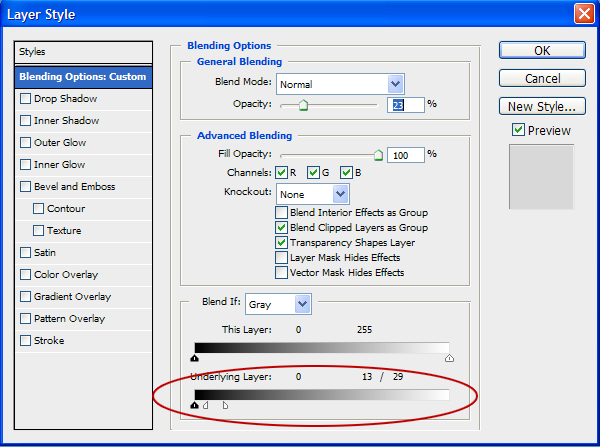
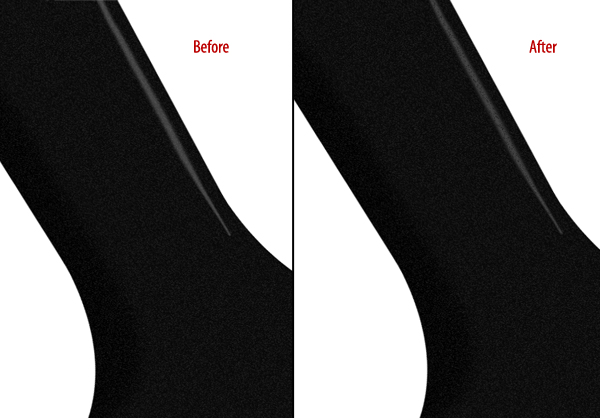
On a new clipping layer, draw a thinner highlight on the grip. Change the opacity to 23%. Open the Layer Styles and adjust the layer’s Blend If sliders as shown (this will break up the highlight so it doesn’t appear unnaturally smooth).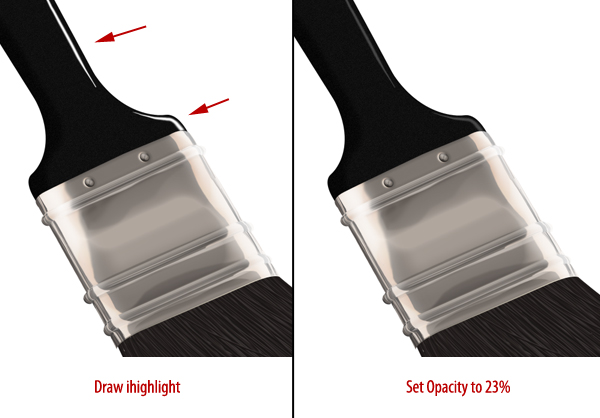
Step 36
I want to add some scratches to the bush’s handle for some added realism. To do this, open a new document and make a thin brush stoke. Select the stroke and go to Edit > Define Brush Preset to make it into a brush.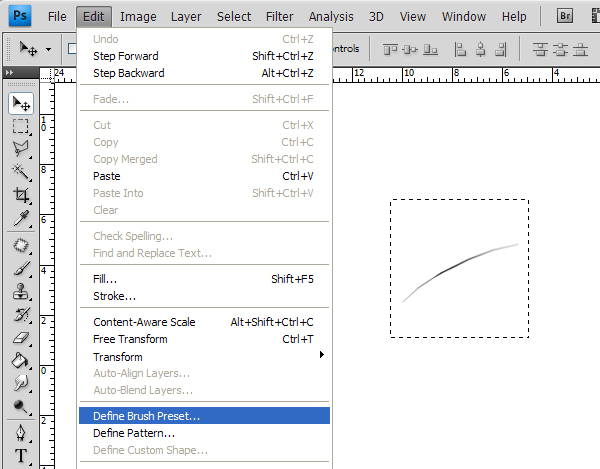
Step 37
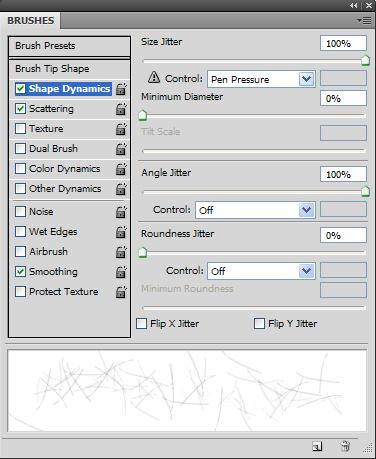
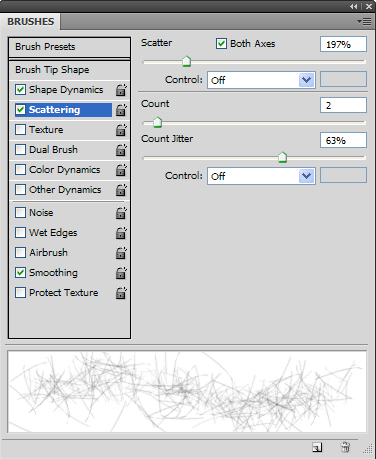
Open your Brush Panel and adjust the settings to give the new brush variable size and scatter.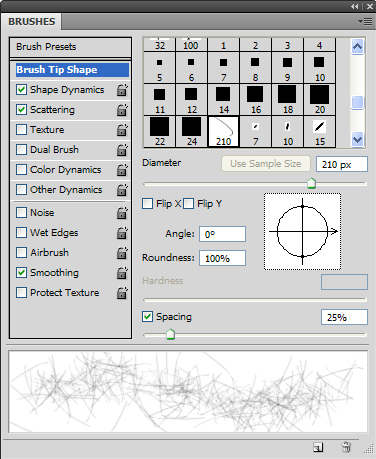
Step 38
Back to the main document, on an new clipping layer, use the scratches brush we just created to draw black scratches on the grip.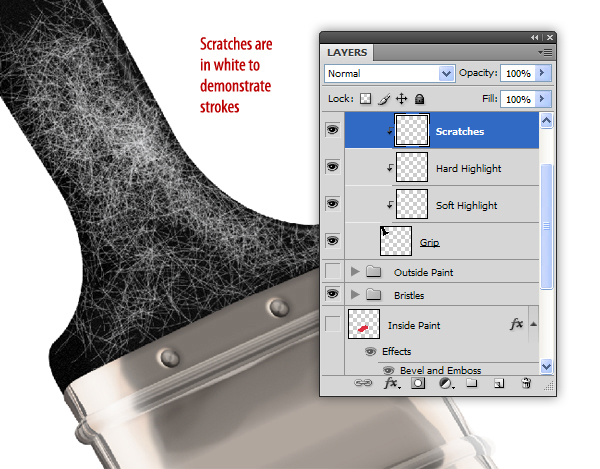
Step 39
Create another clipping layer and add a few more scratches, this time in white. Adjust the opacity of both layers so the scratches are barely visible (darker monitors might have trouble picking this up). Your image should resemble the following: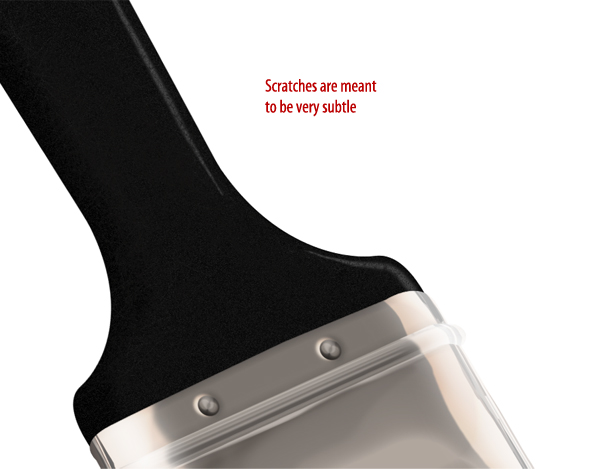
Step 40
As an optional step, you can go in to the “Metal Band” layer and use the same scratches brush to add scratches to the metal.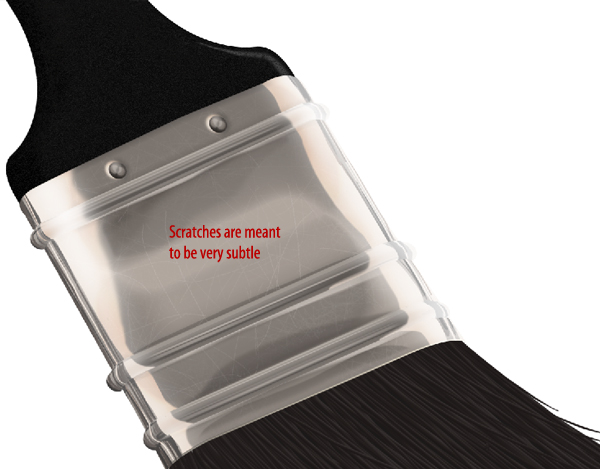
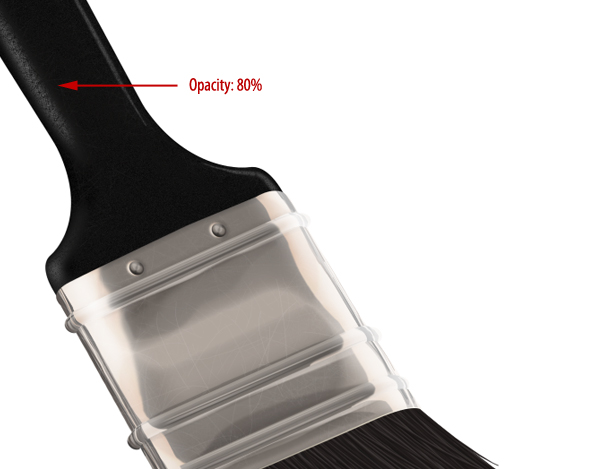
Step 41
Back in the “Handle” group, on a new clipping layer, use the Brush Tool to paint a soft highlight as shown (make sure you are not using the Scratches brush). Change the Blend If settings as shown and change its opacity to 80%.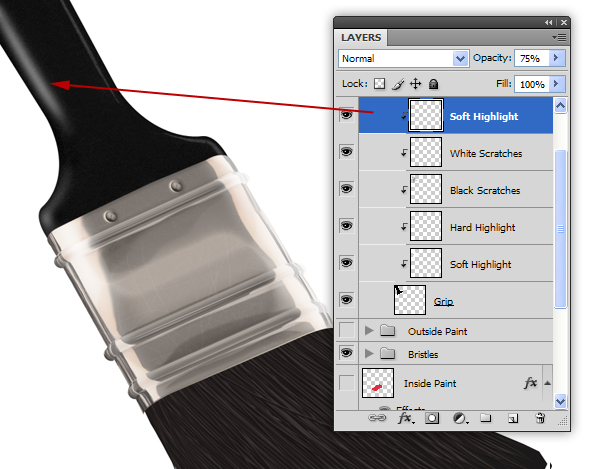
Step 42
On an new clipping layer, create another, thinner highlight on top of the last one. Adjust the Blend If settings similar to the last layer we did and change the Opacity to 12%.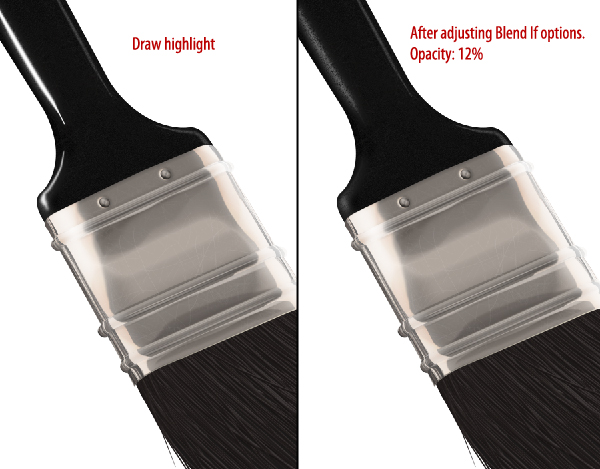
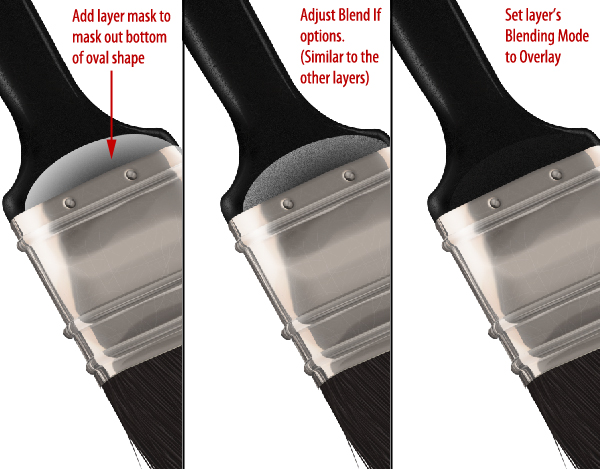
Step 43
On a new clipping layer, create an oval and fill it with white. Rotate it in to perspective and add a layer mask to erase part of the bottom of the oval. Adjust the Blend If slider and set its Blending Mode to Overlay.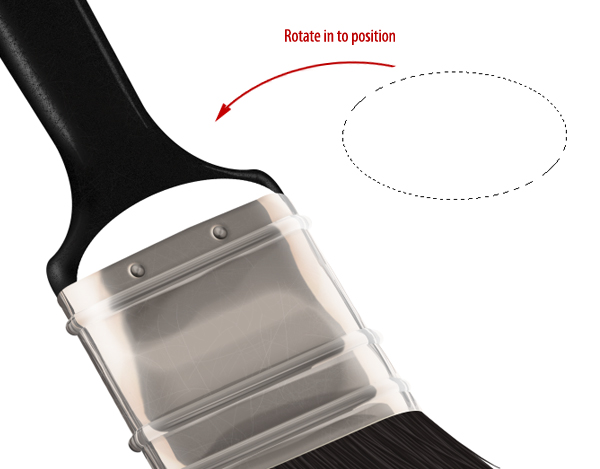
Step 44
Use a Brush Tool to add a bit of a highlight on the bevel. Use the Blur Tool to soften the highlight.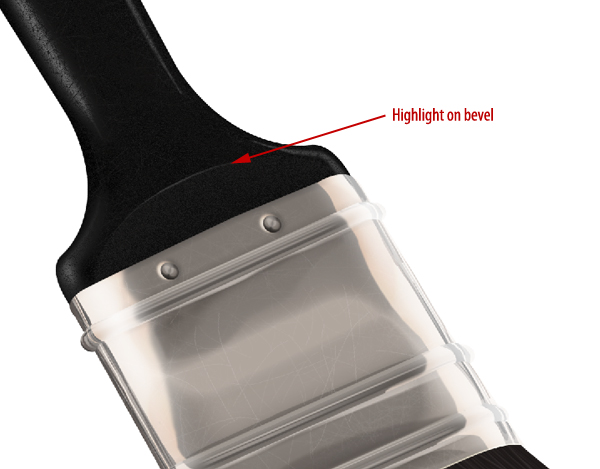
Step 45
Lastly, we can go back through the image to add some detail or make minor adjustments.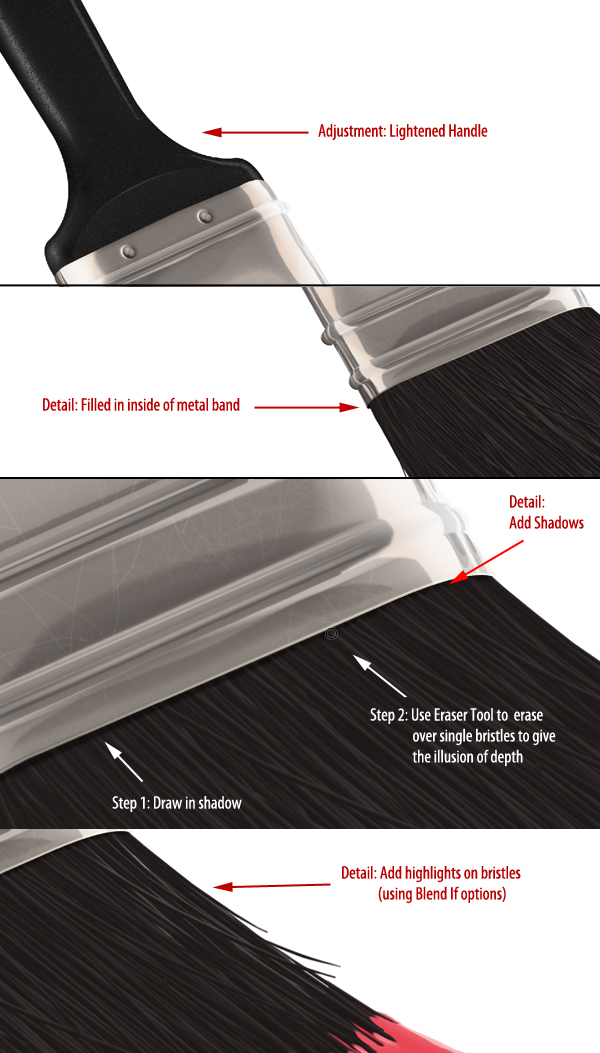
Step 46
Unhide all the working layers and you’re finished. If you want to, you can use the original “Grip” layer to add different textures. In this case, I’ve added a faux wood finish using a texture I’ve already created using Photoshop.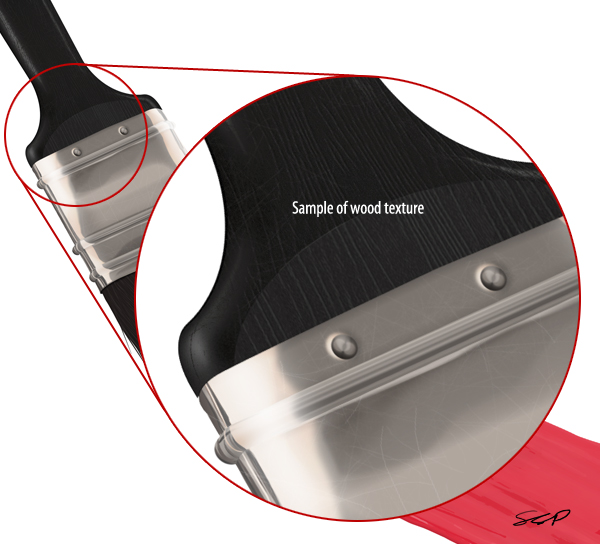
Final Image


0 comments:
Post a Comment