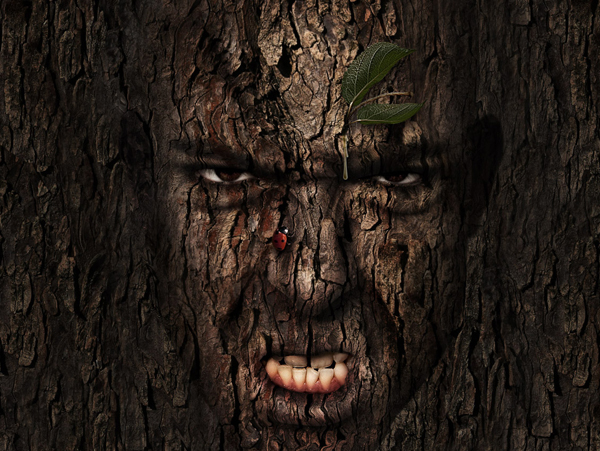
Final Product What You'll Be Creating
Video Tutorial
Our video editor Gavin Steele has created this video tutorial to compliment this text + image tutorial.Step 1
Job number one, as ever, is pooling your assets together. I got the man from iStockphoto here and the tree bark (courtesy of K. Tuck) from stock.xchng here.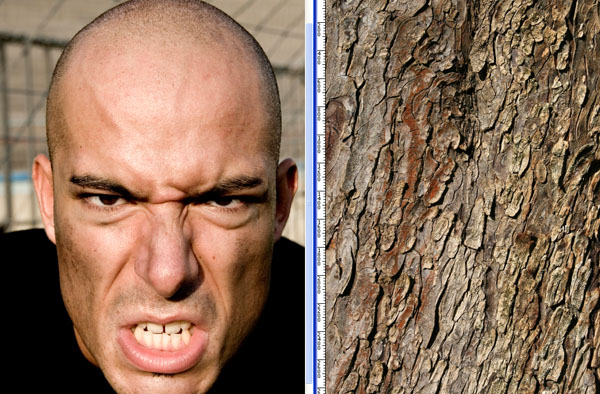
Step 2
Cut out the face using the Pen tool (set to Paths not Shape Layers). Cut and paste it into your blank canvas (1562 pixels by 1172 pixels at 300dpi). Open up the bark image, and import it into your working document. Resize and rotate the document as in the screengrab.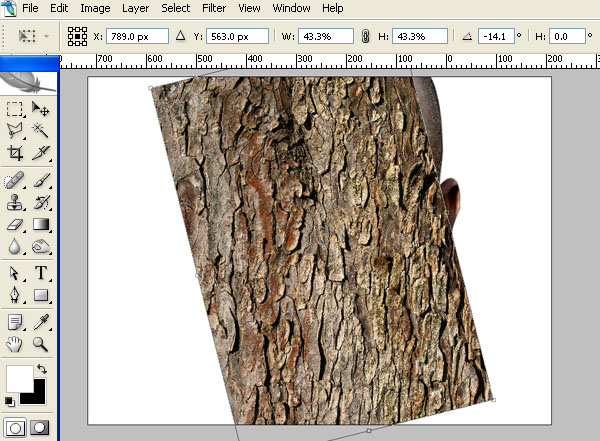
Step 3
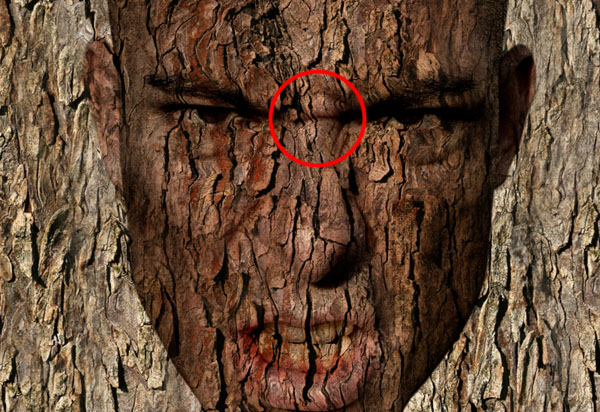
Use the Clone Stamp tool to fill in the rest of the texture. Avoid easily recognizable repetitions in the texture like the ones circled. Clone them out. I used a 200 pixel, soft-edged brush to do this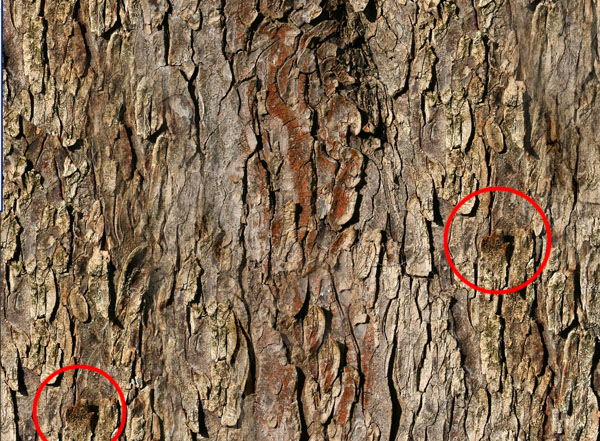
Step 4
Turn the visibility of the “Bark” layer off (clicking the eye icon next to the layer thumbnail will do this). Go to the Channels palette, select the channel with the best contrast, and duplicate this channel into a new document.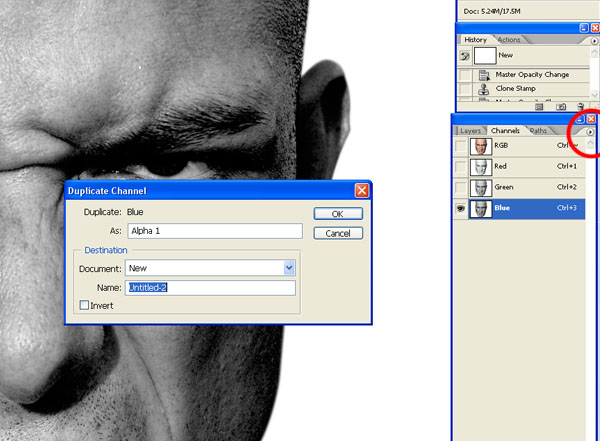
Step 5
Apply a 2 pixel Gaussian Blur to your new document and then adjust the Levels as in the screengrab below. Save as “Displace.psd.”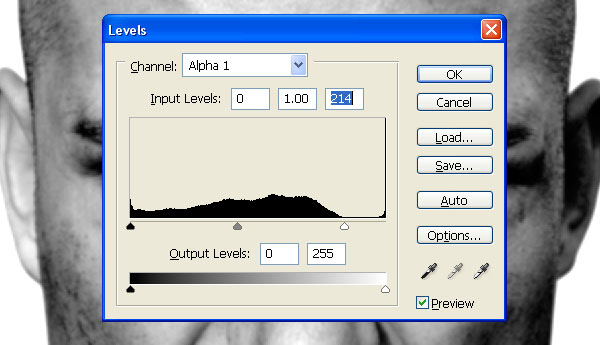
Step 6
Reselect the “RGB” channel (so all channels are selected and the image is now back in color) and return to the Layers palette. Make the “Bark” layer visible and select it. Go to Filter > Distort > Displace. Set the Horizontal and Vertical scale to 1 (or try other values), select Stretch To Fit and Repeat Edge Pixels. Set the Layer Blending Mode to Multiply. You can see how it’s distorted over parts of the face.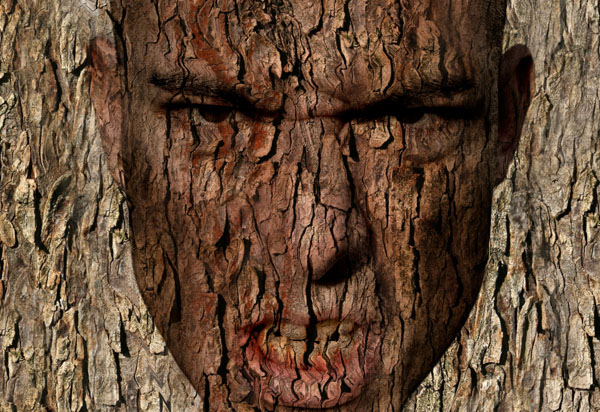
Step 7
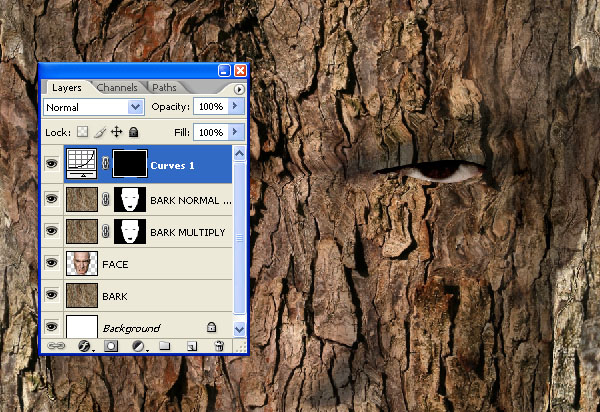
Duplicate the “Bark” layer twice. Set one to Multiply with an Opacity of 100%. Set the other to Normal at 40% Opacity. Position in the Layer hierarchy as in the image below.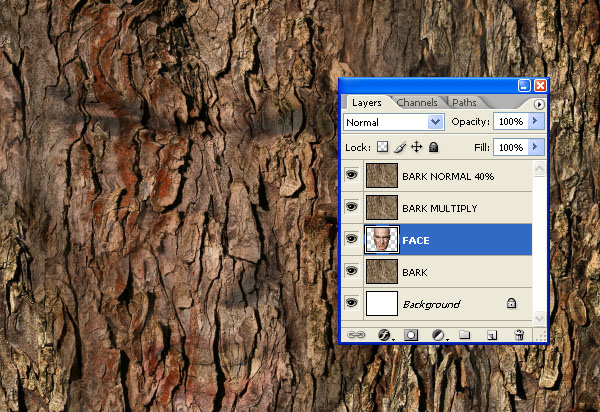
Step 8
Command-click on the “Face” Layer to create a selection. Select the “Bark Normal 40% Layer” and go to Layer > Layer Mask > Reveal selection. Repeat this for the “Bark Multiply” Layer. Zoom into 300% and use the Pen tool to draw around the eyes and the mouth. Add a rough edge to the top of the mouth. Press Commmand-click on the Path thumbnail to create a selection.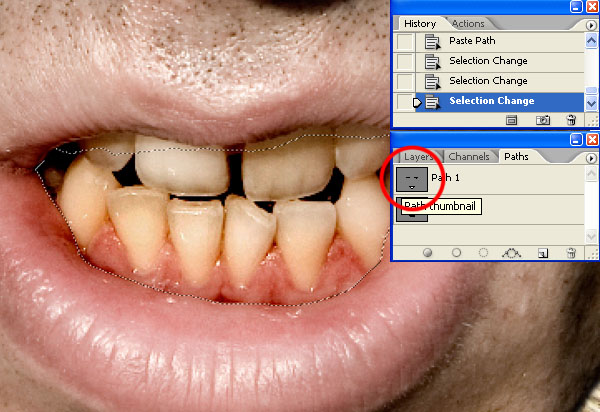
Step 9
Select the “Bark Normal 40%” Layer Mask thumbnail to work directly on the Mask. Select black as the background color and then delete the selection from the Layer Mask. Repeat this process for the “Bark Multiply” Layer.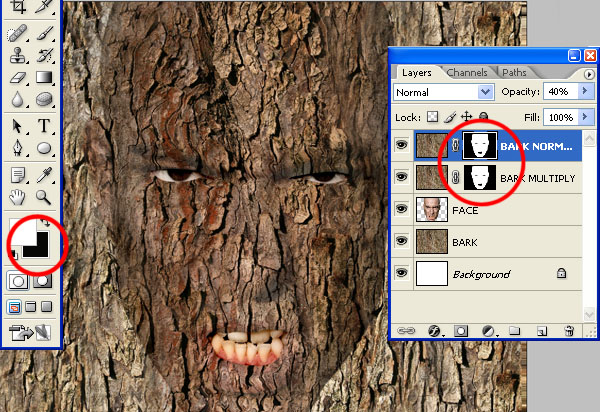
Step 10
Go to Layer > New Adjustment Layer > Curves and set up as shown below. Then fill the Adjustment Layer Mask with black so the effects aren’t visible.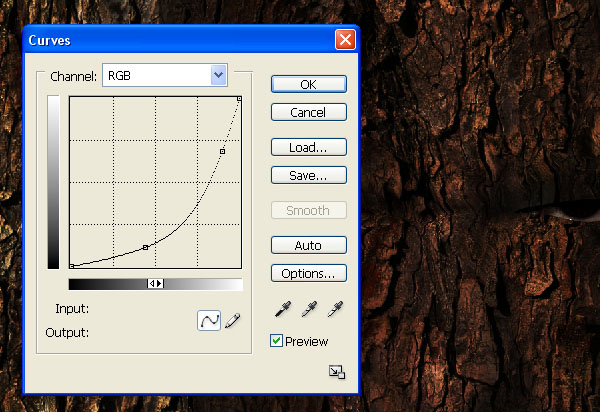
Step 11
Turn off the visibility of the “Bark” Layers and use the Pen tool to draw a paths around the hard edges we need to mask. The bottom of the nose and cheek lines are good examples. Command-click on the Path thumbnail to create a selection from it.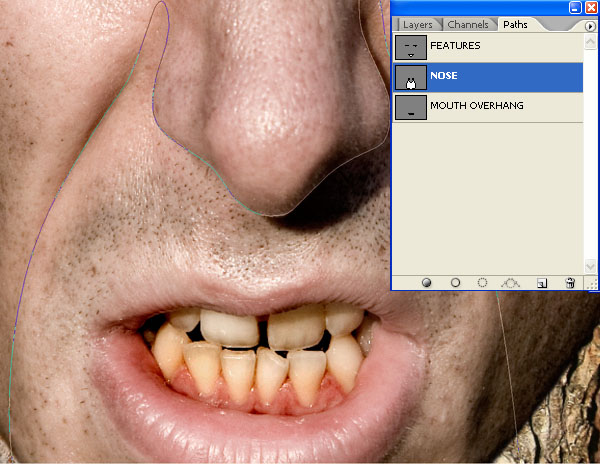
Step 12
Select a soft-edged (0% Hardness) brush, loaded with white (as the foreground color) and set to 16% Opacity. Paint directly on the Layer Mask. Press Command + H to hide selection the, if it helps. Draw over several times, applying more at the shadow source and less as you get further from the harsher shadows.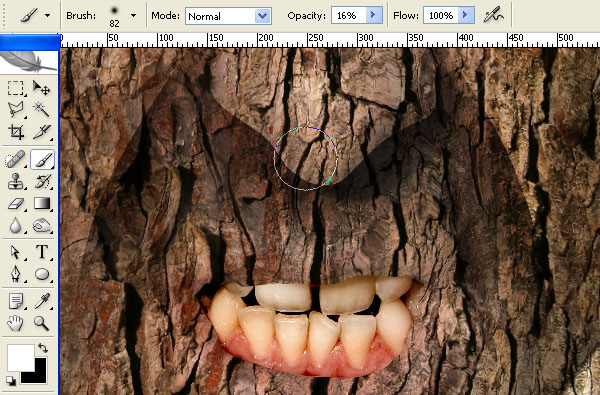
Step 13
Draw around other features which produce hard lines such as the bottom lip. Draw the Shadows in the same manner.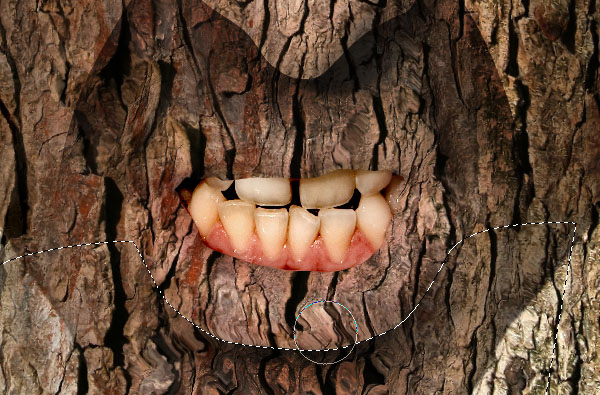
Step 14
Create a selection from the “Face” layer by Command-clicking the layer thumbnail. Draw all the shadows in…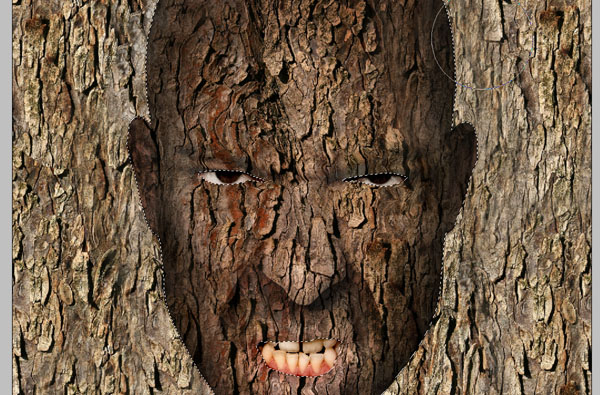
Step 15
…Changing the Brush size to suit size of the area you’re treating. Around the lip for example, use a small brush.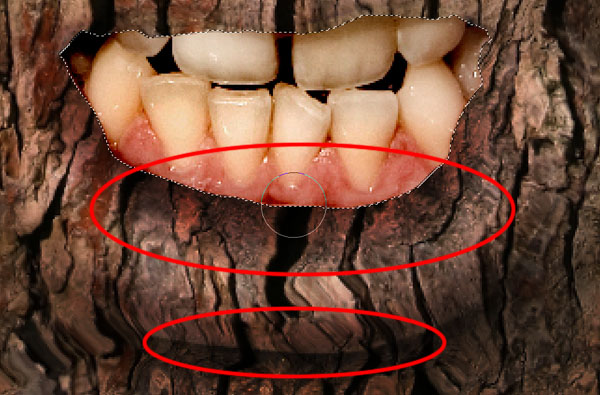
Step 16
Turn the “Bark” layers off to see the key areas of shadow. You can still work on the Mask with the face showing. I flick between working with the “Bark” visible and invisible.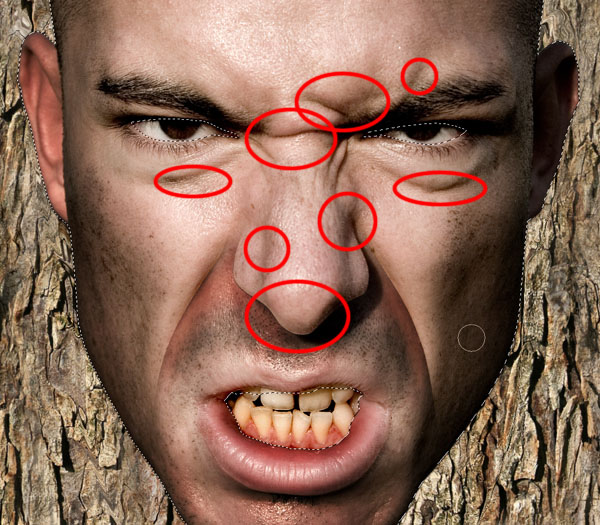
Step 17
In order to soften or erase any shadows that you’re not happy with, change the brush color to black and draw on the mask in the same way as before. Keep working on the Mask until you get it right.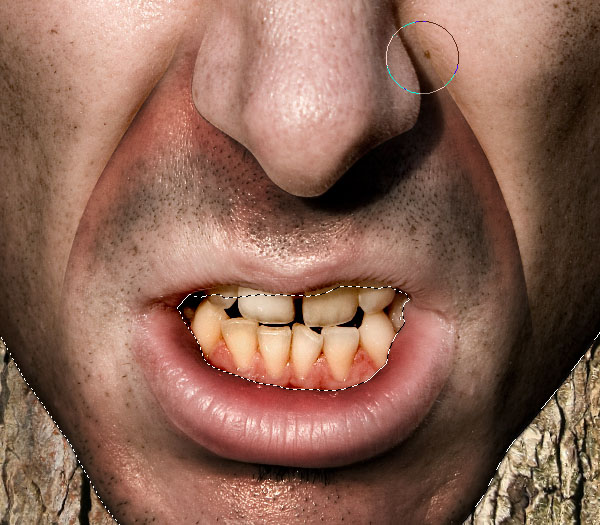
Step 18
Whilst drawing on the Mask, you should be changing your brush size and the opacity to suit the shadow. For a big gradual shadow you’ll want around a 300 pixel brush set to 16% Opacity, all the way down to 18 pixels and increasing the opacity to suit. Finally, apply a 0.6 pixel Gaussian Blur to the Adjustment Curve Layer Mask to soften the hard edges.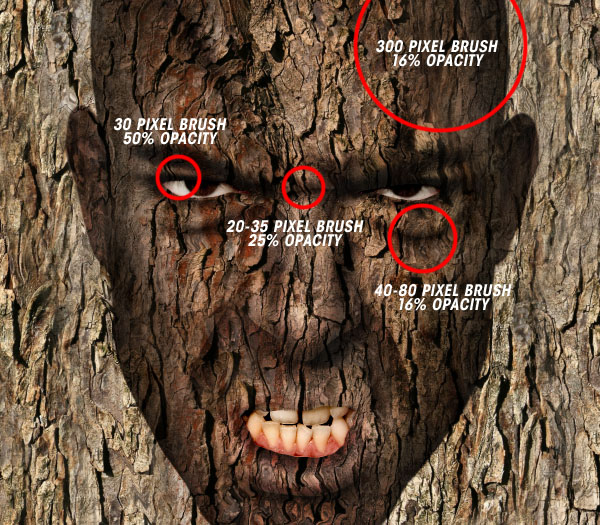
Step 19
Duplicate the “Bark” Layer that sits beneath the “Face” Layer. Set them up so they are the same as the top Bark layers, one Normal at 40% opacity, one Multiply at 100%. Then under those two layers create a new layer and fill it with C=61%, M=66%, Y=66%, and K=62%.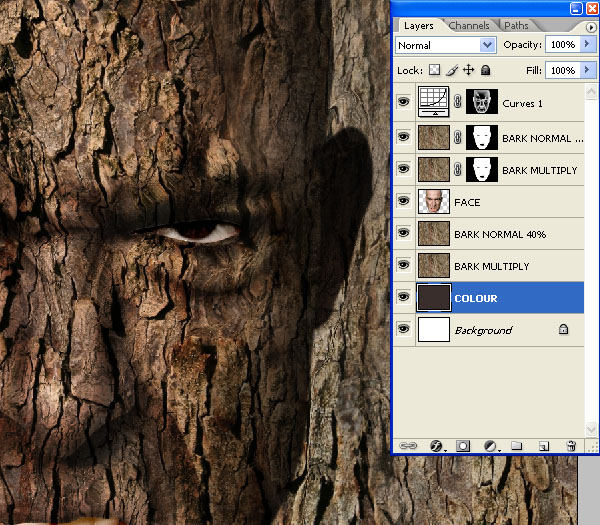
Step 20
Create a selection from the “Face” Layer (Command-click the Layer thumbnail) and go to Select > Inverse. Then go to Select > Modify > Expand. Give it a 1 pixel expansion. Select the Curves Adjustment Layer Mask and Fill the selection with 20% black.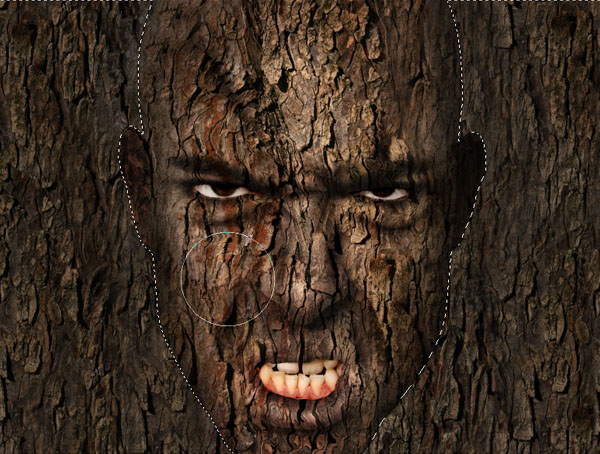
Step 21
Create a selection from the Eyes/Mouth Path you made earlier. Add some shadows by drawing on the Curves Adjustment Layer Mask.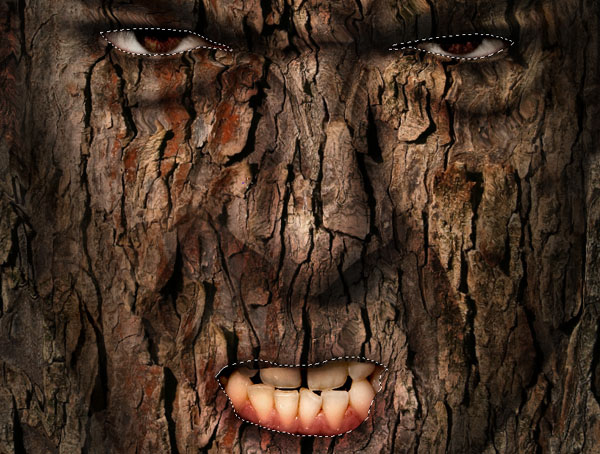
Step 22
To further fuse the elements together, and to grade the image, add a Curves and a Hue/Saturation Adjustment Layer to the top of the Layers hierarchy.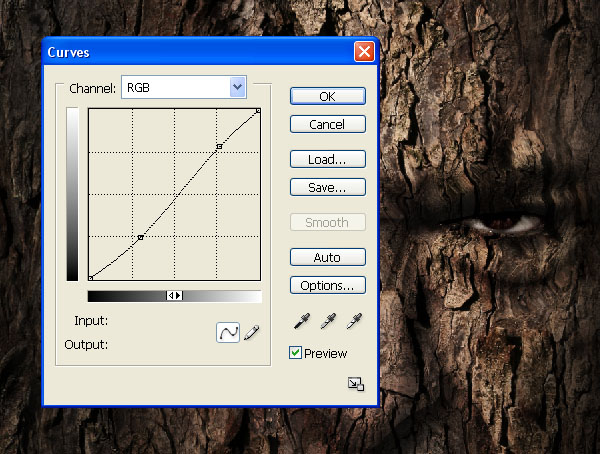
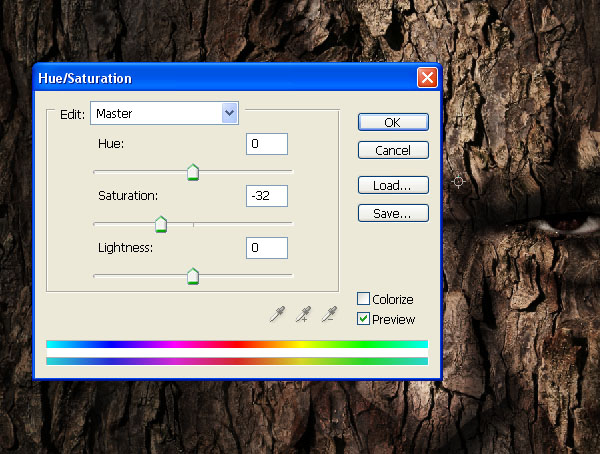
Step 23
Flatten the image and go to Filter > Liquify. Select the Bloat tool and set up roughly how it is in the image below. We want to add a 3D quality to the areas such as cheeks, nose, and forehead. Select an appropriate Brush size for each of these areas and click on each a few times rather than dragging the brush around.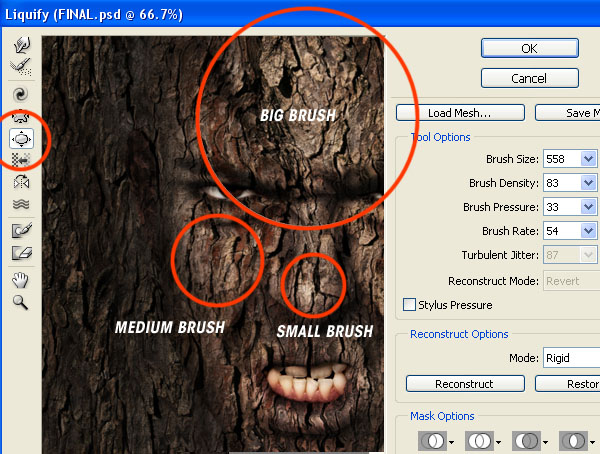
Conclusion
You can always add some real world effects such as leaves and bugs to the final image – go nuts. This technique works for applying any texture to any surface, for example you could make a brand new Mercedes SLK rusty and riveted, or make a house out of skin. Go have fun whilst you perfect your craft. You can view the final image below or view a larger version here.
0 comments:
Post a Comment