Actions are very popular. They’re easy to use and can save you a lot of time, but at the end of the day, they aren’t very powerful and offer very low versatility. That’s where Photoshop’s scripting features go into action. We’re going to show you the almost endless possibilities that Photoshop scripting offers.
Actions vs Scripts
Basics of Photoshop Scripting
What Happens in the App, Stays in the App
Guiding Your Work
Modify All of Your Text at the Same Time
Let There be Squares
Conclusion
Actions vs Scripts
An action is simply a way of recording a series of steps so we can play them back again and again. If you want to be able to quickly draw a 50x50px red square by pressing a button, just record yourself doi
ng it once, and then play the action whenever you need it. You’re done. But, what if sometimes you need a 50px red square and other times you need a 100px blue one? Well, you’d have to record another action for the second figure. Actions offer very low versatility, because the recorded steps are static – their behavior doesn’t change depending on external variables.
ng it once, and then play the action whenever you need it. You’re done. But, what if sometimes you need a 50px red square and other times you need a 100px blue one? Well, you’d have to record another action for the second figure. Actions offer very low versatility, because the recorded steps are static – their behavior doesn’t change depending on external variables.
Photoshop scripting lets you add conditional logic, so that the script automatically makes decisions based on the current situation or the user input. For instance, in the previous example, a Photoshop script could ask the user for the square’s width and color,
and then render it properly. Furthermore, scripts offer many more advantages over actions, such as advanced file handling, multiple application support, etc.
and then render it properly. Furthermore, scripts offer many more advantages over actions, such as advanced file handling, multiple application support, etc.
Basics of Photoshop Scripting
A Photoshop script is a text file with code that tells the program to do certain tasks. These scripts can be written in three different scripting languages. If you’re running Mac OS, you can use AppleScript and JavaScript. On Windows, you can use VBScript and JavaScript as well. Given JavaScript is fully supported on both platforms, it’s the best choice to ensure our script reaches the widest audience, so we’re going to focus on it throughout this article. Also, JavaScript is the most popular client-side scripting language, so chances are you’ve heard of it previously.
Photoshop’s scripting engine provides us with ways of manipulating the different elements of the application, such as layers, guides, channels, documents, etc. Almost every single element within Photoshop can be examined and modified from a script. These are reflected in the Photoshop Document Object Model. In this article we’re going to work with some basic elements, but there are a lot, you can see them all in the Official Photoshop Scripting documentation.
Bundled with Photoshop there’s a program called Adobe ExtendScript Toolkit CS5. It’s an integrated development environment for scripting, not only for Photoshop, but for any of the Creative Suite member. To keep things simple, we’re going to be using a plain text editor like Notepad, but for big scripts Adobe ExtendScript Toolkit offers a lot of tools, like code auto-completion, integrated help and a debugger.
So without further ado, let’s go to your Presets/Scripts folder in your Photoshop directory, create an empty text file called firstScript.jsx and open it with your favorite text editor.
What Happens in the App, Stays in the App
When we’re dealing with Photoshop scripts, everything starts with the “app” object. It represents the application, and it contains all the other objects in a hierarchical fashion. In this first step we’re going to look at some basic properties of the “app” object.
Head to the text editor and type the following in firstScript.jsx
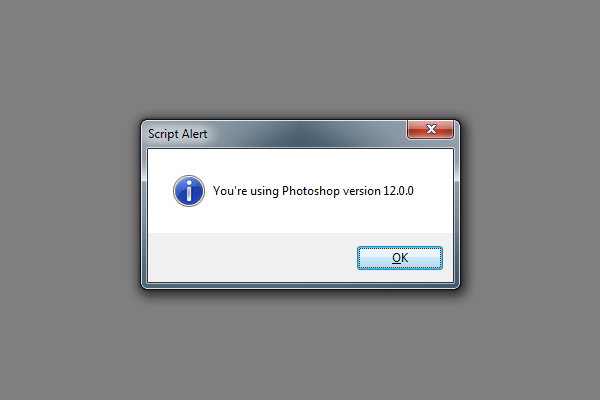
1. alert("You're using Photoshop version " + app.version);
Then fire Photoshop and go to File > Scripts > firstScript. You will see an alert box saying that “You’re using Photoshop version 12.0.0″ (or the version you’re using). The “alert” function shows a message, a string with the text and the version of the application, read from the “version” property of the “app” object. In JavaScript, you can access the properties and children of an object using the “.” operator, like in “app.version”.
In Photoshop, the basic working environment is the document. The “app” object contains a collection called “documents”, which obviously represents the set of open documents within Photoshop. Let’s go back to the editor, replace the contents of firstScript.jsx with the following:
1. if(app.documents.length > 0){
2. alert("There are " + app.documents.length + " open documents");
3. }else{
4. alert("There are no open documents");
5. }
6.
If you launch the script (File > Scripts > firstScript), the alert message will change depending on the number of currently open documents. The code is very simple, the first line checks if the number of open documents (that is, the length of the set of documents in the app) is greater than zero, showing a message with that number. Otherwise, it shows a message saying there are no open documents. Easy, isn’t it? But so far this does not look too useful.
Guiding Your Work
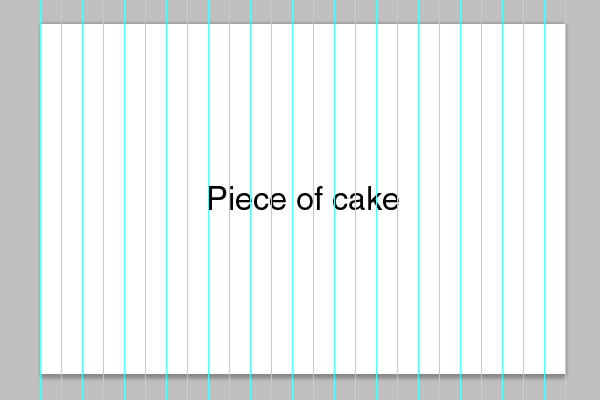
Let’s try with a more useful example. For instance, suppose you want to divide your document in equally sized columns. Doing that manually would imply measuring the document width, dividing it by the number of columns and then carefully placing the guides. What if you need twelve columns? That would be a total waste of time. Let’s see a piece of code that does that job:
1. if(app.documents.length > 0){
2. var numberColumns = parseInt( prompt("How many columns do you need?", 5) );
3. var doc = app.activeDocument;
4. var documentWidth = doc.width;
5. var columnWidth = documentWidth / numberColumns;
6. for(i = 0; i <= numberColumns; ++i){
7. doc.guides.add(Direction.VERTICAL, i * columnWidth);
8. }
9. }
Don't be scared! The code is very easy. You already know what the first line means: "if there's at least one open document, do the following". The next line uses the "prompt" function to ask the user for the number of columns, and passes its result to the "parseInt" function, that conveniently converts it into an integer. The result is stored in the "numberColumns" variable. Just in case you don't know it, variables are used in programming languages to store values, so if you want to save a certain value, you use a variable.
The third line creates a new variable, called "doc", that represents the active document. The fourth line reads the width of the current document and stores it in the "documentWidth" variable. The fifth line computes the width of each column by dividing the total width by the number of columns. Finally, the sixth line starts a loop that repeats once per column (plus once more for the last guide). In each iteration, the variable "i" will hold the current column number: 0, 1, 2, 3... The septh line will add a vertical guide to the current document, placed at the proper position.
To try the code, it's the same as before. Replace the content of our firstScript file with the code and then go to File > Scripts > firstScript.
Modify All of Your Text at the Same Time
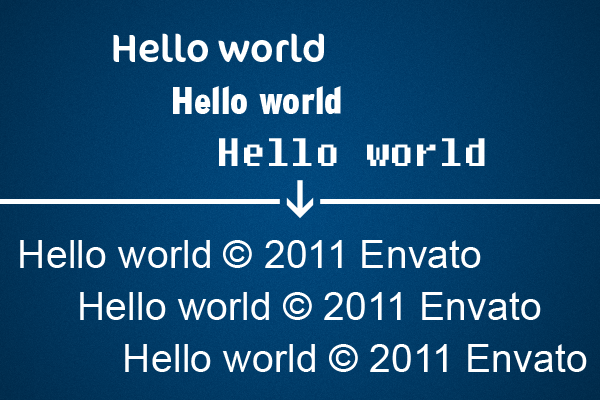
So you've created a great web design, using the always beautiful Helvetica, but looks like the client doesn't have it installed, he prefers Arial. Also, he'd like to make sure everyone knows the copyright of the material so he insists in adding a copyright notice in every text element. "No problem, I know Photoshop Scripting!", you reply. Let's see how to do it:
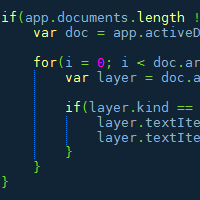
1. if(app.documents.length != 0){
2. var doc = app.activeDocument;
3.
4. for(i = 0; i < doc.artLayers.length; ++i){
5. var layer = doc.artLayers[i];
6.
7. if(layer.kind == LayerKind.TEXT){
8. layer.textItem.font = "ArialMT";
9. layer.textItem.contents += " © 2011 Envato";
10. }
11. }
12. }
The first two lines are already known. Then, there's a new element here, the layer collection. In Photoshop scripting, there are two types of layers, on the one hand we have the "Layer Sets", which are essentially groups, and on the other hand we have the "Art Layers", that include all the other kind of layers: normal layers, text layers, adjustment layers, etc. Our document object ("app.activeDocument") has a property called "artLayers", to access only the art layers, another property called "layerSets" to access the layer sets, and then a property called simply "layers", that includes both previous sets.
In our code we are traversing the set of art layers of our document. In each iteration, we store our current layer in the variable "layer", then we check if the kind of the layer is "LayerKind. TEXT", which represents a text layer. In that case, we access the textItem property of our layer, that holds all of the characteristics of the text, and change its "font" attribute to "ArialMT" (we need to use the PostScript name of the font). Also, we add the copyright notice to the contents of the layer by using the "+=" operator on the "contents" property.
Let There be Squares
We've left the hardest for the end. The example we proposed at the very beginning of the article consisted of having a way of automatically creating squares, just choosing the size and the color. Well, that's quite an easy task for a script.
1. if(app.documents.length > 0){
2. var doc = app.activeDocument;
3. var squareSize = parseInt( prompt("Select the size of the square", 50));
4. var squareColor = new RGBColor;
5. squareColor.hexValue = prompt("Select the color of the square (hexadecimal)", "ff0000");
6. var newLayer = doc.artLayers.add();
7. newLayer.name = "Square - " + squareSize + " - " + squareColor.hexValue;
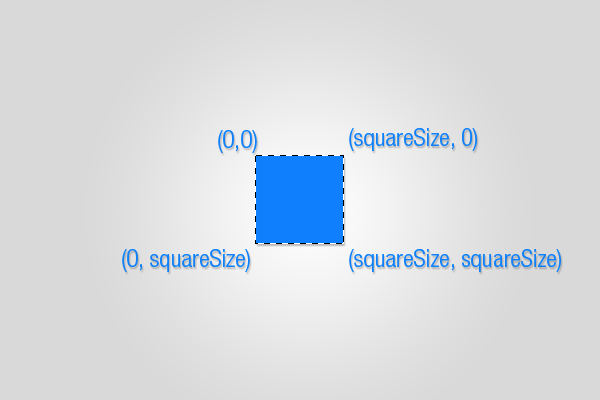
8. selectedRegion = Array(Array(0,0), Array(0, squareSize), Array(squareSize, squareSize), Array(squareSize, 0));
9. doc.selection.select(selectedRegion);
10. doc.selection.fill(squareColor);
11. doc.selection.deselect();
12. }
This is the longest code we've seen so far, but it's not hard to understand. In the third line, we ask the user for the size of the square and store it in the "squareSize" variable. Next, we create a new RGBColor to specify the color of the square, and we read the hexadecimal value from the user input.
The next step is to create a layer. We access the "artLayers" set from the active document, and use its "add" method to add a new layer, storing a reference to it in the variable "newLayer". Next, we change its name acordingly.
The last step is to make a selection. We create an array of arrays indicating the coordinates of each corner of the selection. Then we pass that region to the "select" method of the "selection" object of the active document.
Finally, we fill the selection using the previously defined color, and then deselect all. Our square creator is finished!
Conclusion
Scripts have proved to be way more powerful and configurable than actions. They're certainly a little bit harder to create, but the results are worth the effort. Also, there's an increasingly big and supporting community, and there have even been created complete javascript libraries for Photoshop scripting, likextools, which is open source. These libraries try to fulfill some gaps which would otherwise require lower level solutions.
Also, given the rising popularity of action packs for little money, I think there may be an emerging market for script packs, specially
for complex layout tasks and things like that. I hope that, with this article, you've learnt the basics of Photoshop scripting – have fun writing your own scripts!
for complex layout tasks and things like that. I hope that, with this article, you've learnt the basics of Photoshop scripting – have fun writing your own scripts!
P.S.: now it may be a good opportunity to have a look at NetTuts Javascript from Null video series, which will give you a good understanding of JavaScript basics from start to finish.


0 comments:
Post a Comment