In this tutorial I’ll show you how to create a amazing fantasy fiery portrait of a woman. You’ll learn how to use textures, add fire and create lighting effect.
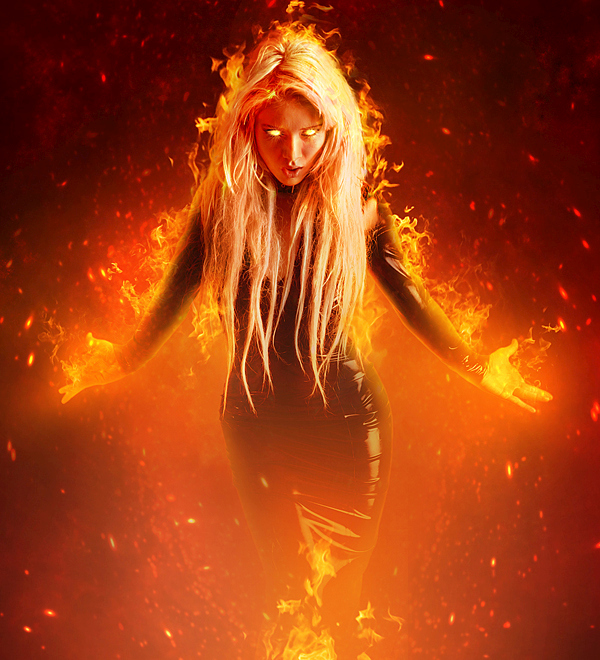
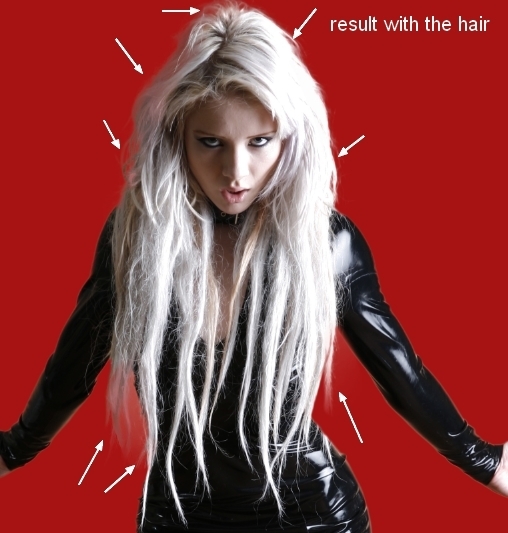
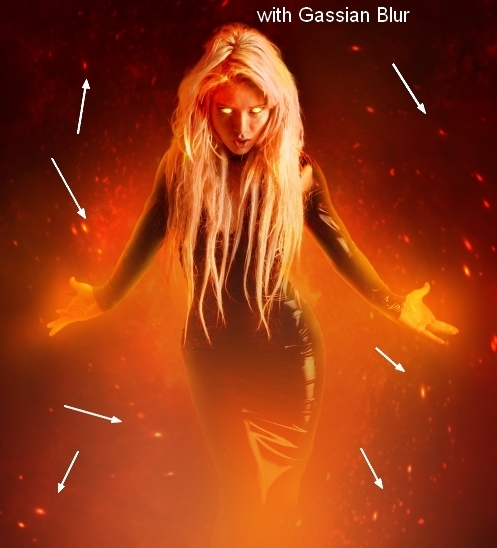
Final Image
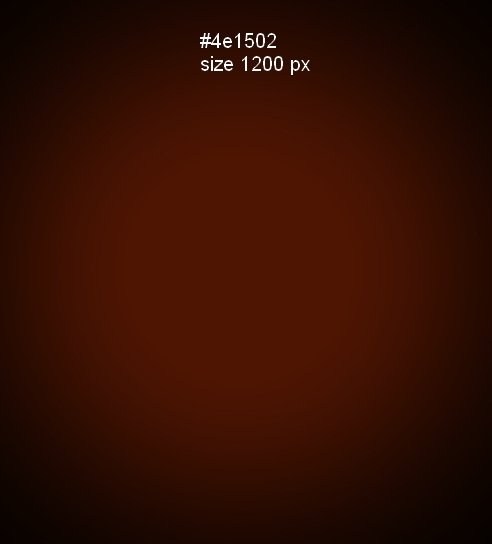
Step 1
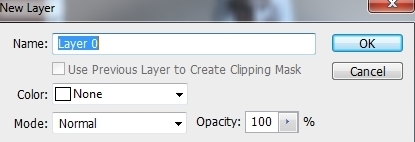
Create a new document with size of 1000×1100 px and fill it with black. Press Cmd/Ctrl+Shift+N to make a new layer. Active Brush Tool (B) with color #4e1502 and size 1200 px. Paint on the center of the black canvas:
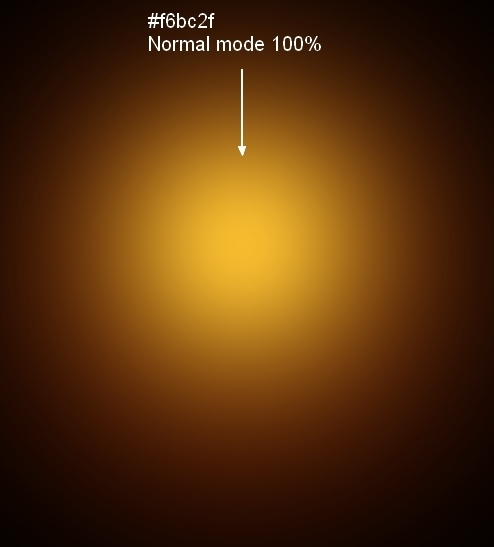
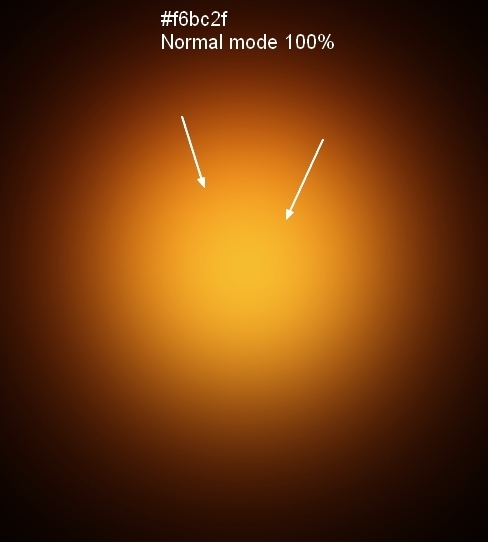
Step 2
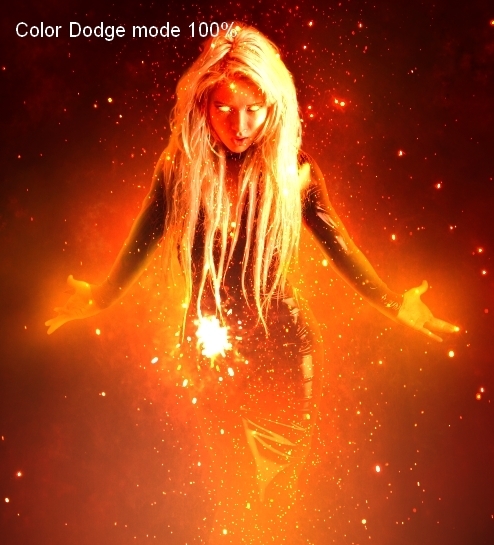
Create a new layer, change brush color to #f6bc2f. Paint inside the dark red area and change the mode to Color Dodge 100%:
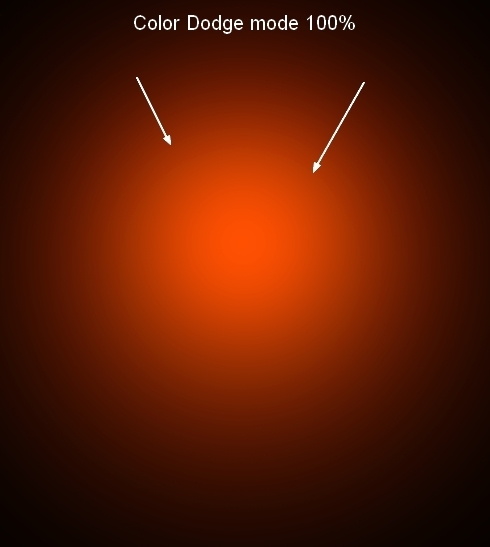
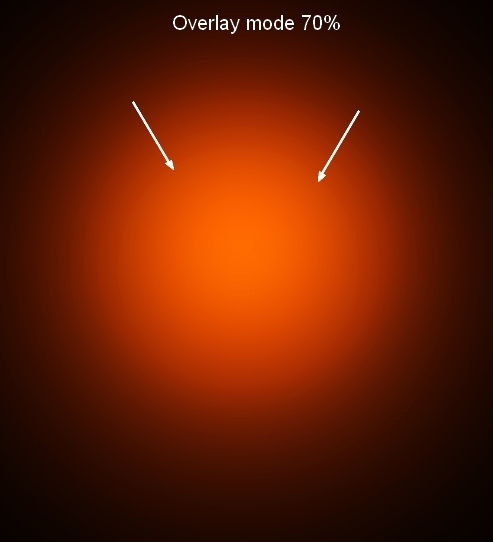
Step 3
Use same brush to paint again on a new layer, put the mode to Overlay 70%:
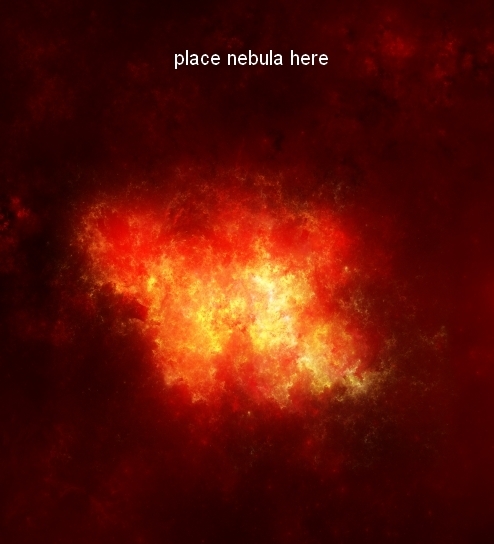
Step 4
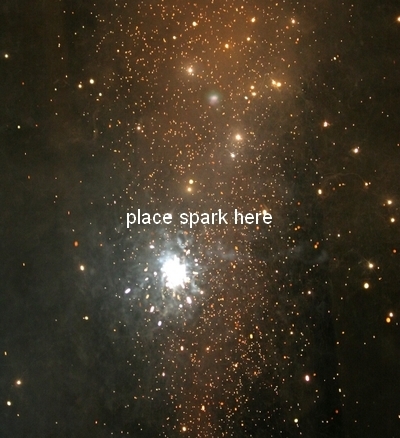
Open nebula stock. Use Move Tool (V) to drag it into our canvas:
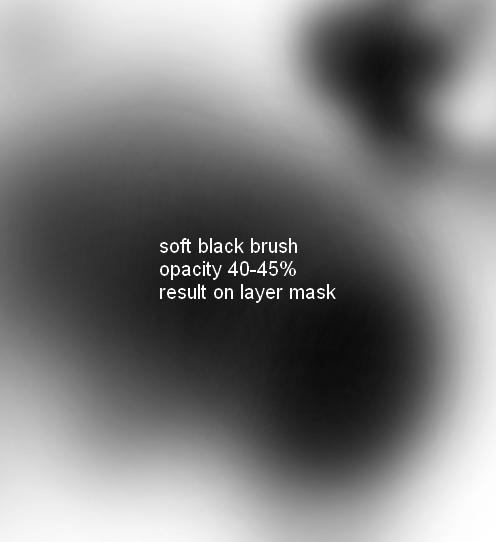
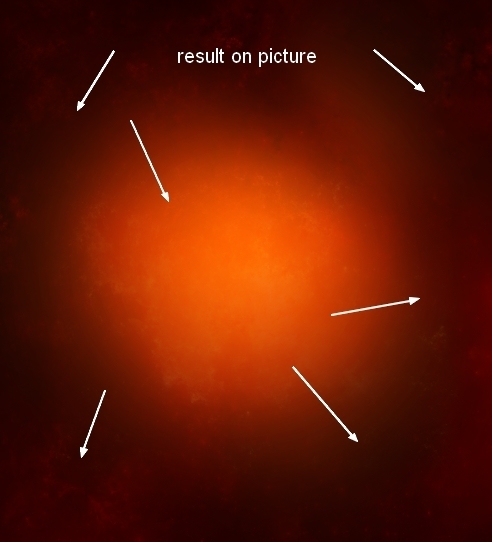
Step 5
Click the second button at the bottom of Layer Pallete to add mask to this layer. Use soft black brush with opacity about 40-45% to reduce nebula effect on some parts. You can see how I did it on layer mask and result on picture:
Step 6
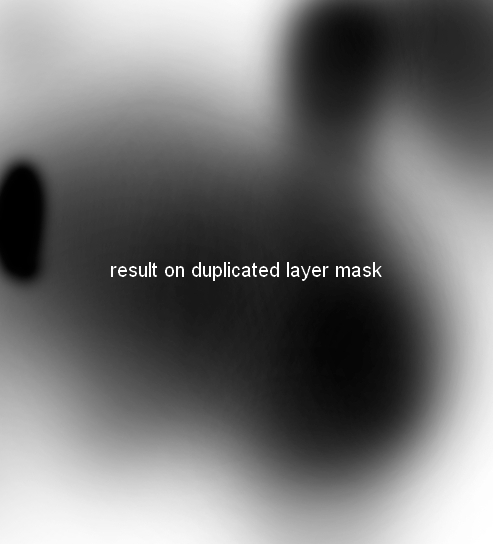
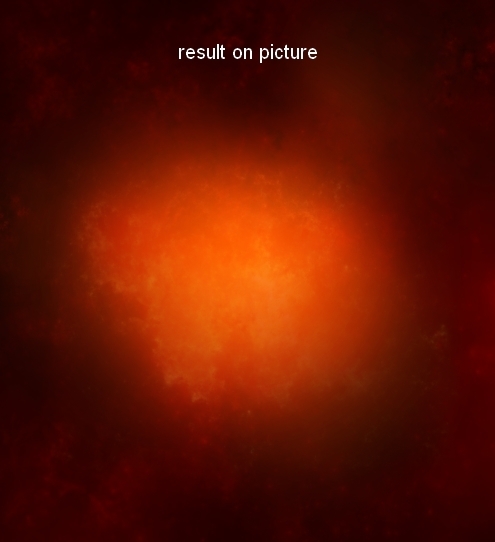
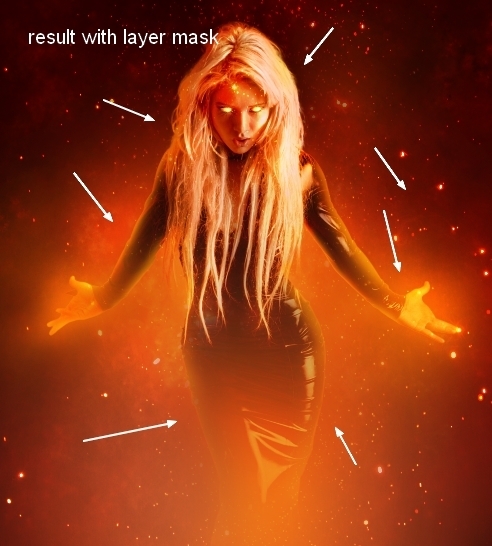
Duplicate this layer and erase some parts with layer mask to get the result below:
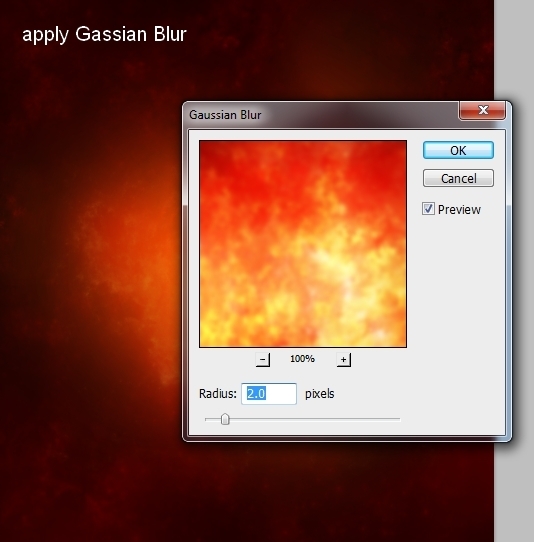
Go to Filter-Blur-Gassian Blur and choose radius as 2 px:
Step 7
Open model stock. First I used Polygonal Lasso Tool to make a selection around model (no need to be so precise with the hair):
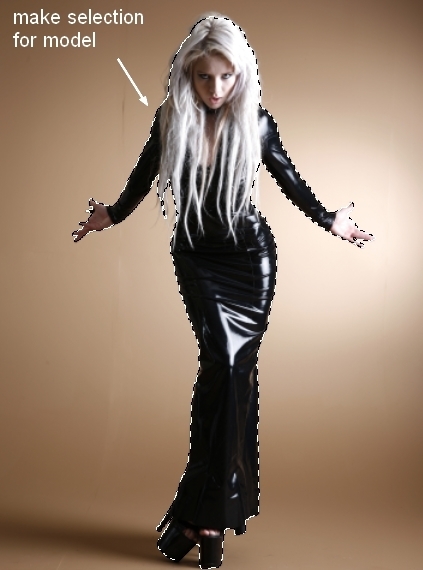
Double click background layer to unlock it.
Click the layer mask button to hide background part:
Step 8
Right click the mask of Layer 0, choose Refine Mask:
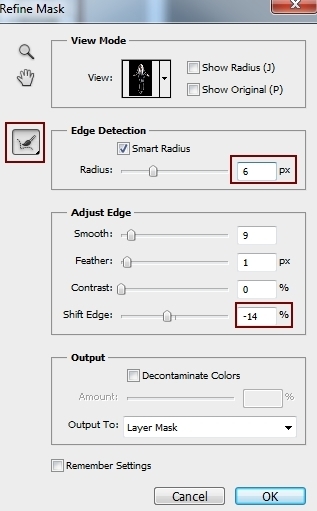
Use Refine Radius Tool with size about 100 px to paint around the head to reveal more hairs.
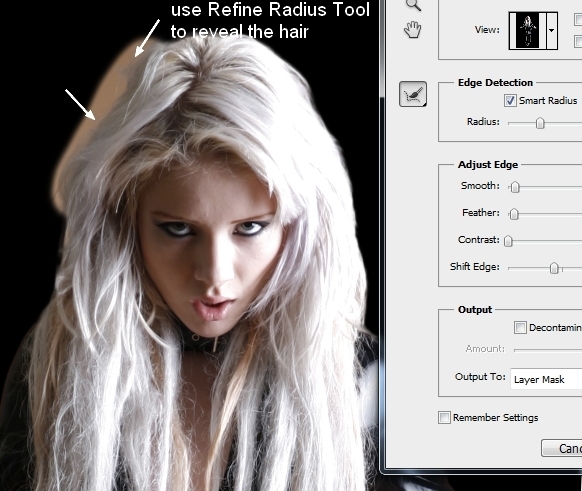
Here is my result after refining (I used a red background to make you see it more clearly):
Step 9
Place model after extracting into our main picture, on the top of layers:
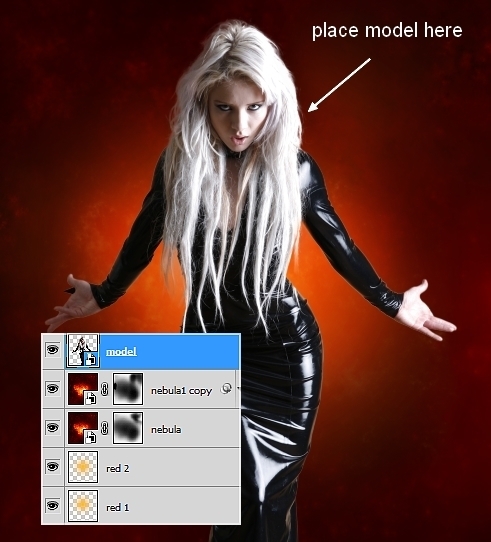
Step 10
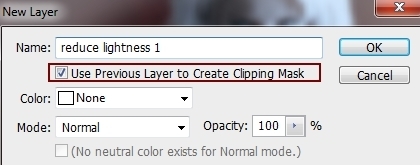
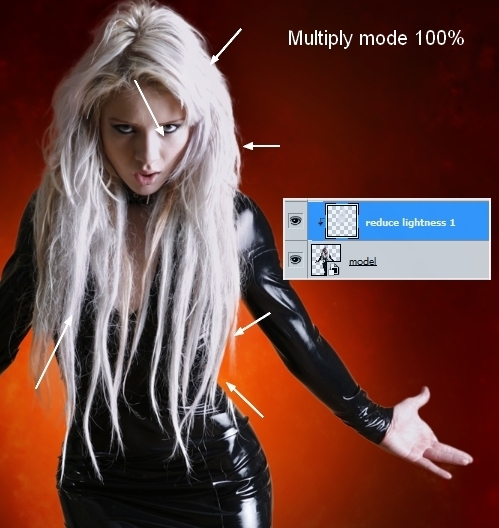
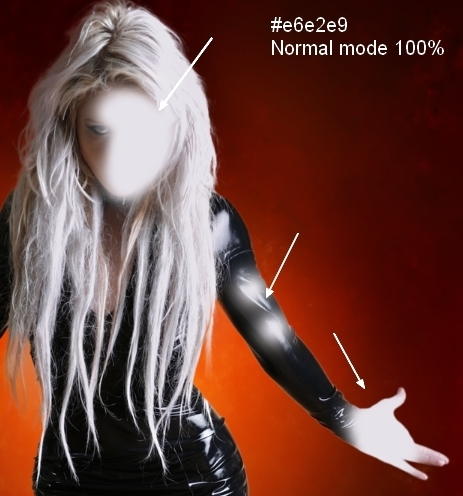
I want to reduce the lightness on the bright parts of the model so create a new layer above model one with Clipping Mask:
Use brush with color #e6e2e9 to paint on the bright hair, face and hand parts and change the mode to Multiply 100%:

Step 11
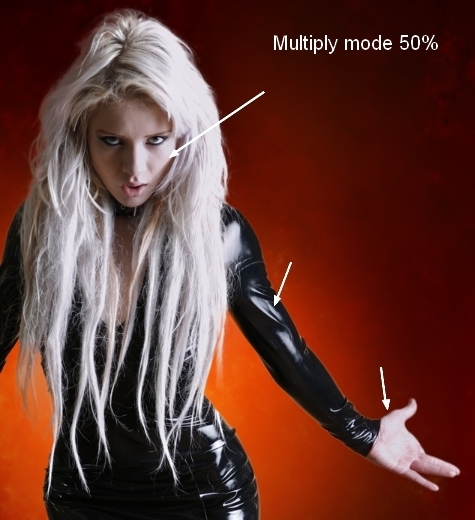
Continue reducing the light on model face, arm with a new layer (Clipping Mask) and same brush. I altered the mode to Multiply 50%:
Step 12
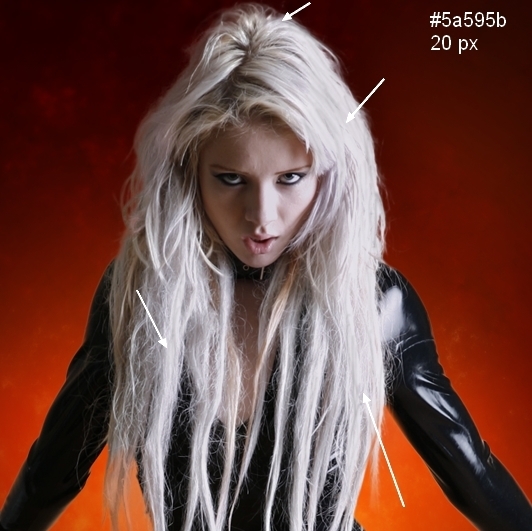
I want to give more details for model hair so on a new layer I used brush with color #5a595b and size about 20 px. Here is the result after drawing more hair:
Step 13
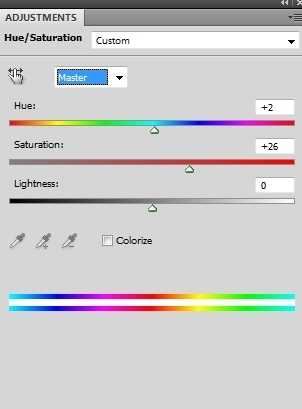
To add some red color to the model, I used an adjustment layer with Clipping Mask. Go to Layer-New Adjustment Layer-Hue/Saturation:
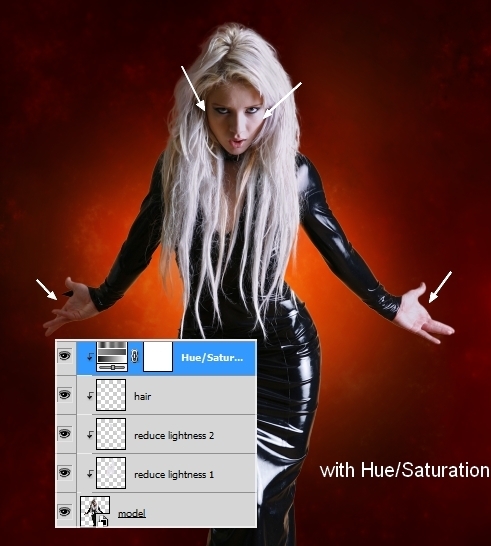
Step 14
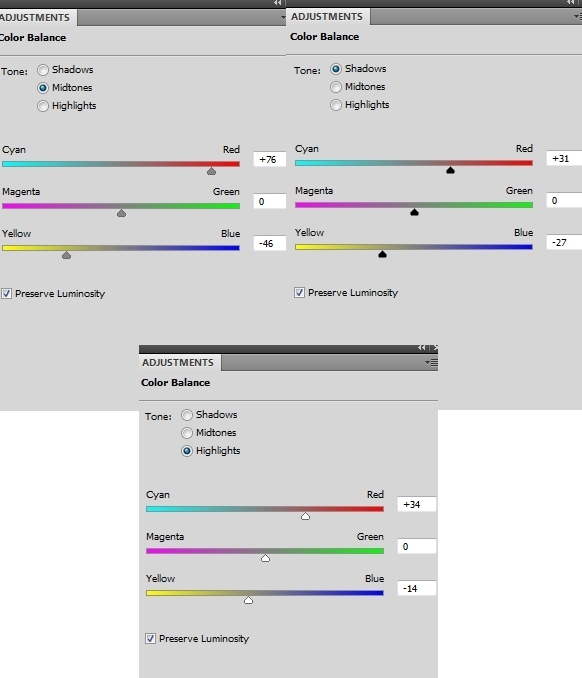
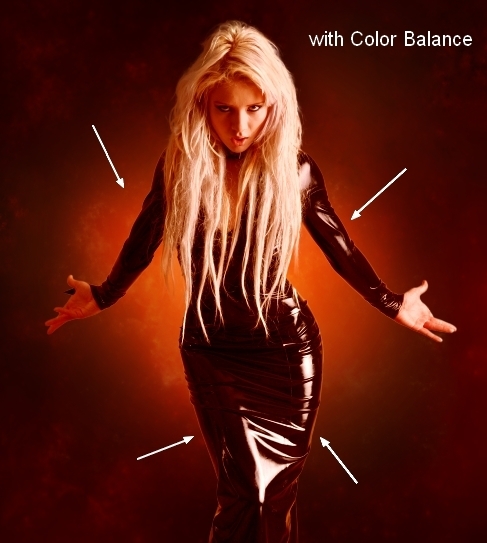
I added a Color Balance layer with same purpose:
Step 15
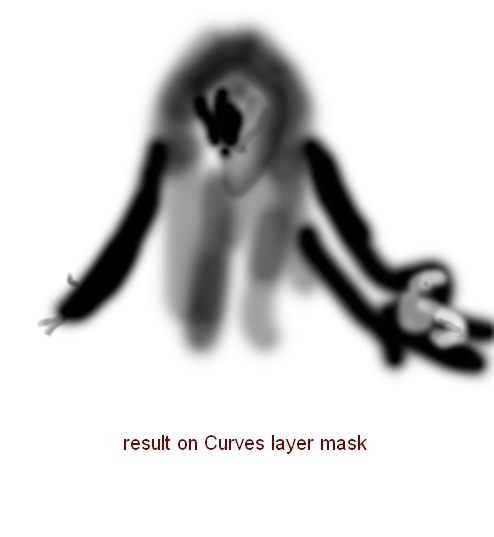
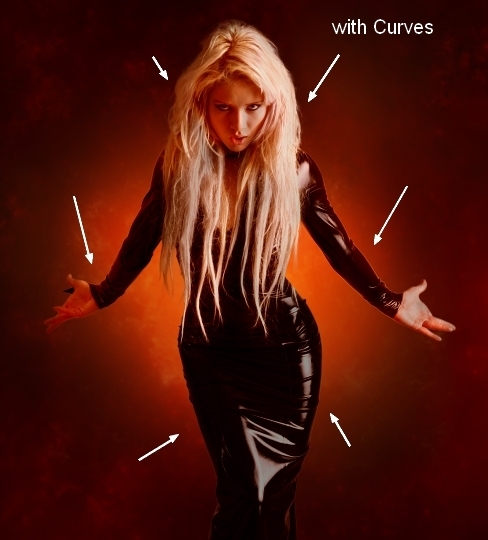
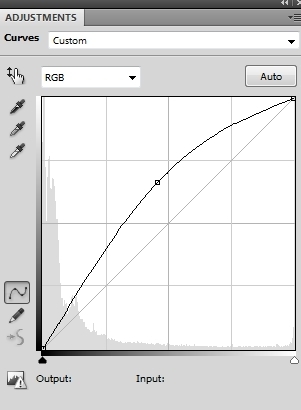
Make a Curves layer to darken the model:
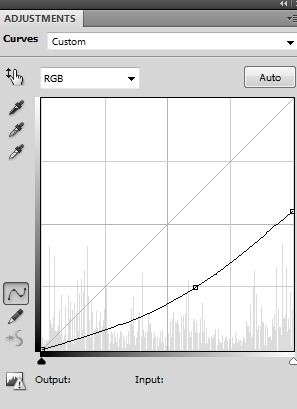
On Curves layer mask I used soft brush to remove and reduce dark intensity.
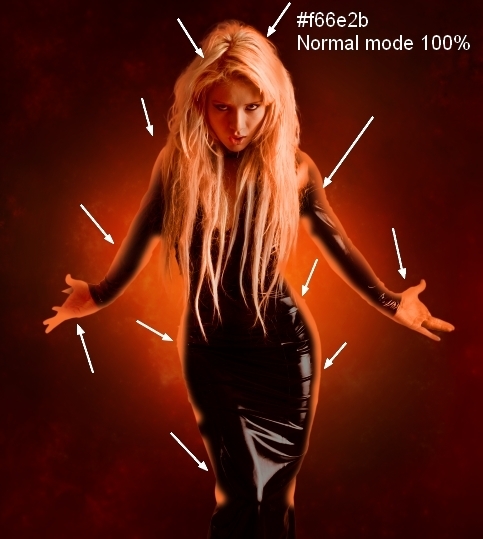
Step 16
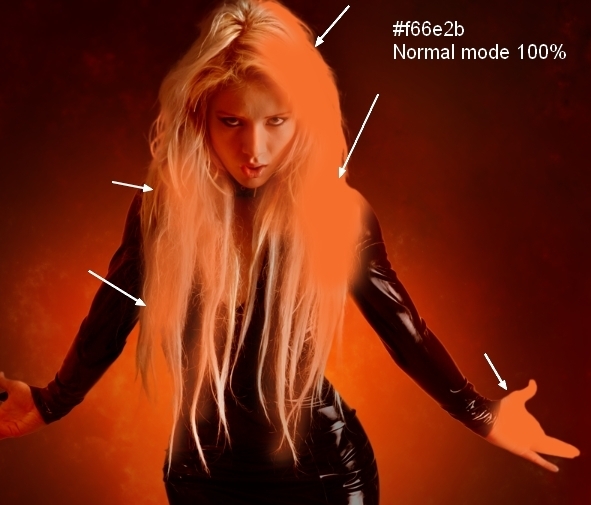
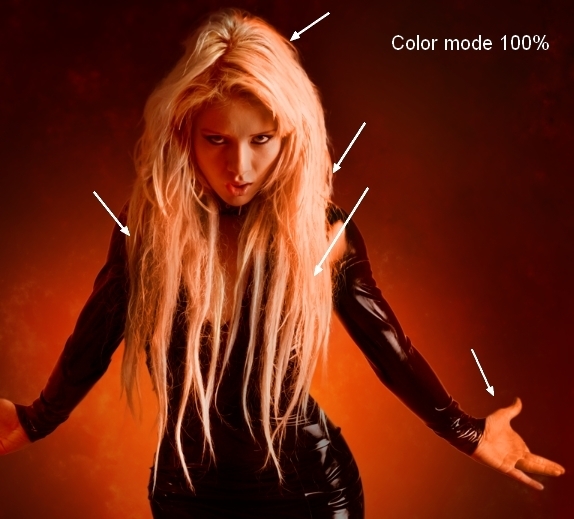
Create a new layer and use brush with color #f66e2b to paint on the hair and hand. Change the mode to Color 100%:
Step 17
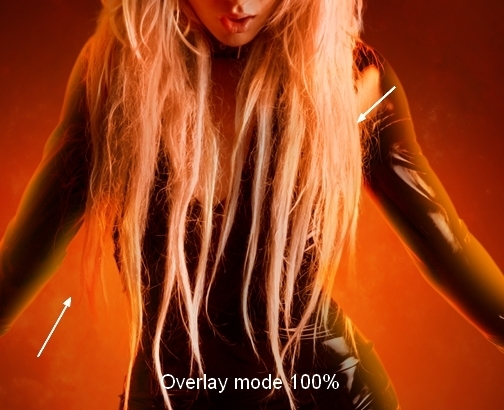
On a new layer use same brush to add more vivid red to the hair and body contour. Set the mode to Overlay 100%:
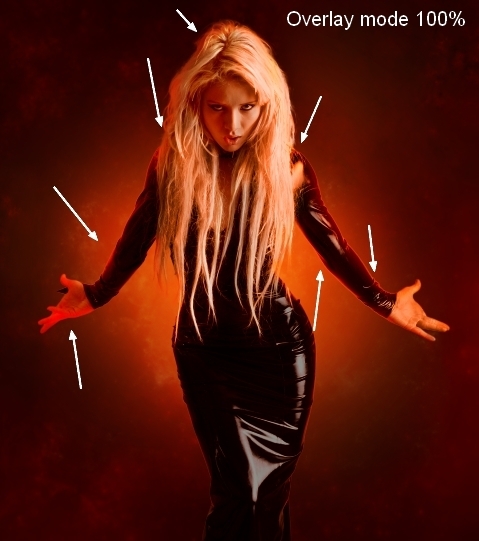
Step 18
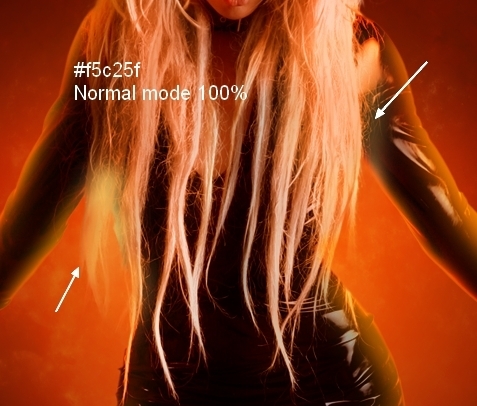
I used brush with color #f5c25f to paint on model contour again to give some orange there. Change the mode to Hard Light 100%:
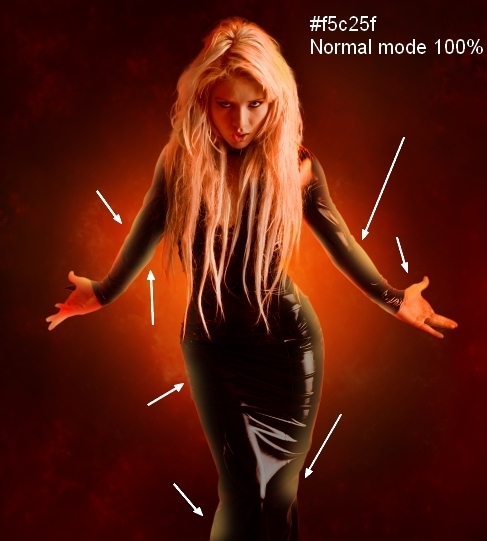
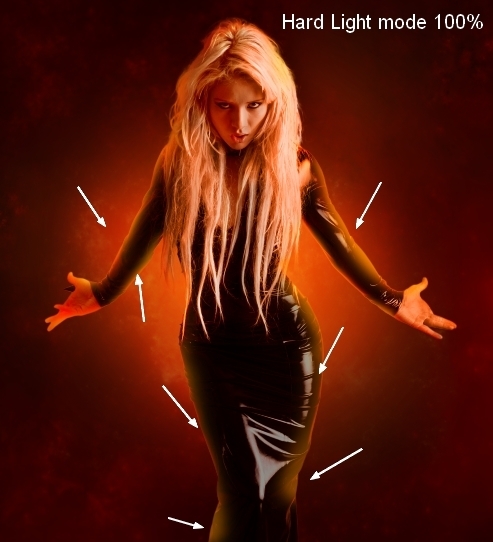
Step 19
Make a new layer and use same brush to paint on some hair ends and put the mode to Overlay 100%:
Step 20
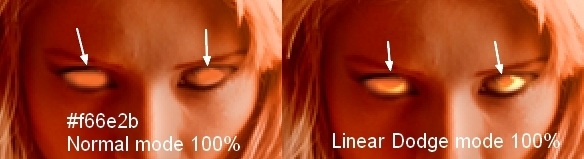
Create a new layer, I used color #f66e2b to paint inside the eyes then put the mode to Linear Dodge mode 100%:
Step 21
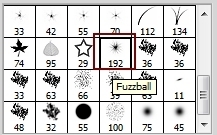
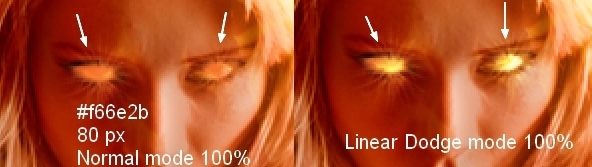
Click brush menu, choose Reset Brushes to active default brush preset. Now on a new layer, change foreground to #f66e2b and click Fuzzball brush:
Lower brush size to 80 px and spot inside the eyes. I altered the mode to Linear Dodge mode 100%:
Step 22
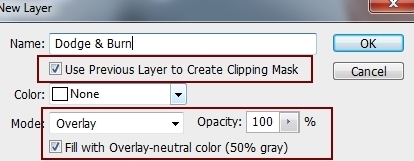
To enhance some face details, I made a new layer, changed the mode to Overlay 100% and filled with 50% gray:
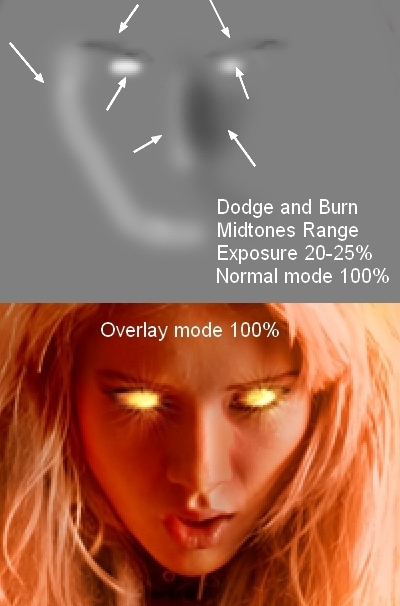
Use Dodge and Burn Tool (O) with Midtones Range, Exposure about 20-25% to brighten the eyes effect, face side and nose, darken eyebrows, nose bridge. You can see how I did it with Normal mode and result with Overlay mode:
Step 23
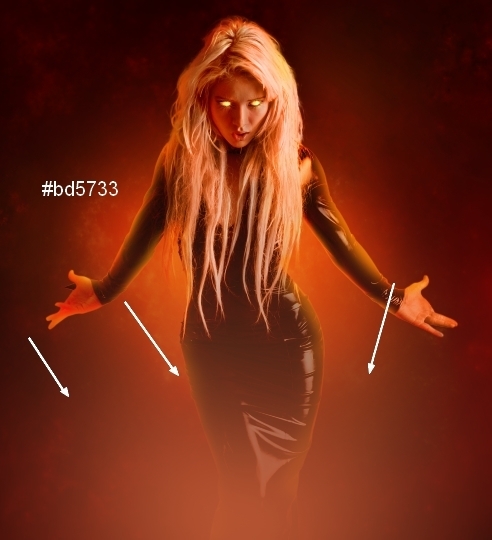
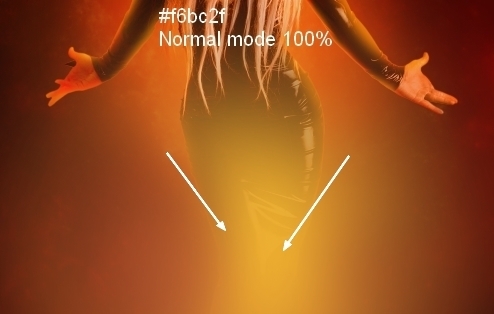
Make a new layer on the top, use soft brush with color #bd5733 to paint at the bottom of the image:
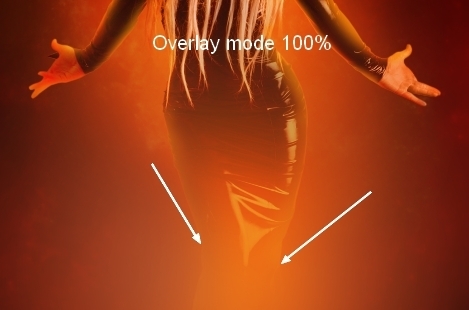
Step 24
To make a stronger effect there I used soft brush with color #f6bc2f and changed the mode to Overlay 100%:
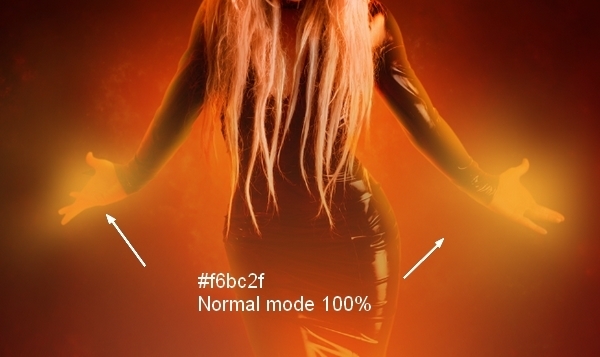
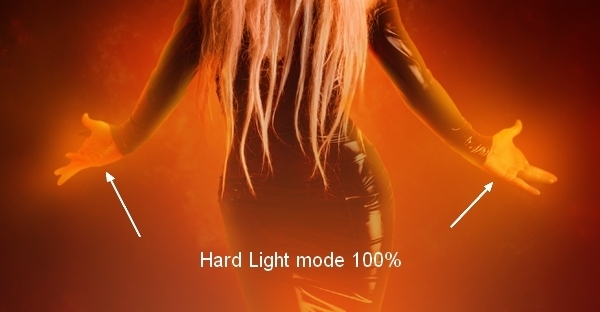
Step 25
On a new layer use brush with color #f6bc2f to paint on two hands. I changed the mode to Hard Light 100%:
Step 26
Drag sparks image into our canvas and put the mode to Color Dodge 100%:
I named it “sparks 1″.
Step 27
Add layer mask to this one. Use brush to remove and reduce sparks intensity on some parts below:
Step 28
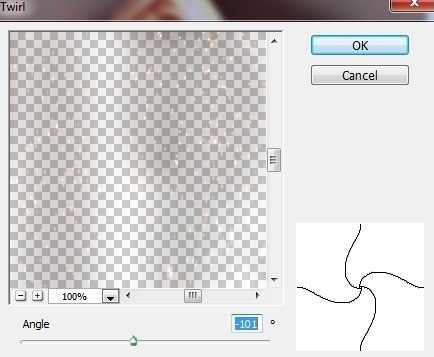
On sparks 1 layer, go to Filter-Distort-Twirl:

Apply Gassian Blur with 2 px:
Step 29
Duplicate this layer, use Cmd/Ctrl+T to rotate it to get the result below. You can use layer mask to remove any unwanted parts:

Step 30
Open fire images. I’ve chosen two these images to work with:
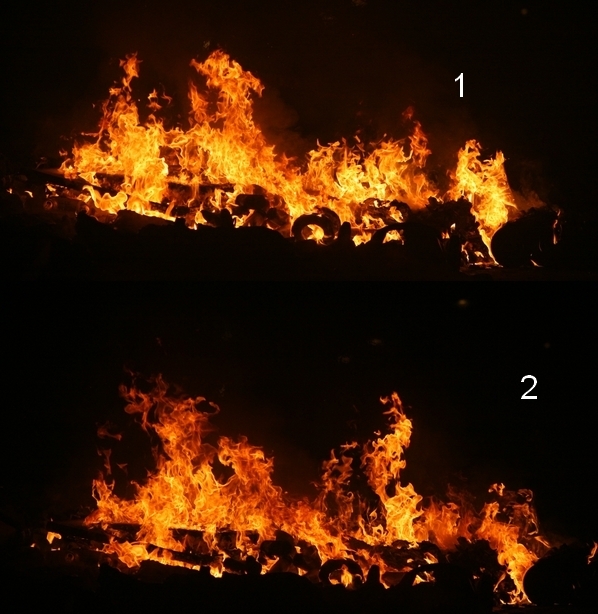
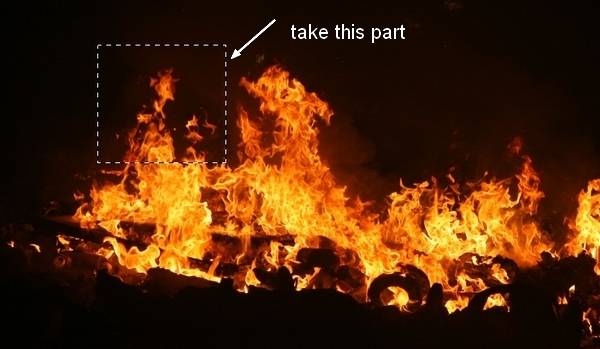
Use Retangular Marquee Tool (M) to make selection for a fire part on image 1:
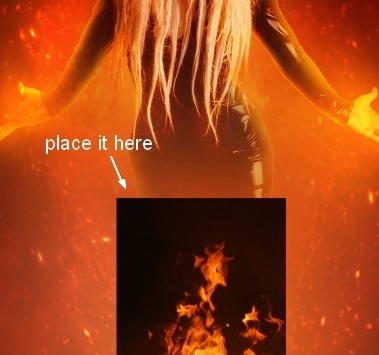
Place it at the bottom of model body, change the mode to Screen 100%:

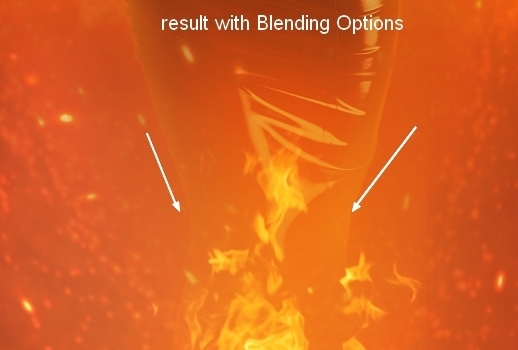
Step 31
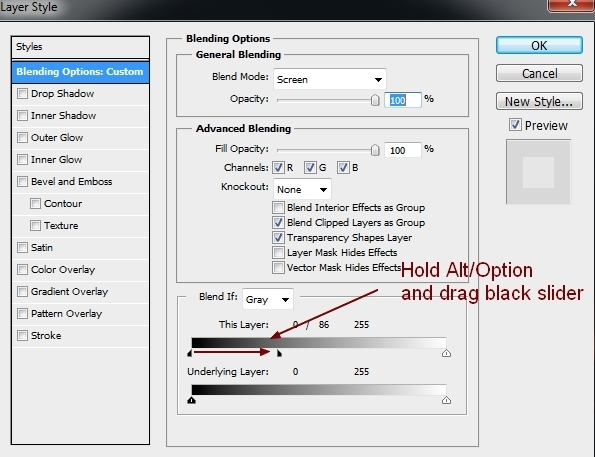
To remove white edges remained after changing blending mode, double click this layer, choose Blending Options. Hold Alt/Option key while dragging black slider of This Layer until the white edges disappear:
Step 32
Take another parts of the fires and put them around model hair and body. I applied same settings of Blending Options with all of these layers and used layer mask to remove unecessary parts.
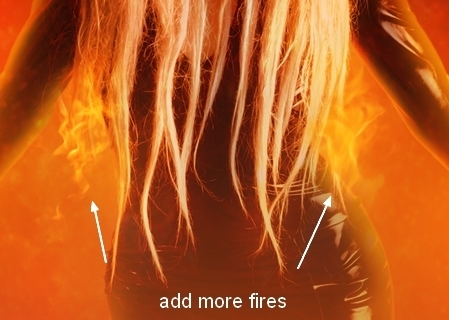
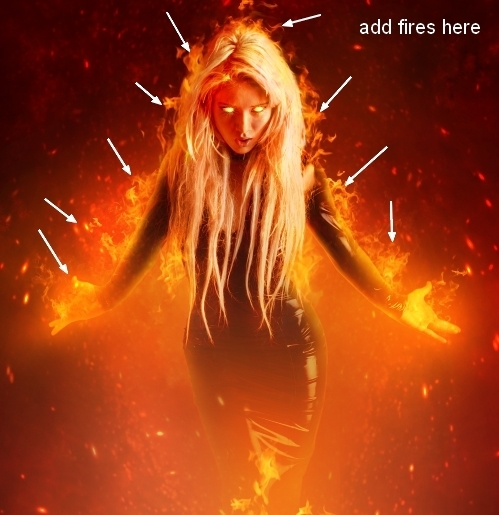
I used 14 layers for this effect.
Step 33
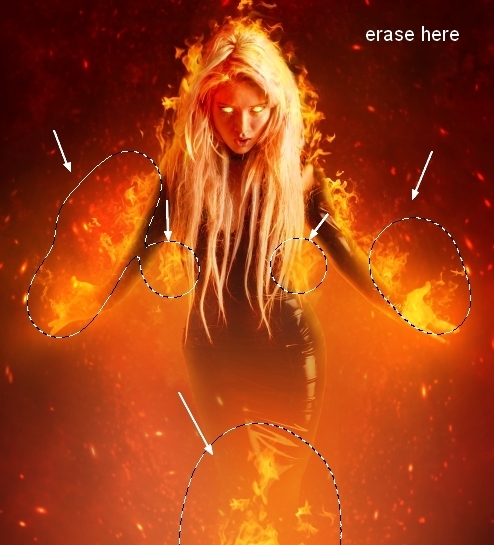
Make all fire layers selected then press Cmd/Ctrl+G to make group for them. Change the mode of this group from Pass Through (default group mode) to Screen 100%. On layer 14 go to Layer-New Adjustment Layer-Curves:
On Curves layer mask use brush to erase fires on the arms, hair and bottom as I don’t want them too bright:
Step 34
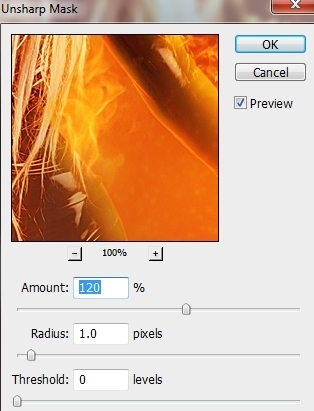
Final step: Press Cmd/Ctrl+Option/Alt+Shift+E to merge all visible layers. Go to Filter-Sharpen-Unsharp Mask:
And We’re Done!
I hope that you enjoyed the tutorial.


0 comments:
Post a Comment