Photoshop layer styles are a popular way to add effects, such as
drop shadows and strokes, to layers in a non-destructive way. With the
right knowledge and experience, any effect can be achieved. To achieve
these effects, however, you need to understand what each setting does
and how they can be combined to achieve a certain look. we will explain every aspect of Photoshop's layer styles feature and show you how to unlock their potential.
The Uses For an Outer Glow When you hear the name "Outer Glow" you automatically assume that this effect is limited to just that, an Outer Glow. The truth is that there is much more you can do with it than a simple glowing effect.
On top of creating a glowing effect, Outer Glow can also be used to create faux drop shadows as well as add outer strokes to your designs.
Below you will see an example of how an Outer Glow can not only make an object look like it is emitting light, but how it can also be used to create a shadow effect. Keep in mind that only the Outer Glow settings were changed between the two different looks.
If you are unfamiliar with how all the different Blending Modes work, I highly recommend checking out the
 In the following example, you can see that Linear Dodge (Add) will
create a more extreme glowing effect while Screen will affect the Outer
Glow in a slightly more subtle way.
In the following example, you can see that Linear Dodge (Add) will
create a more extreme glowing effect while Screen will affect the Outer
Glow in a slightly more subtle way.

 In the following example, you can see that text on the left has a
subtle glowing effect while the one on the right is much more
pronounced.
In the following example, you can see that text on the left has a
subtle glowing effect while the one on the right is much more
pronounced.

 In the following example, increasing the amount of Noise takes us from a smooth Outer Glow to a "glowing particle" effect.

 In the following example, setting a single color will give a
predictable Outer Glow, while experimenting with different gradients can
help us achieve more unique effects, like the slight rainbow glow you
might see in soap bubbles.
In the following example, setting a single color will give a
predictable Outer Glow, while experimenting with different gradients can
help us achieve more unique effects, like the slight rainbow glow you
might see in soap bubbles.

 In the following example, you can see the difference between the more
organic looking Softer setting, and the Precise technique on the right.
In the following example, you can see the difference between the more
organic looking Softer setting, and the Precise technique on the right.

For a typical Outer Glow, you will normally want to leave this at 0%, but for more intense glows you should increase it, and for outer strokes with hard edges you can set it all the way to 100%.
 In the following example, increasing the spread percentage from 0% to 50% gives the Outer Glow and harder edge.

 In the following example, since the Size of the glow on the left is
2px, it gives us a more contained glowing effect. Increasing the glow
Size to 9px makes the text seem more radioactive.
In the following example, since the Size of the glow on the left is
2px, it gives us a more contained glowing effect. Increasing the glow
Size to 9px makes the text seem more radioactive.

This is really useful is when you are trying to achieve special glow or abstract effects.
In addition, the "Anti-aliased" checkbox allows you to improve the quality of the shadow with a very slight drop in performance. The performance hit is negligible, so we recommend always keeping the box checked.
 In the following example, changing the Contour to a "sine wave" shape
results in an Outer Glow with more character, which allows us to add
special effects to our images.
In the following example, changing the Contour to a "sine wave" shape
results in an Outer Glow with more character, which allows us to add
special effects to our images.

A lower setting gives us a harder glow while a higher setting gives us a softer one.
 In the following example you can see how changing the Range affects the softness of the Outer Glow.

It is a easier to see the difference in action.
 In the following example, the effect on the left is achieved using
the Noise slider, while the one on the right uses the Jitter slider. If
you don't see a difference, don't worry. The difference is very subtle
most of the time, often so much so that it doesn't matter which you use.
In the following example, the effect on the left is achieved using
the Noise slider, while the one on the right uses the Jitter slider. If
you don't see a difference, don't worry. The difference is very subtle
most of the time, often so much so that it doesn't matter which you use.

By clicking "Reset to Default", Photoshop will then load whatever settings were last saved. This allows you to experiment and simply reload custom default settings if you want to start over.


The Uses For an Outer Glow When you hear the name "Outer Glow" you automatically assume that this effect is limited to just that, an Outer Glow. The truth is that there is much more you can do with it than a simple glowing effect.
On top of creating a glowing effect, Outer Glow can also be used to create faux drop shadows as well as add outer strokes to your designs.
Below you will see an example of how an Outer Glow can not only make an object look like it is emitting light, but how it can also be used to create a shadow effect. Keep in mind that only the Outer Glow settings were changed between the two different looks.

The Layer Styles Inner Shadow Dialog Box
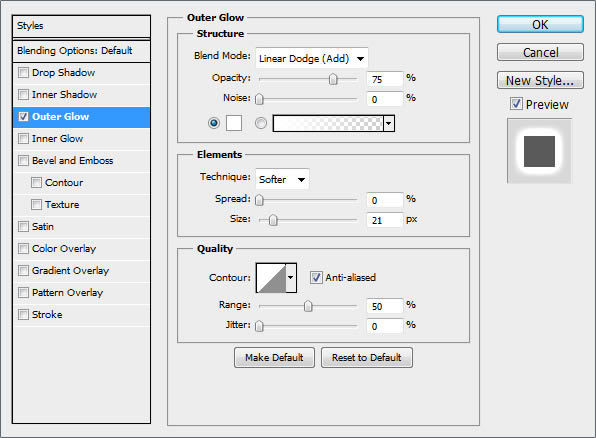
The Outer Glow dialog box is shown below. A few new settings are displayed here that we have not seen before, like Technique, Range, and Jitter.Blend Mode
The Blend Mode allows you to set the blending mode for your Outer Glow. If you are looking to create a glowing affect, Linear Dodge (Add) or Screen are good modes to use, if you want to create an "outer shadow" type effect, Linear Burn or Multiply work well, and if you are trying to create an outer stroke (which we will get into in more detail below) then Normal is fine.If you are unfamiliar with how all the different Blending Modes work, I highly recommend checking out the
Opacity
The Opacity slider allows to to specify how transparent your Outer Glow will be. A setting of 0% is completely see through while 100% is completely opaque.Noise
The Noise slider is the same within Outer Glow as in Drop Shadow and Inner Shadow. Increasing the Noise slider will add a bit of noise to your Outer Glow, allowing you to create a type of "glowing dust" effect.Color and Gradient
When the corresponding radio button is selected, the Color block allows us to change the color of the Outer Glow, while the same goes for the Gradient radio button. With Gradient selected, you are not limited to a single color, which can help you create very intricate and abstract glowing effects.Technique
The Technique dropdown box gives us two different options for rendering our Outer Glow, Softer and Precise. Softer gives us an Outer Glow that is more organic and natural looking, while Precise fits the shape of the glow tighter to the original shape of the layer.Spread
The Spread slider changes the falloff of the Outer Glow in a linear fashion, or in other words, how gradually it fades out at the edges.For a typical Outer Glow, you will normally want to leave this at 0%, but for more intense glows you should increase it, and for outer strokes with hard edges you can set it all the way to 100%.
Size
The Size slider is pretty self explanatory. It allows you to increase the size of the Outer Glow in 1px increments. The higher the Size value is, the bigger the Outer Glow becomes.Contour
The Contour shapes allow you to change the falloff of the Outer Glow in a non linear fashion. By choosing different curve profiles, you can get the glow to fade out in different ways.This is really useful is when you are trying to achieve special glow or abstract effects.
In addition, the "Anti-aliased" checkbox allows you to improve the quality of the shadow with a very slight drop in performance. The performance hit is negligible, so we recommend always keeping the box checked.
Range
Adjusting the Range is similar to changing the Spread. It allows you to control the falloff of your Outer Glow in almost the same way.A lower setting gives us a harder glow while a higher setting gives us a softer one.
Jitter
While Range is similar to Spread, Jitter is similar to Noise. Noise creates transparency of adjacent pixels using a Normal blend mode, while Jitter adds noise by adjusting the and lightness of adjacent pixels in a way that is similar to Overlay.It is a easier to see the difference in action.
Saving and Loading Default Settings
You can save and load default settings for each effect in the Layer Styles dialog box. By clicking "Make Default", Photoshop will store whatever settings are currently active as the new default settings for that effect.By clicking "Reset to Default", Photoshop will then load whatever settings were last saved. This allows you to experiment and simply reload custom default settings if you want to start over.
One for the Road
Until next time, this free, exclusive layer style and accompanying .PSD will keep the flame of love for layer styles burning bright and help you get better acquainted with Outer Glow.


0 comments:
Post a Comment