Showing posts with label photoshop tutorial. Show all posts

Photoshop Tutorial Create a Clean, Glossy Plastic Text Effect

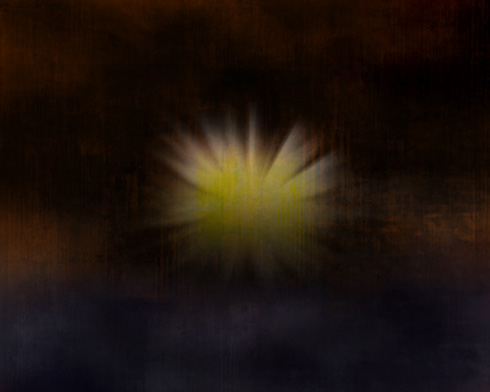
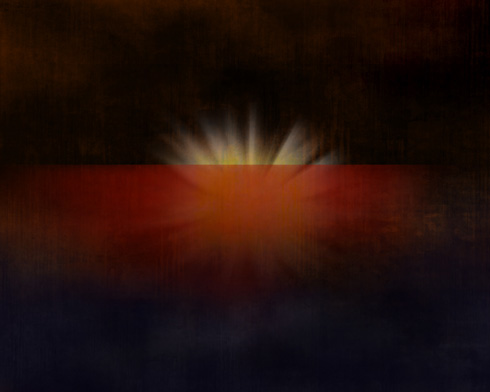
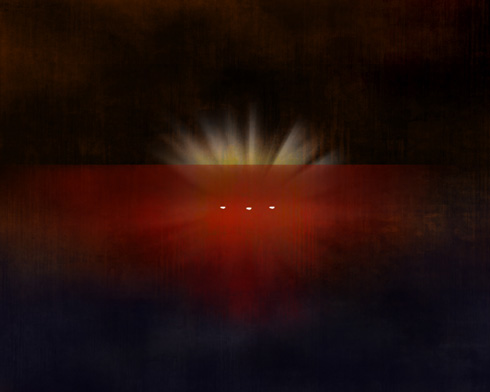
Final Result of Creating Clean Glossy Plastic Text Effect.
Final product image
What You'll Be Creating
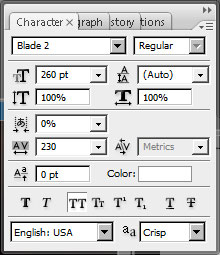
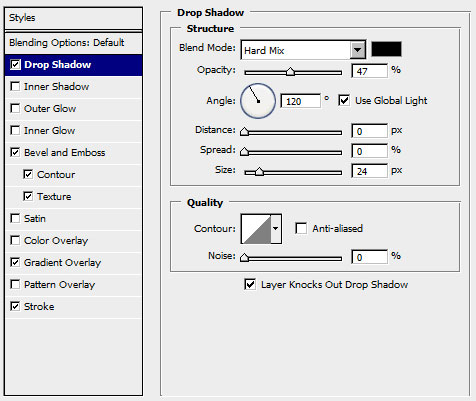
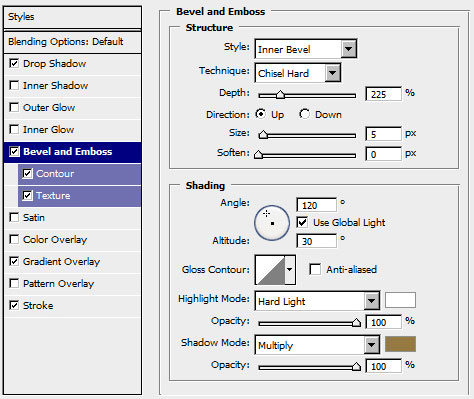
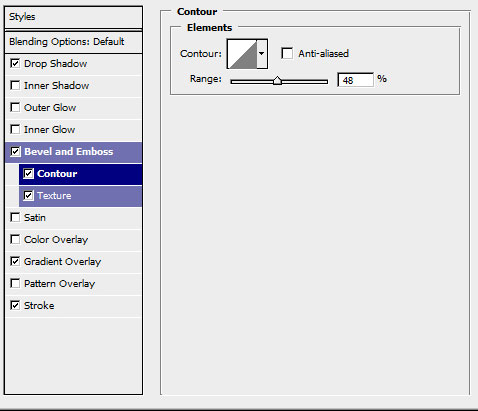
Using multiple layer styles can help achieve a more detailed 3D effect. This tutorial will show you how to use layer styles, filters, textures, brushes, and adjustment layers to create a shiny, clean plastic text effect in Adobe Photoshop. Let's get started!
Read More

Colourizing B&W old Photographs

Here is the sample image I have chosen to for this article.  It’s in bad shape, but the scene is fantastic.  These are also family members at the cottage, and I own the rights to it, so it's another bonus.  Perhaps in the future, I'll add another section to the article on how to go about replacing the missing piece of this image, but that will be an advanced section, and I wouldn't start with this image.  But it can be done, and done convincingly!  For the mean time, let's crop out what we don't need.  I scanned the original at 600 dpi; this will be an adequate resolution for our needs.  If your image is less then 300 dpi, now is the time when you would change the resolution to allow a large enough image to work with and to reduce image artefacts later on.


Read More

Create Spider Man 3 Text Style

In this tutorial we’re going to show you how to create some
eye catching metallic text similar to the type used for the new”Spiderman 3″
movie.


Read More

3D Diablo Text Effect in Photoshop

Final Result


Create a new file (File>New) of 1280×1024 px and 72 dpi.
Paint the first layer with black color, applying the Paint Bucket Tool (G).
Make a Diablo III styled wallpaper in Phootshop CS3
Let’s start making a very gloomy texture. Download out of Internet a set of ready to use brushes D_Grungeset1.
In this case we’ll use all the brushes, except the marked one in the table below. The color’s code is #532100. Brush’s Opacity needs to be on 20%.
Make a Diablo III styled wallpaper in Phootshop CS3
We must get almost the same thing as on the picture below:
Make a Diablo III styled wallpaper in Phootshop CS3
Choose now a brush as in the next table. We’ll use it during the entire lesson.
Make a Diablo III styled wallpaper in Phootshop CS3
On a new layer we’ll try to represent the blue color – #04020FOpacity:20%.
Make a Diablo III styled wallpaper in Phootshop CS3
Enlarge the brush’s size by pressing Ctrl +] and try to represent one more layer of the same color.
Make a Diablo III styled wallpaper in Phootshop CS3
On the next layer the brush needs to be enlarged even more, changing the Opacity on 40% and trying to get the same result as below:
Make a Diablo III styled wallpaper in Phootshop CS3
Select the white color, Opacity of 10% and represent an element remembering the clouds.
Make a Diablo III styled wallpaper in Phootshop CS3
Set the next parameters on the layers’ palette.
Make a Diablo III styled wallpaper in Phootshop CS3
Select the black color and the same opacity’s value to create a dark haziness on the top part of the picture.
Make a Diablo III styled wallpaper in Phootshop CS3
Create a new file of 500x500px and 72 dpi, painting it in black color.
Make a Diablo III styled wallpaper in Phootshop CS3
Select the Gradient Tool (G) on a new layer for giving it the white gradient. Select on the top gradient’s menu the option Foreground to transparent, having a picture, like the next one.
Make a Diablo III styled wallpaper in Phootshop CS3
Next select the main menu Filter>Distort>Wave…, setting the options from below
Make a Diablo III styled wallpaper in Phootshop CS3
…and then Filter>Distort>Polar Coordinates
Make a Diablo III styled wallpaper in Phootshop CS3
We’ll get a fascicle of light like the next one. Select after that the Smudge Tool (R) to spread out the rays from their middle part to outside.
Make a Diablo III styled wallpaper in Phootshop CS3
Then place the result that we’ve got on our main picture.
Make a Diablo III styled wallpaper in Phootshop CS3
Set the parameters:
Make a Diablo III styled wallpaper in Phootshop CS3
Make a copy of this layer Ctrl+J and enlarge the copy up to one third parts, applying Free Transform option(Ctrl+T). Set the layer’s parameters demonstrated below:
Make a Diablo III styled wallpaper in Phootshop CS3
We need to get the result from below:
Make a Diablo III styled wallpaper in Phootshop CS3
Create a new layer, giving it the Blending Mode from below:
Make a Diablo III styled wallpaper in Phootshop CS3
Select the brush with the color’s code #F8F70C and the Opacity of 100% and make several touches on the light’s central part.
Make a Diablo III styled wallpaper in Phootshop CS3
Use the brush of black color on the bottom part of a new layer that needs to be made up first of all. The Opacityis of 10%.
Make a Diablo III styled wallpaper in Phootshop CS3
Create again a new layer and select the Rectangular Marquee Tool (M) to represent the element from below, painting it with red color (Opacity 30%). The bottom corners should be erased with the Eraser Tool (E).
Make a Diablo III styled wallpaper in Phootshop CS3
Paint out now a black stripe, applying the Opacity of 30%.
Make a Diablo III styled wallpaper in Phootshop CS3
Create a new layer with the parameters demonstrated below and insert several touches of red color, having theOpacity of 100%.
Make a Diablo III styled wallpaper in Phootshop CS3
On a new layer we’ll draw three dots with the usual brush.
Make a Diablo III styled wallpaper in Phootshop CS3
Stretch out the made dots with the Free Transform option and erase the extreme lines on both sides, the same way the next picture indicates it. Set for this layer Blending mode-Soft Light.
Make a Diablo III styled wallpaper in Phootshop CS3
Make a copy of this layer and grow narrow a little each stripe, marking them with the Rectangular Marquee Tool (M). Set for the new layer the Blending Mode – Overlay till getting the next result.
Make a Diablo III styled wallpaper in Phootshop CS3
Next we’ll write the next word on the central part of the picture.
Make a Diablo III styled wallpaper in Phootshop CS3
Select the next parameters for the text’s layer.
Make a Diablo III styled wallpaper in Phootshop CS3
Select also for the new layer Blending Options>Drop Shadow, following all the selections from below.
Make a Diablo III styled wallpaper in Phootshop CS3
Blending Options>Bevel and Emboss
Make a Diablo III styled wallpaper in Phootshop CS3
Blending Options>Bevel and Emboss>Contour
Make a Diablo III styled wallpaper in Phootshop CS3
Blending Options>Bevel and Emboss>Texture
Make a Diablo III styled wallpaper in Phootshop CS3
Blending Options>Gradient Overlay
Make a Diablo III styled wallpaper in Phootshop CS3
Gradient Editor
Make a Diablo III styled wallpaper in Phootshop CS3
Blending Options>Stroke
Make a Diablo III styled wallpaper in Phootshop CS3

Final result:

Read More

Flooded Scene Creating In Photoshop


In this tutorial, we will learn how to manipulate a simple photo into a flooding torrent of a scene. We'll use some relatively simple techniques to give this image a semi-realistic, stylized feel. Let's get started
Read More

How to Color Inked Line Art in Photoshop

In this Photoshop tutorial, I’m going give you a general overview of how I digitally color an illustration. We’ll go over scanning, cleaning, flatting, coloring, rendering, and texturing techniques. There’s just as many ways to coloring a drawing digitally as there is to painting a picture. This tutorial won’t focus on any specific way to blend or choose colors; we’ll assume you have knowledge of the basics.

Preview

Click the image below to see it in full size.
Read More

Photoshop Combo Moves Killer

Well, learn to defend yourself! Master these killer Photoshop keyboard combos and you’ll find yourself with more time for the important things (e.g. Facebook trivia questions). These combos assume you’re using Photoshop CS3 on Windows platform with default keyboard shortcuts.
Legend:
( ) = Repeat as desired
{ } = Manual Input Required
Top 10 Killer Photoshop Combos
Read More

How To Beautify Your Face in Photoshop

This Photoshop tutorial will show you how to beautify a face. The corrections that we're going to do will make the face look different, but at the same time we avoid to make the results look unnatural like we tend to see in other Photoshop tutorials. Of course, the face we're going to work on is not going to look the same when we're done, but we will only make necessary and subtle changes. We will use Photoshop to fix skin, remove blemishes and wrinkles, whiten and fix teeth, fix hair, fix eyebrows, increase definition in the eyes and crop and sharpen the image in the final steps.
I'm not only going to show you how to beautify a face, but I will also make suggestions that can be useful for other projects. I will also explain how to use some of the tools involved and show you how to work in a non-destructive way.
The tutorial is written for Photoshop 7 and higher, but some of the techniques that are shown in this tutorial or advice that is given, can also be useful for those who use older versions of Photoshop.
We're going to use the following image:

Beautify a Face - Original Image
Read More

Furry Text

This Photoshop tutorial will show you how to create text with a furry texture.
Step 1,2.
Read More

Outer Glow layer style in photoshop

Photoshop layer styles are a popular way to add effects, such as drop shadows and strokes, to layers in a non-destructive way. With the right knowledge and experience, any effect can be achieved. To achieve these effects, however, you need to understand what each setting does and how they can be combined to achieve a certain look. we will explain every aspect of Photoshop's layer styles feature and show you how to unlock their potential.

The Uses For an Outer Glow When you hear the name "Outer Glow" you automatically assume that this effect is limited to just that, an Outer Glow. The truth is that there is much more you can do with it than a simple glowing effect.
On top of creating a glowing effect, Outer Glow can also be used to create faux drop shadows as well as add outer strokes to your designs.
Below you will see an example of how an Outer Glow can not only make an object look like it is emitting light, but how it can also be used to create a shadow effect. Keep in mind that only the Outer Glow settings were changed between the two different looks.
Read More

Photoshop Color To Black Pencil Drawing

In this tutorial we will learn how to make any image have a Color To Black Pencil Drawing Effect.

Step 1: Open an image.

Take a Photo
Step 2: Go to Filter> Sharpen> Sharpen the Image.
Step 3: Now making for Color To Black  Image. Firsset your color palette. Press 'D' to set your foreground color to Black and press 'X' to set your background color white.

Read More