Showing posts with label Photoshop cs6. Show all posts

Using Pencil Tool and Shapes

Using Illustrator’s pencil tool and shapes of solid color, you can imitate the graphic novel styling of A Scanner Darkly. An animator from the film shows us how.

Director Richard Linklater’s A Scanner Darkly impressed audiences this summer with a stunning 2D animation style that mixes heavy blacks lines with shapes of solid color to represent a realistic image. After filming the movie live action, we used proprietary vector software to animate directly over live footage, preserving the likeness and performances of the actors – a process called “Interpolated Rotoscoping.” This tutorial will show you how I was able to recreate a similar effect using tools in Adobe llustrator. Using Illustrator’s pencil tool and shapes of solid color, you can imitate the graphic novel styling of A Scanner Darkly.

1

Select an interesting image for photo reference – the bigger the dimensions of the image the better. Go to File>Place to insert it into your Illustrator file.
Read More

How to Create Crazy Movie Poster

Christian Keyes, Ocean, Boat, Tentacle

Start with your open ocean.
Make the desired color adjustments.
Read More

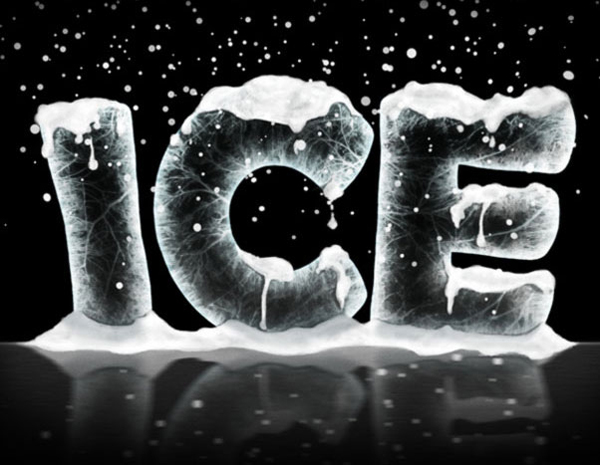
Create Ice Effect in Photoshop


Step 1 Create a document of the size you want, staying near to 1600 pixels by 1200 pixels, 300 dpi resolution (if you are going to print it) or 72 dpi if you're going to publish it on the Web. We can use 72 dpi to keep our document tidy and work faster. Set the Foreground color to black #000000 and then press Alt + Delete to fill the "Background" layer with a black color. Our "Background" layer become black with a touch!
Now choose #ff0000 as our Foreground color and type some text with the Horizontal Type Tool (T) using the settings shown below and the font we previously downloaded. We're using a red color just to create some contrast with the black background and the white effects that will come next.
Read More

Transparent Glass Letter Design in Photoshop


Step 1:

BACKGROUND LAYER
To begin this tutorial, we'll first give ourselves a nice background gradient. Now while most gradients are two-color, in Photoshop you can actually make much more complex gradients by clicking on the Gradient icon in the top left. You'll get a panel showing the gradient and you can add more colors to it. In this case, I've used three colors to make a gradual change from green to a set of blues.
Multi-color gradients can make for a stunning background. I've used a Radial Gradient and centered it to the bottom right.
Read More

New Features in Photoshop CS6

Not only does Photoshop CS6 bring with it a greatly improved and enhanced Crop Tool, it also introduces the Perspective Crop Tool, a brand new crop tool designed to easily fix common distortion and perspective problems in an image. In this tutorial, we’ll learn how it works!

Cropping Images In Photoshop Cs

Here’s a photo I’ve opened that has some issues with perspective. If you look closely, you’ll notice that instead of appearing vertically straight as it does in real life, the hotel seems to be tilting in on itself as it rises upward, making the top appear more narrow than the bottom. The smaller building to the left of the hotel also looks like it’s leaning inward. In fact, everything in the photo seems to be tilting towards some imaginary center point high above the image:
The Golden North Hotel in Alaska. Image © 2012 Steve Patterson
Photos of buildings often suffer from perspective distortion.
Download our tutorials as print-ready PDFs! Learning Photoshop has never been easier!

The New Perspective Crop Tool

Read More