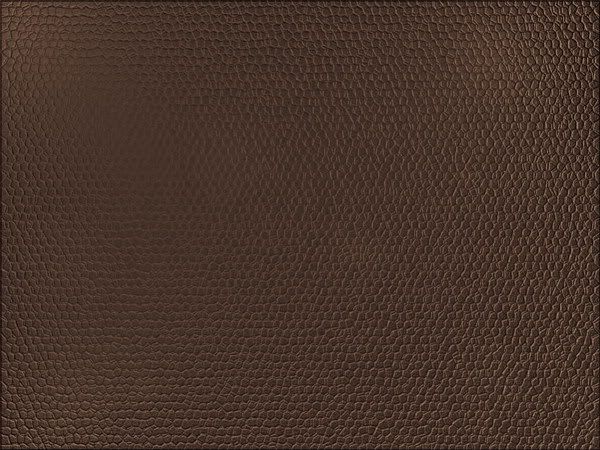
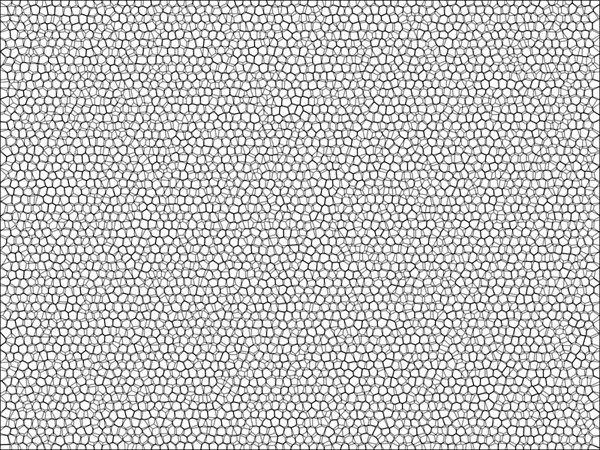
Final Product What You'll Be Creating
In today’s quick tip tutorial we will demonstrate how to create a leather texture from scratch using Photoshop filters.
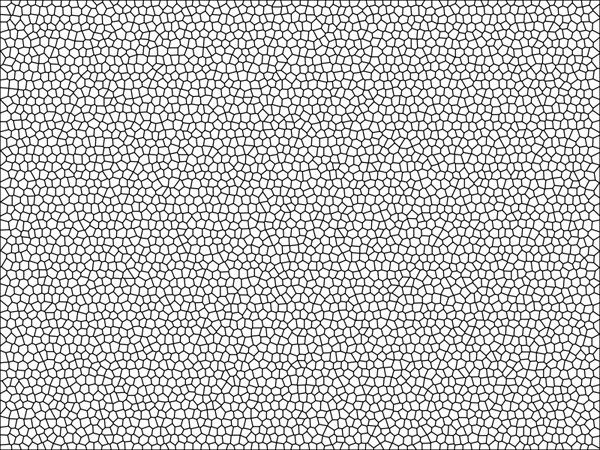
Step 1
Create a new file with a white background. Set the foreground and background color to black and white by pressing D. Click Filter > Texture > Stained Glass.
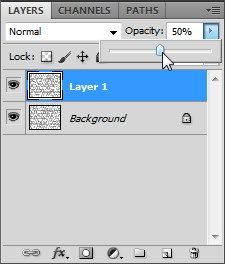
Step 2
Create new layer and fill it with white. Change its opacity to 50%. Repeat previous filter by pressing Cmd + F. If you want tweak the setting use Cmd + Alt + F.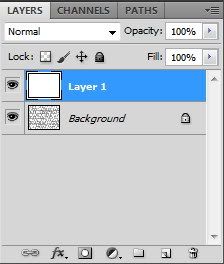
Step 3
Press Cmd + E to merge both layers. Click Filter > Noise > Add Noise.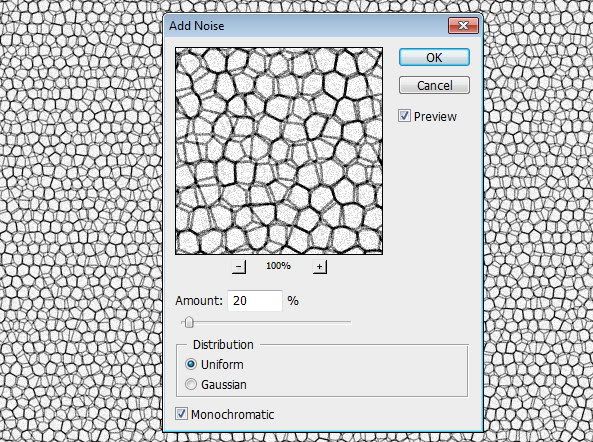
Step 4
Press Cmd + A then Cmd + C to copy all to clipboard. Open Channels panel and create new channel. Then Paste (Cmd + V).
Step 5
Click RGB channel to return to Background layer. Click Edit > Fill, choose Use: Color and pick your color. You can use any color you want, just make sure it’s dark enough for the next filter.
Step 6
Click Filter > Render > Light Effects. In Texture Channel choose Alpha 1.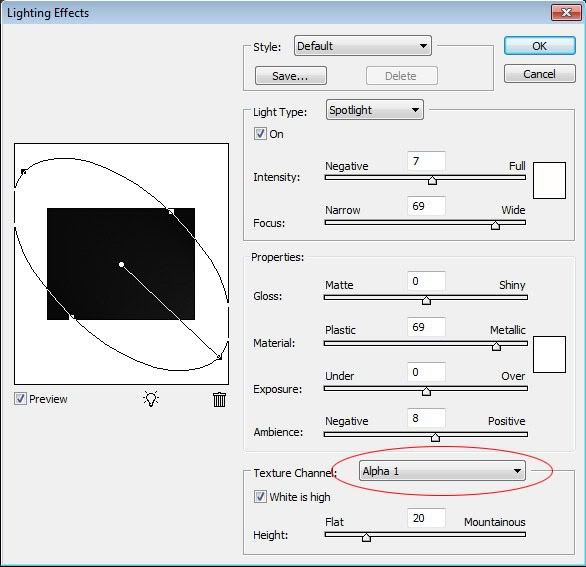
Step 7
The default light is too dark. You need to add more light sources by dragging the lamp icon to the preview box. Set its type to Omni.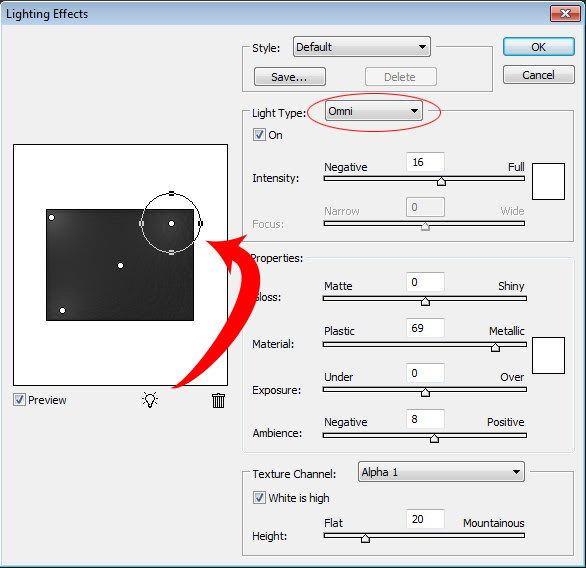
Step 8
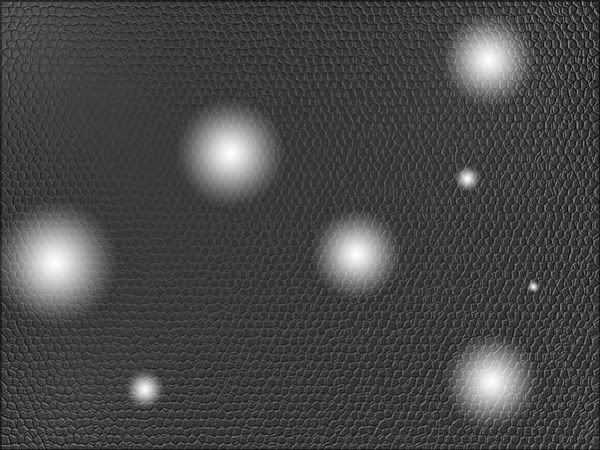
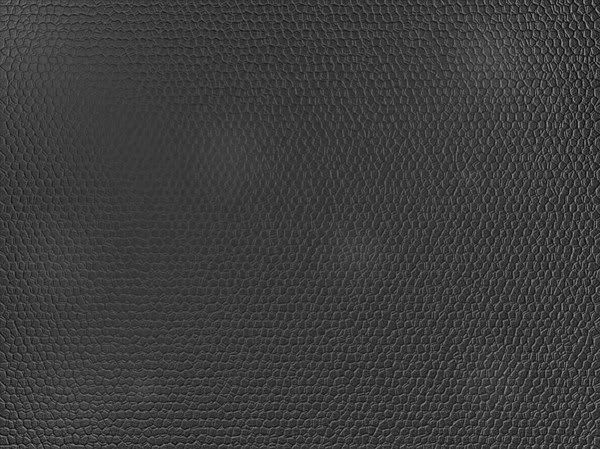
Click OK and the result should look something like below.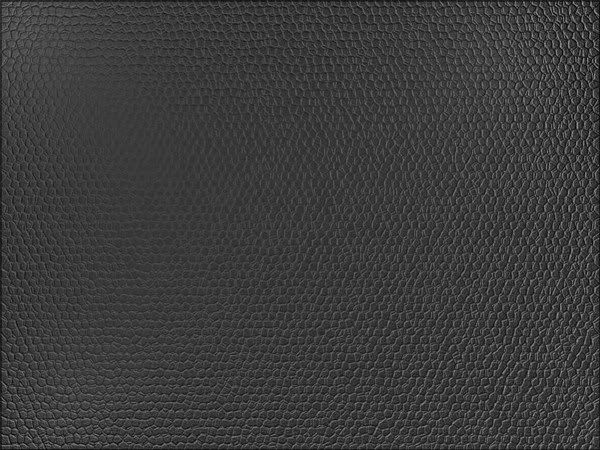
Step 9
Change the background and foreground color to white and black by pressing D then X. Activate the Gradient Tool, choose radial with white to transparent. Create a new layer and draw a gradient.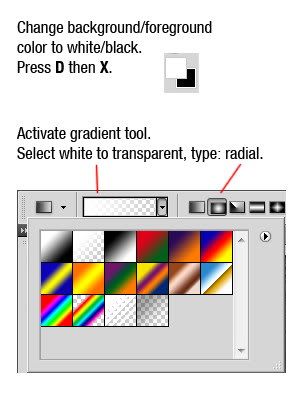
Step 10
Change opacity to 4%. This will add subtle lighting to the leather.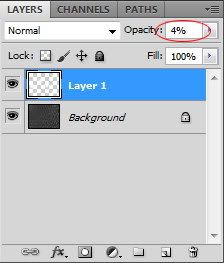
Step 11
The Lighting Effects filter will add a small border to the image (just a few pixels). To remove it, click Image > Canvas Size and reduce the size of the image.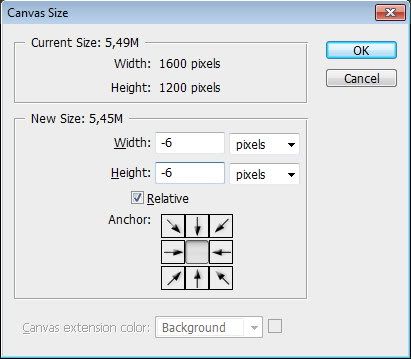
Step 12 (Optional)
You can change the color by adding an adjustment layer Hue/Saturation. Check colorize and move sliders until you satisfied with the result.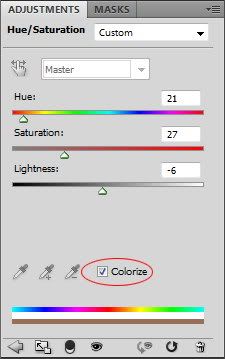
Final Image
That’s it. I hope you like the final result and have learned some new techniques from this short quick tip tutorial.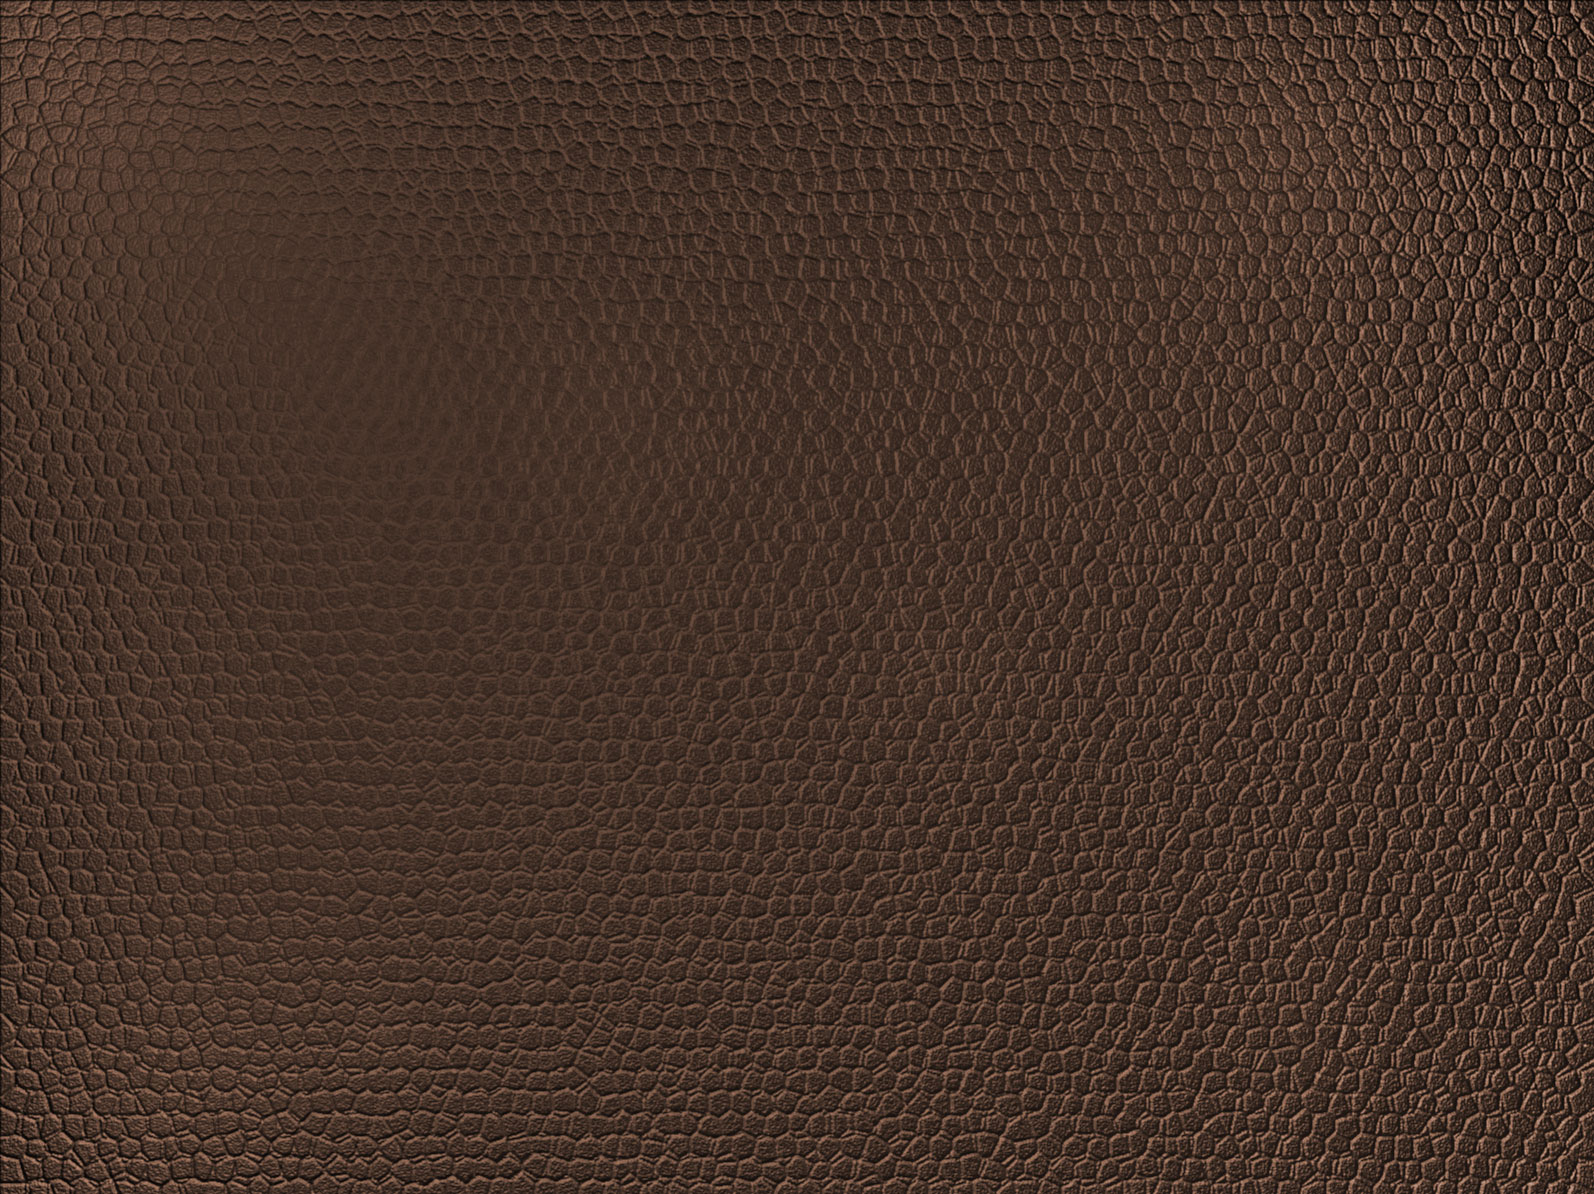


1 comments:
excellent effect made for leather.
Post a Comment