Quick White Balance Correction Techniques
Here are several of the most popular white correction method that's fast and easy to use. They are sorted by their effectiveness with the best technique first.Color Correcting with Raw Editor
If your digital camera supports the raw file format and you've taken your photo in this format, you're in luck. White balance in raw files can be easily fixed at none or minimal quality loss. Because most cameras take raw photos in 12 bit color (4096 shades/color) instead of 8 bit color (256 shades/color), this gives you powerful white balance adjustments with no visible loss in quality.Tip: Don't let the bit number fool you! Although most digital cameras are only able to produce 12 bit out of the 16 bit color, they're still a lot better than 8 bit color. 12 bit color contains 4096 tones per color and that's over 68 million colors and 4000 times better than 8 bit color!
Step 1
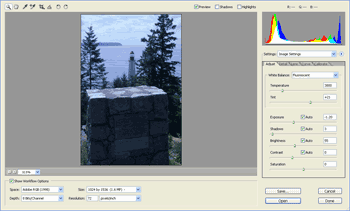
Open your raw file with Adobe Photoshop. The raw editor should appear.
Step 2
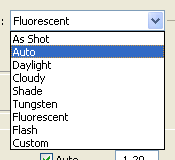
Try using auto white balance first. To do this, select Auto from the White Balance drop down 
Step 3
If that does not work or if you would like a more precise white balance adjustment, manually select a gray area in your image. To do this, use the White Balance Tool (I) and click on a point that's supposed to be gray. Try to select a point that's closest to 50% gray for best results.
Step 4
You may make final slight adjustments by adjusting the Temperature and Tint sliders.
Final Results
Rollover the image to see the before and after effect.

0 comments:
Post a Comment