This technique produce the best results and is extremely fast and easy. Use this whenever possible for non-raw photos.
Step 1
Color Correcting Overlay with Photoshop
This is one of the techniques I've developed probably over a year ago when I wasn't very good with Photoshop. It worked very well on some photos, but not on all. If you're unable to fix the white balance with the Levels technique, give this one a try.
Step 1
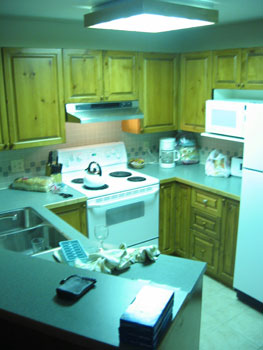
Download and save the following JPG file to your computer then open it inside Adobe Photoshop.
kitchen 23.94 Kb (right-mouse click> Save As)
Step 2
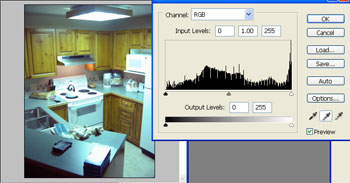
Try using the Levels technique above. You'll notice that it's difficult to get the correct white balance and even when you do get better results, it doesn'tseem like it's the best. At times like this, the Color Overlay technique will work well.
Step 3
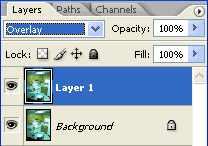
Let's start this technique. Duplicate the photo layer and change the blending mode of the new layer to Overlay.
Step 4
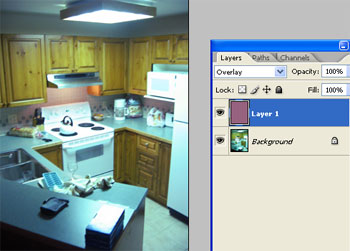
Apply an Average filter (Filter> Blur> Average) to the new layer then invert the layer(Ctrl+I).
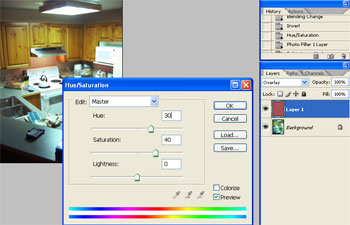
Step 5
To tune the results, open the Hue/Saturation tool (Image> Adjustments> Hue/Saturation or Ctrl+U) and adjust the Hue and saturation slightly. Adjusting the hue will affect the tint and adjusting the saturation will affect the strength.
Final Results
Rollover the image to see the before and after effect.


0 comments:
Post a Comment