Foreground Lighting Using Photoshop

Improve your portraits with this easy and effective foreground lighting effect. In this Photoshop tutorial, you will learn how to dim the background to add focus to the subject. This effect may sound simple, but it does an exceptional job fixing portraits with busy backgrounds.

Foreground Lighting Photoshop Tutorial

Foreground Lighting Photoshop Tutorial


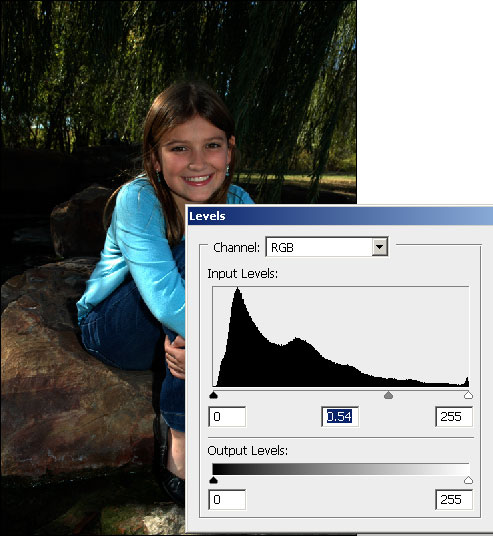
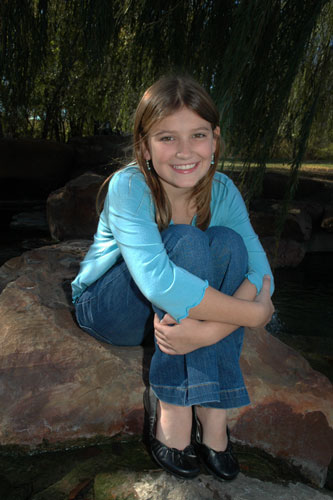
Step 1: Open a portrait photo

First, open an image of a portrait with a busy background that you would like to apply this effect to. This effect will make the background darker to add focus to the subject.
undefined

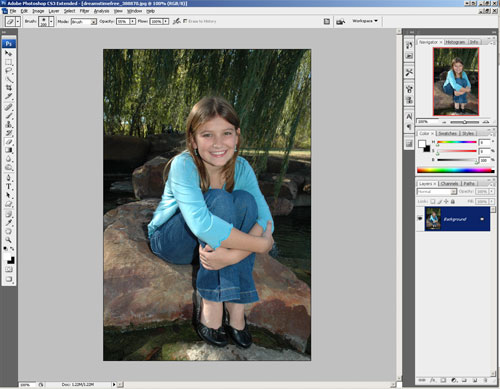
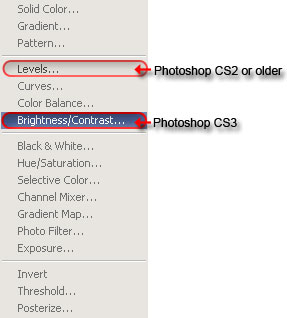
Step 2: Add an adjustment layer

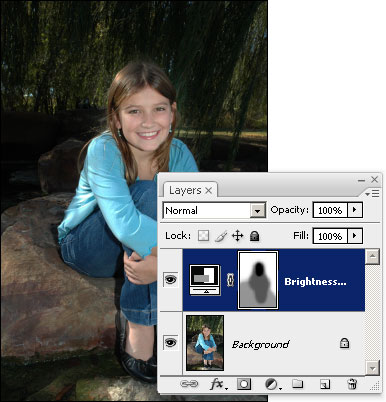
Now we'll need to add an adjustment layer that will make the image darker. In the Layers palette, click on the New Adjustment Layer button.
undefined
There are many ways to darken the image, but the simplist methods are shown below. We don't recommend using the Brightness/Contrast tool in Photoshop CS2 or older because they produce poor results. The Brightness/Contrast tool has been greatly improved in Photoshop CS3, but if you're an experienced Photoshop user and you want more control, we recommend using the Levels or Curves tool instead.
undefined
If you picked the Brightness/Contrast adjustment layer, simply reduce the brightness and increase the contrast. As you adjust the settings, focus on the background instead of the subject because this effect will only be used to darken the background.
undefined
If you picked the Levels adjustment layer instead of the Brightness/Contrast adjustment layer, start by moving the middle input slider towards the right. You may play around with the other input sliders and adjust the output levels to get the effect that you like. Remember to focus on the background instead of the foreground because this layer will only be used to darken the background.

undefined

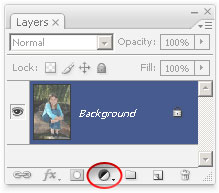
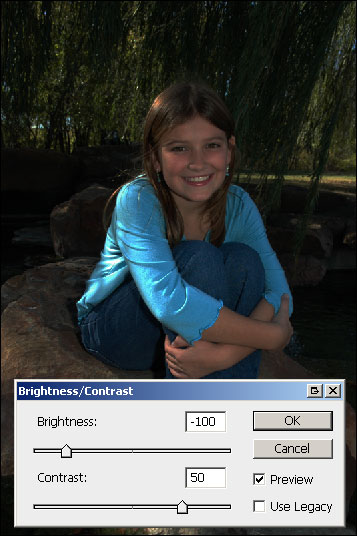
Step 3: Mask the adjustment layer

The adjustment layer darkened the entire image. Now we have to mask out the areas that we don't want to be darkened - the subject/person. In the Layers palette, you should now see a new adjustment layer with a layer mask. Make sure that the layer mask is selected by clicking on the layer mask thumbnail. It should have a white border to indicated that it is activated.
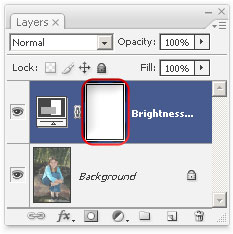
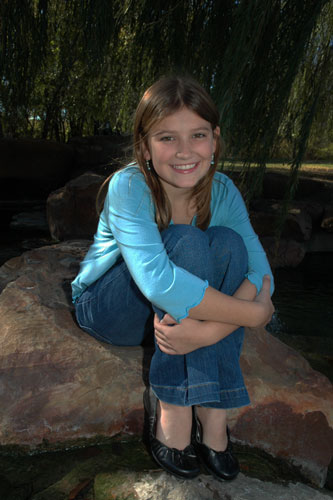
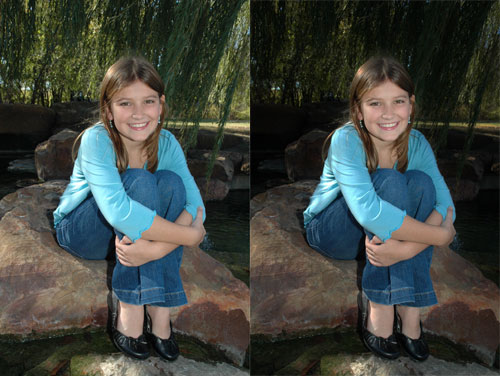
undefined
Now select the Eraser tool from the toolbar. Also, make sure that your foreground and background colors are set to the default. Simply press the D key on your keyboard to reset the foreground and background colors to the default colors.
undefined
Once you have the Eraser tool selected, the option bar near the top will show you the settings you can set for the Eraser tool. Set the Opacity to 50% and adjust the brush size and hardness.
undefined
Using the Eraser tool, erase the foreground to make it brighter. If you make a mistake, you can switch back to the brush tool to paint back the areas that you want to reverse.
undefined
Here's what my image looks like after erasing the foreground.
undefined
Erase the foreground or just the subject again. This time, I ony erased the subject to keep the rock a little darker.
undefined
In the option bar, set the Opacity of the brush to 100%.
undefined
We'll apply one more layer of erasing to the layer mask. This time, I only erased the face. In the image below, you can see the areas that I erased. If you look closely, you can see a halo around the subjects head. This is because I was being sloppy and my brush hardness was too soft. I can fix this by switching back to the brush tool and using a stronger hardness (50%) to paint back the background.
undefined

Final Results

undefined
Dimming the background is a simple, but truely effective way to hide busy backgrounds and increase focus to the subject.
Left to right: Before and after

0 comments:

Post a Comment