In this lesson I will explain to you some main principles of creation of a collage, as “The Arch”. We will use photos which we have found in the Internet.
Today I am going to show you a useful tutorial. In this tutorial you can learn how to create old style photo effect with interesting accent. So let’s have a try…
At first you need to find some appropriate picture for our tutorial. Actually you can find pictures in Google search or use this picture. Open our original picture and apply Image > Adjustments > Hue/Saturation with next presets to change hue and saturation:
In this tutorial we will learn how to create a candy cane like text effect with the help of some simple Photoshop techniques.
Step 1: Some words about the font
Download the typeface Candice.
You’ll also find instructions on how to install the font in case you never did that before.
Feel free to use another font if you like to, but Candice is really a nice fit for our text effect as well as it is completely free.
In this photo effects tutorial, we'll learn how to easily convert a portrait photo into a pencil sketch with Photoshop. The initial sketch will appear in black and white, but at the end of the tutorial, we'll learn how to colorize it with the photo's original colors! In the next tutorial, we'll learn a slightly different way to convert an image into a sketch, one that's usually better suited for objects or landscape photos.
I'll be using Photoshop CS5 throughout this tutorial but the steps apply to any recent version of Photoshop. If you're using Photoshop Elements 8 or 9, you'll find that version of the tutorial here.
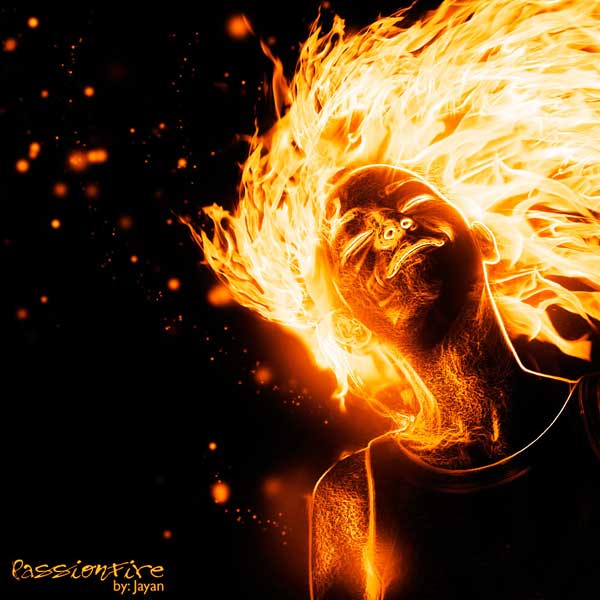
In this tutorial, we’ll manipulate a picture so it looks like a woman burning in flames. The idea behind this manipulation was to create a nice looking illustration, only by using simple techniques and tools such as the Brush tool and Warp command. I hope you enjoy the tutorial and try it with your own stock imagery.
In this tutorial I will show you how to make that cool aqua text that is on my header. In the end
you text will look like the O below. (based on the look of a text created by robouk.mchost.net )
n this tutorial, I will show you how to make a stunning 3D text effect using different textures to give it a unique look with Xsara3D & Photoshop.
Final Image Preview
Start by creating each letter separately in a 3D program, I use Xara3D (download the Xara3D 6 trial to your Desktop, run the installer file and follow the on-screen instructions), and import them into a Photoshop document.
Learn how to create a coffee shop advertisement using Photoshop and iClone4. The first part of this tutorial will show you how to create a swirling milky coffee. The second part will show you how to use iClone to put a 3D model in the coffee. You’ll finish the artwork in Photoshop where you’ll combine the 3D model and coffee together and apply the finishing touches.
In this tutorial, we are going to design a simple card in Photoshop. I hope you enjoy this tutorial and that it inspires you to create your own postcard fo!
Final Image Preview
Create a new document (Ctrl+N) in Photoshop with the size 1920px by 1200px (RGB color mode) at a resolution of 72 pixels/inch. Using the Rectangle Tool (U), let’s represent a big rectangle reserved for background of the card we want to have.
In this simple Photoshop tutorial we’ll be looking at a simple technique that’s quite popular at the moment. The technique is using gradients/brushes to make soft highlights/glows on things, it’s particularly popular with some styles of forum skins. You can see the end result of this tutorial below.
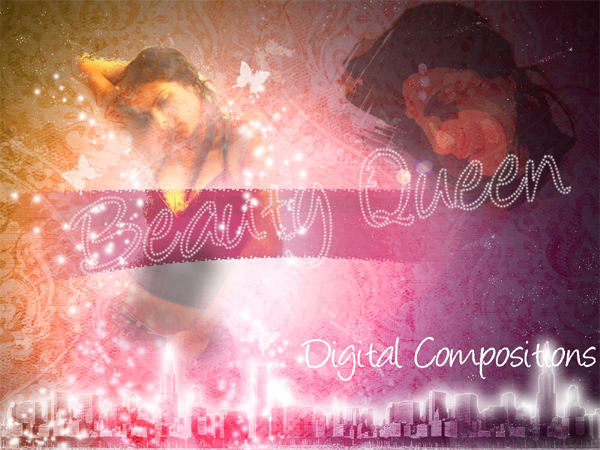
This tutorial will help you create a fashion wallpaper with several techniques. It also shows you the effectiveness of default Photoshop brushes & blend modes, and how you can use them to greatly improve artworks. Fashion Wallpaper Photoshop Tutorial Preview of Final Results
Make your photos interesting with this popular effect created from a combination of three photo effects. In this Photoshop tutorial, you’ll learn how to create common photo effects that can be combined to simulate the trendy effect many photographers use on their photos. Preview of Final Results
Ever wondered how to create a textured, abstract piece of art only using Illustrator. Well, here your challenge is to learn how to do it! We’ll be using mostly the Blend Tool, Paintbrush Tool and textures to enhance the image. A basic understanding of each and every tool is advised.
Explore the three quick white balance correction techniques and learn how to manually calibrate the balance of each channel. White balance is a feature found in digital cameras to prevent color casts by adjusting the temperature of the photo. However, lighting variance and wrong white balance settings may produce color casts that require post processing.
Quick White Balance Correction Techniques
Here are several of the most popular white correction method that's fast and easy to use. They are sorted by their effectiveness with the best technique first.
Color Correcting with Raw Editor
If your digital camera supports the raw file format and you've taken your photo in this format, you're in luck. White balance in raw files can be easily fixed at none or minimal quality loss. Because most cameras take raw photos in 12 bit color (4096 shades/color) instead of 8 bit color (256 shades/color), this gives you powerful white balance adjustments with no visible loss in quality. Tip: Don't let the bit number fool you! Although most digital cameras are only able to produce 12 bit out of the 16 bit color, they're still a lot better than 8 bit color. 12 bit color contains 4096 tones per color and that's over 68 million colors and 4000 times better than 8 bit color!
Step 1
Open your raw file with Adobe Photoshop. The raw editor should appear.


