Learn how to tone map with Photoshop CS3 to create beautiful high dynamic range (HDR) photos. The final result is exceedingly better than Photoshop's local adaptation and similar to Photomatix's tone mapping.
HDR Tone Mapping
What is Tone Mapping?
Tone mapping compresses the tonal values of a high dynamic range image into a lower one. The result is an image with more visible details that would not be seen on an image with lower dynamic range.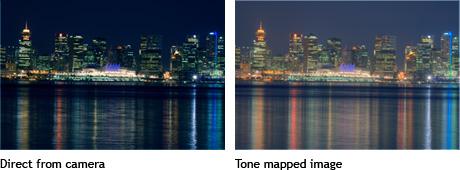
How does Tone Mapping Work?
Tone mapping works by merging multiple images with different exposures into one image. Each image contains details not visible in another. To take these images, use the Automatic Exposure Bracketing feature on your camera to capture three images of different exposures. You may need to place your camera on a tripod to prevent camera movement.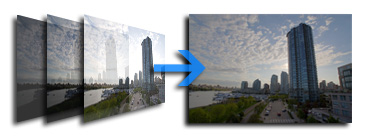
Tone Mapping Methods
Most common methods :- Using Adobe Photoshop to merge the images into a HDR file then converting the image to an 8-bit file using local adaptation.
- Using HDRsoft Photomatix to create a HDR file then tone mapping the HDR file into a 8-bit file.
Layered Tone Mapping with Photoshop
Although Photomatix produces amazing results and Photoshop's local adaptation methods can create satisfactory results, none of them can produce a layered file. In this Photoshop CS3 tutorial, you'll learn how to tone map three exposures with results better than Photoshop CS3's local adaptation and similar to Photomatix tone mapping. In addition, the document will have seperate layer allowing advance Photoshop users to tweak their image with greater control.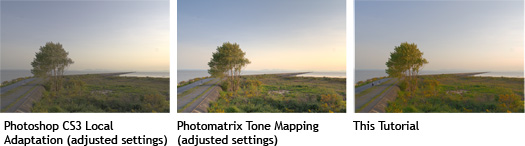
Before We Begin
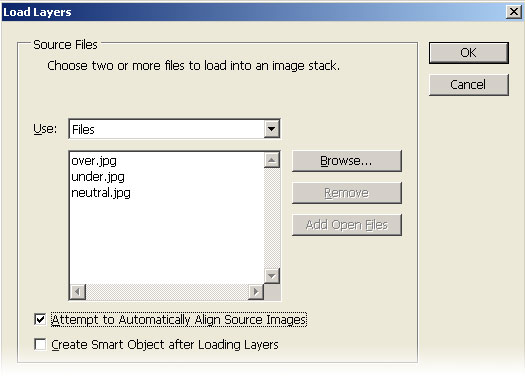
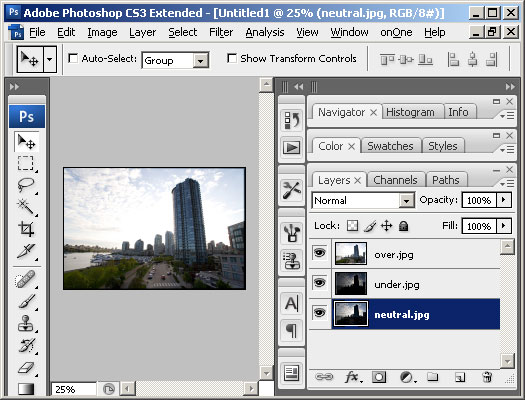
Download the following three images to your hard Drive- neutral.jpg
- under.jpg
- over.jpg
First, we'll need to load the three images into Photoshop. We will use the Load Files into Stack feature for this. To access this, select the File> Scripts menu and choose Load Files into Stack.
The Load Layers window should appear. In the Load Layers window, browse for the three images you've downloaded and add them to the list. Checkmark the "Attempt to Automatically align Source Images. With this checked, Photoshop CS3 will try to align the images.
After waiting for Photoshop CS3 to process the images, you should end up with a new document with three layers. Make sure that the neutral.jpg layer is the bottom layer and the over.jpg layer is the top layer.
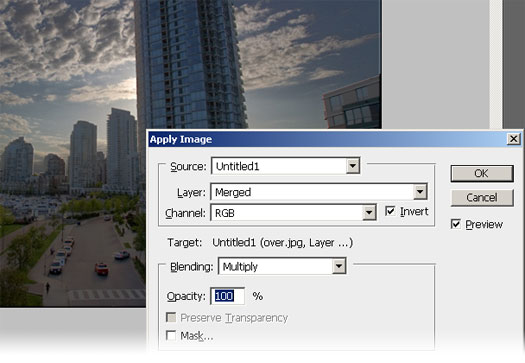
Select the over.jpg layer and add a layer mask by opening the Layer> Add Layer Mask menu and selecting Reveal All.

Open the Image menu and select Apply Image. In the Apply Image window, checkmark Invert and click OK.

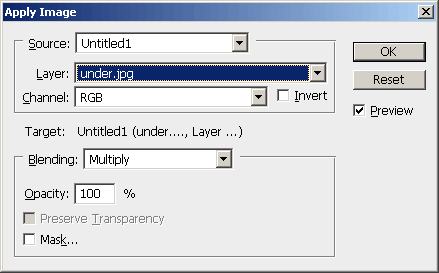
Select the under.jpg layer and add a layer mask by opening the Layer> Add Layer Mask menu and selecting Reveal All.

Open the Image menu and select Apply Image. In the Apply Image window, select the layer under.jpg, uncheck Invert, then click OK.
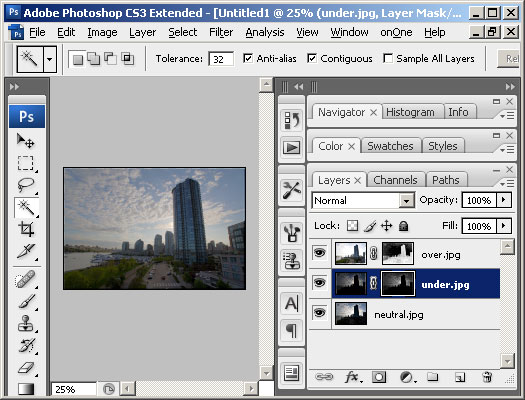
We're done tone mapping and now we have the three different exposures on their own layers with their own layer mask.
Final Results
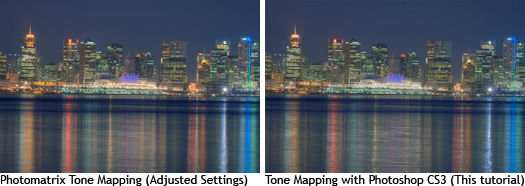
Roll over the image below to see a before and after effect of tone mapping.
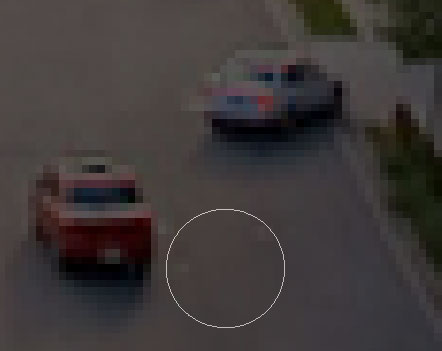
Removing Ghostings
If you look closely, you may notice some ghostings due to moving objects when the image was taken.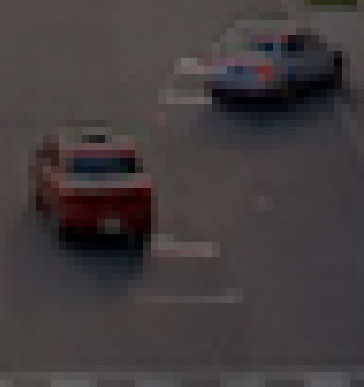
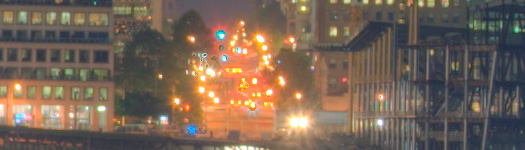
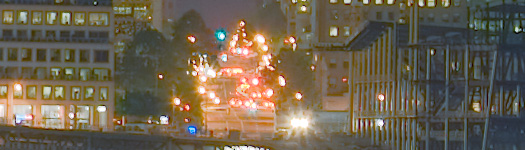
First, we'll begin with this tone mapped cityscape of Vancouver, BC that was toned mapped using both Photomatix and Photoshop CS3.
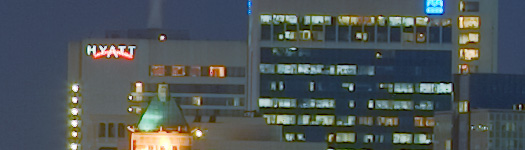
Sharpness
Photomatix:

Photoshop:
Color & Noise
Photomatix:
Photoshop:

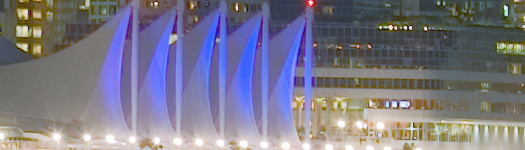
Artifacts - Changing Color
The sails in the images below are lit by a color chaging light that fades from one color to another.Photomatix:

Photoshop:
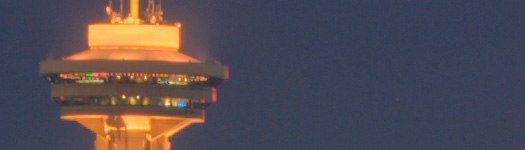
Artifacts - Flares
Photomatix:
Photoshop:
Pros and Cons
The two methods of tone mapping are similar, but they share their own pros and cons. Photomatix does a better job for most of the time. We recommend using Photomatix tone mapping first. If it doesn't produce good results, use try using this Photoshop tutorial instead. While the image generated by Photomatix has more noise and isn't as sharp, these can be fixed in Photoshop aftewards.Photomatix Tone Mapping
Photoshop CS3 (This tutorial)
Pros:
- Simple process and easy adjustments
- Excellent color results
- Smooth tones
- Exposures in their own seperate and editable layer
- Good sharpness
- Lower level of noise compared to original
- Most hot pixels are removed
- Less artifacts
- Slightly more noise than original
- Visible hot pixels
- More artifacts
- More steps required
- Tweaking the results require advance Photoshop knowledge
- Abnormal outlines around bright edges
- Less saturated colors


1 comments:
Stunning! Very well done!
Post a Comment