In this tutorial, we are going to create a glowing glossy futuristic looking text effect. Many layer styles will be applied to achieve this text effect, along with a nice brush trick to create the feathery fluffy stroke.
The Final Result:

Notes:
* the software used in this tutorial is Adobe Photoshop CS5 Extended
* the size of the final result image is 1024 * 768
* you might want to check the Basix Page to see some useful topics on dealing with Photoshop basics, such as loading palettes and some shortcuts.
* the size of the final result image is 1024 * 768
* you might want to check the Basix Page to see some useful topics on dealing with Photoshop basics, such as loading palettes and some shortcuts.
Resources:
Step 1:
- Set the Foreground color to #264c55, and the Background color to #322d2d. Create aRadial Gradient by dragging from the center of the document to one of the corners.
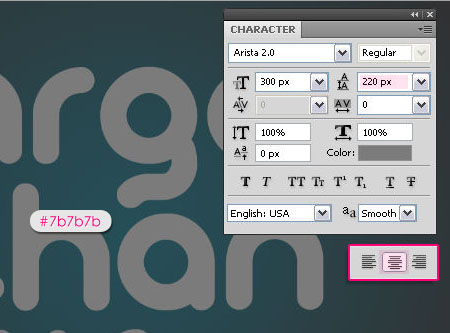
Create your text using the color #7b7b7b. The font used is Arista 2.0, and the size is 300px.
If needed, center-align your text, then open the Character panel (Window -> Character), and set the Leading value to something around 220 px, so that the vertical space between the words isn’t so big.
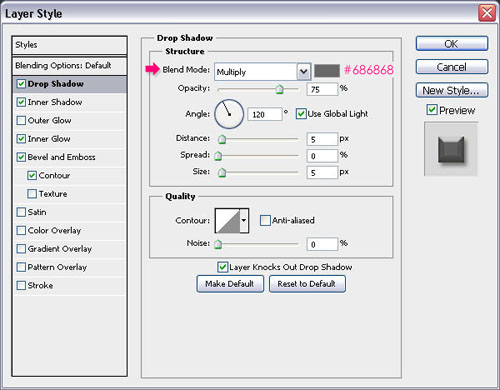
- Duplicate the text layer, then double click on the original one to apply the following styles:
- Drop Shadow: Change the color to #686868.
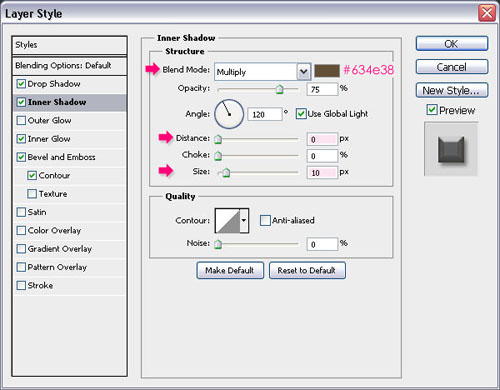
- Inner Shadow: Change the color to #634e38, the Distance to 0, and the Size to 10.
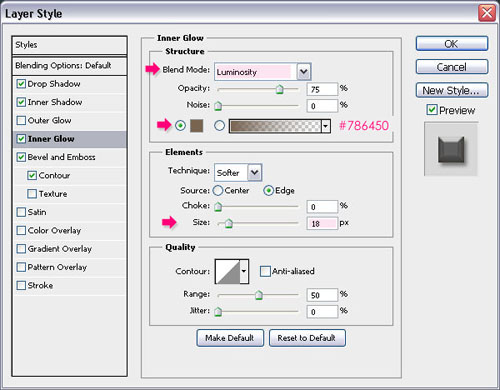
- Inner Glow: Change the Blend Mode to Luminosity, the color to #786450, and theSize to 18.
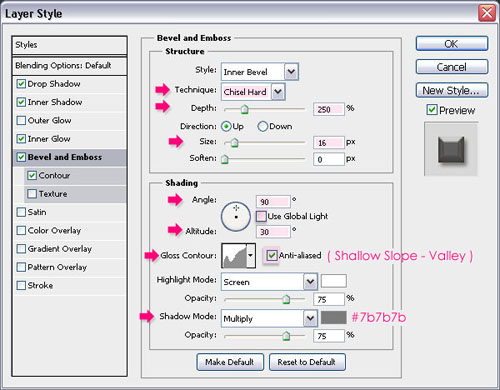
- Bevel and Emboss: Change the Technique to Chisel Hard, the Depth to 250, and the Size to 16. Remove the check next to Use Global Light, then change the Angle to90, and the Altitude to 30. Also, change the Gloss Contour to Shallow Slope – Valley, check the Anti-aliased box for a smoother effect, and change the Shadow Mode color to#7b7b7b.
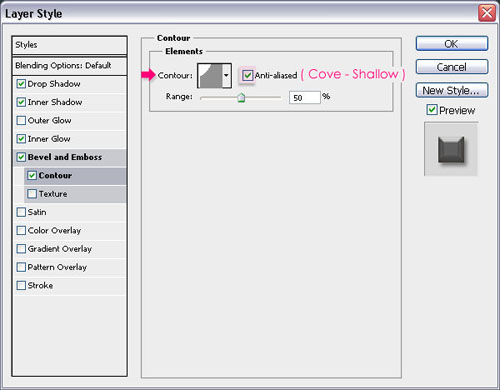
- Contour: Choose Cove – Shallow and check the Anti-aliased box as well.
Step 2:
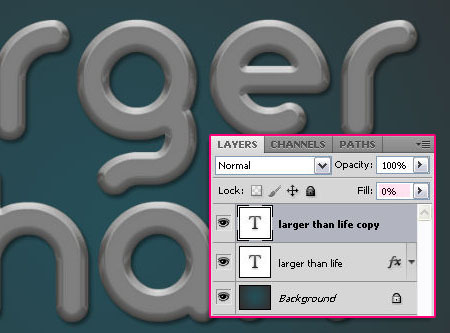
Back to the duplicated text layer, change its Fill value to 0.
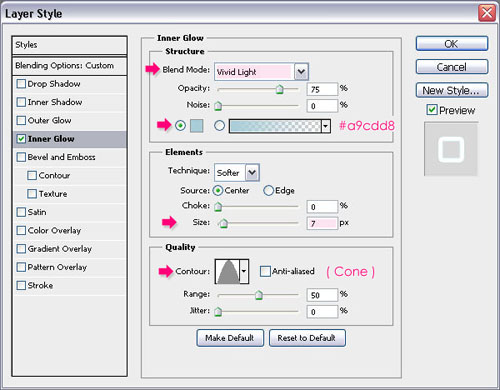
Then double click it to apply an Inner Glow, changing the Blend Mode to Vivid Light, the color to #a9cdd8, the Size to 7, and the Contour to Cone.
This is what you should get:

Step 3:
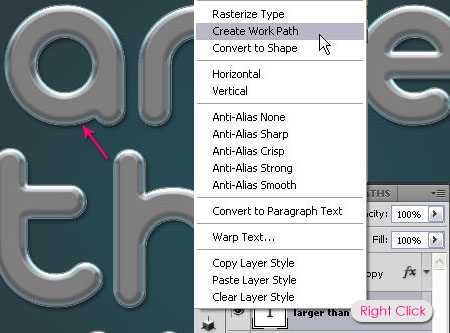
- Right click on one of the text layers and click Create Work Path.
- Select the Brush Tool, then, in the Brush panel (Window -> Brush), choose the Star 42 pixels brush.
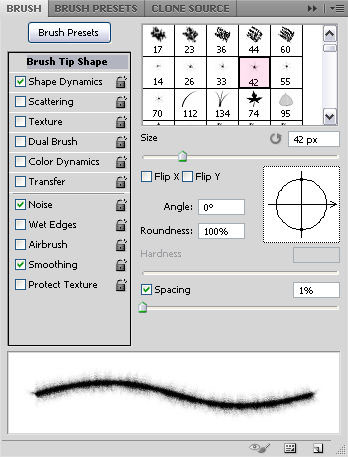
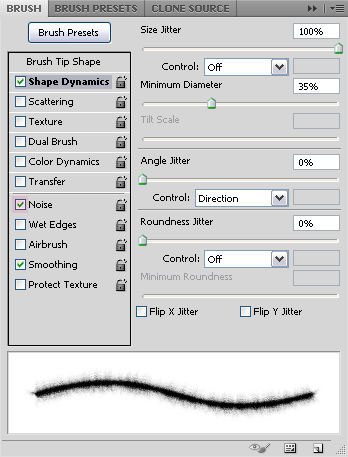
- Under Shape Dynamics, change the Size Jitter to 100% and the Minimum Diameterto 35%. Also, check the Noise box on the left side of the panel.
Step 4:
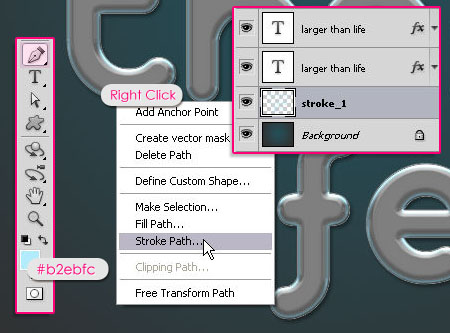
- Create a new layer under both text layers and call it “stroke_1″. Set the Foreground color to #b2ebfc, and grab the Pen Tool. Right click on the path you’ve just created and choose Stroke Path.
- Choose Brush from the Tool drop down menu, and make sure the Simulate Pressurebox is un-checked. Hit OK.
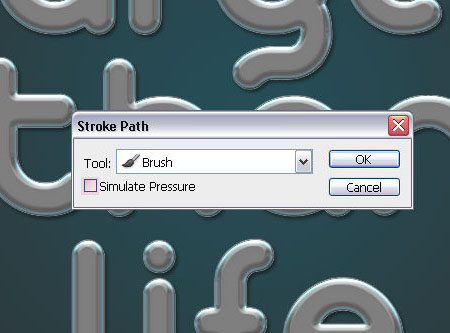
- Hit the Enter key to get rid of the path. You should get a stroke similar to this.

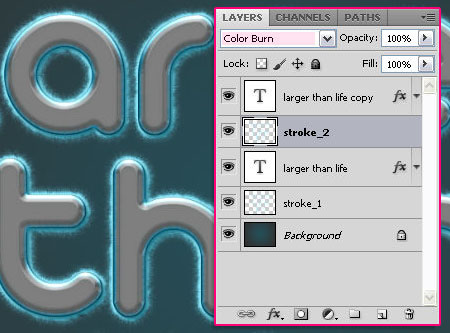
- Duplicate the “stroke_1″ layer, rename it to “stroke_2″, then drag it upwards and drop it so that it is over the original text layer and under the text layer copy, then change itsBlend Mode to Color Burn.
Step 5:
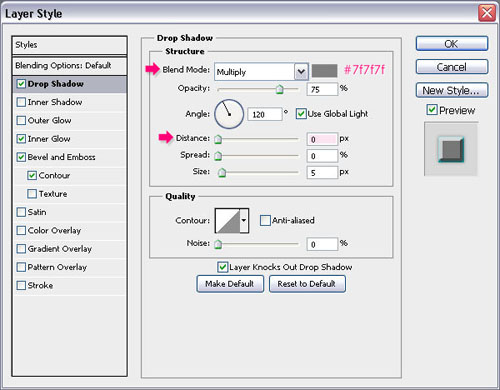
Create a new layer under the “stroke_2″ layer and call it “dots”. Double click it to apply the following styles:
- Drop Shadow: Change the color to #7f7f7f, and the Distance to 0.
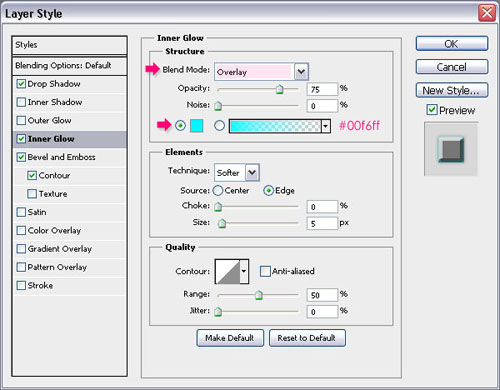
- Inner Glow: Change the Blend Mode to Overlay and the color to #00f6ff.
- Bevel and Emboss: Change the Gloss Contour to Notched Slope – Rounded and change the Shadow Mode color to #767676.
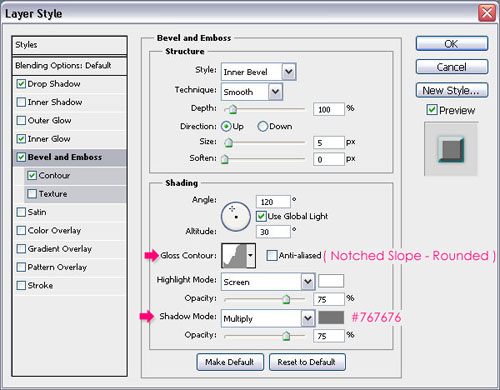
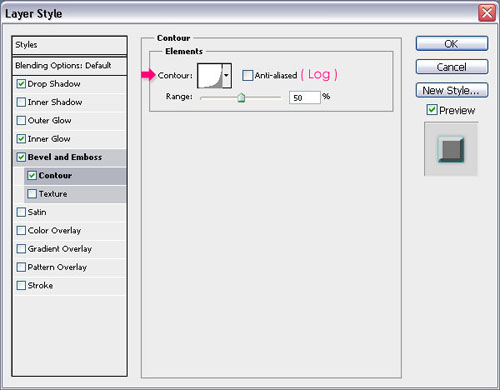
- Contour: Choose Log.
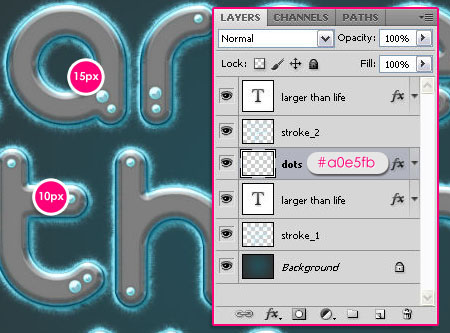
- After you applied the styles, set the Foreground color to #a0e5fb, then pick a hard brush and start adding dots (on the “dots” layer). The sizes of the brush used here are 10 and15 px.
Step 6:
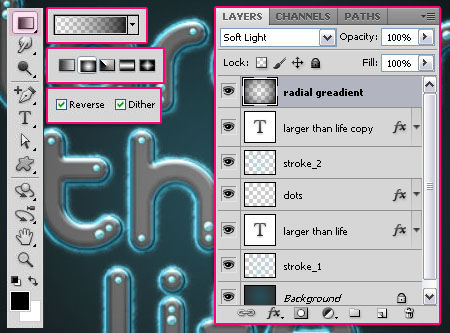
Finally, create a new layer on top of all layers, call it “radial gradient”, and change itsBlend Mode to Soft Light. Use the Gradiant Tool to crate a Radial gradient like you did in Step 1, except this time the gradient should be set to Foreground to Transparentusing a black Foreground color. Don’t forget to check the Reverse box to get the right gradient.
And we’re done!


0 comments:
Post a Comment