It’s always a good idea to keep your eyes open for inspiration for effects and designs no matter what you are doing. Graphics are everywhere and you can learn a lot by looking at what other people do. Now on to the tutorial! Here Look a Final Image of this Tutorial.

Step 1
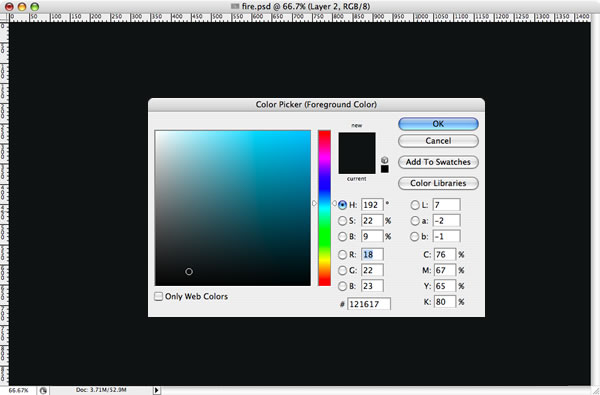
First create a new document and fill it with a dark grey.
Step 2
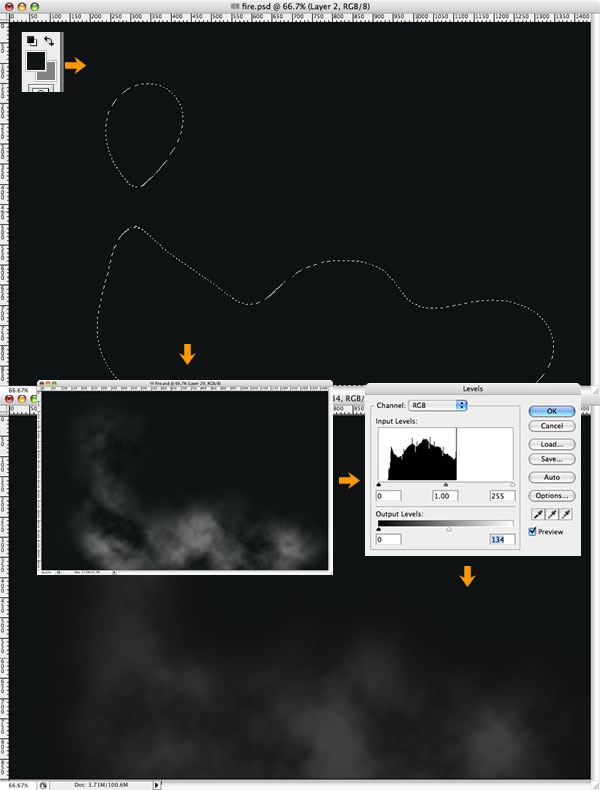
Create a new layer, call it “Clouds,” and using the Lasso Tool (L), make a selection similar to the one I’ve shown below.Set your background color to a 50% grey and the foreground to a dark grey. Go to Filter > Render > Clouds and, holding the Alt key, create clouds. After that go to Images > Adjustments > Levels, and change the input levels and output levels until you make the clouds neither too dark nor too light (see the image shown).
This layer will be on top of the others.
Step 3
Create another layer and repeat Step 2, but this time just change the background color from 50% gray to a blue or green color. This will create a small cloud, lighter than the big one.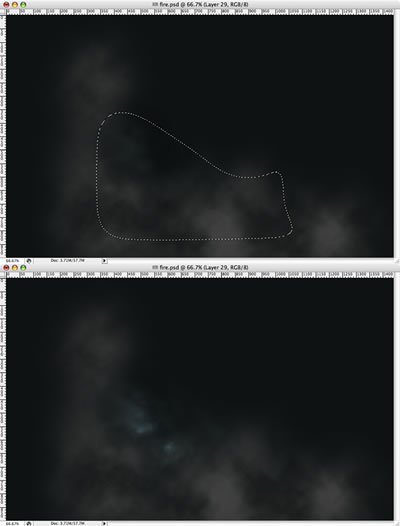
Step 4
Now we’ll switch to Adobe Illustrator to create some text. I used Times New Roman for the font. After that go to Effect > 3D > Extrude and Bevel. Now we will create the 3D text. Rotate the object and change the perspective. You can use the same values as I did (shown below).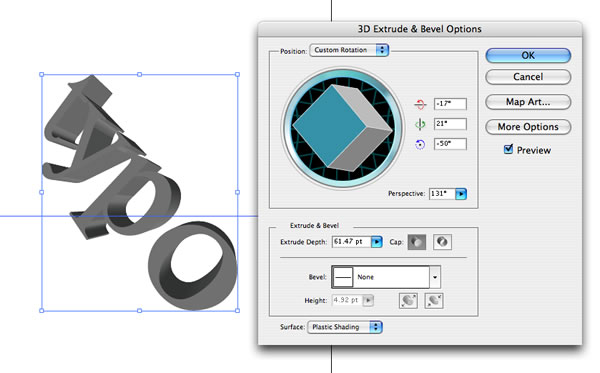
Step 5
- Copy the 3D text and paste it in Photoshop.
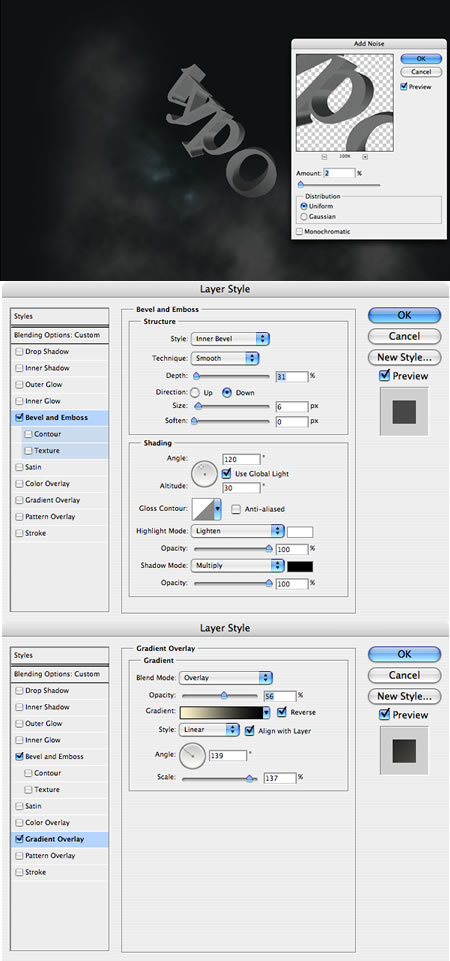
- Place it in the center and add some Noise (Filter > Noise > Add Noise).
- Now let’s change the Layer Style. First add Bevel and Emboss.
- After that, let’s add a Gradient Overlay.
Step 6
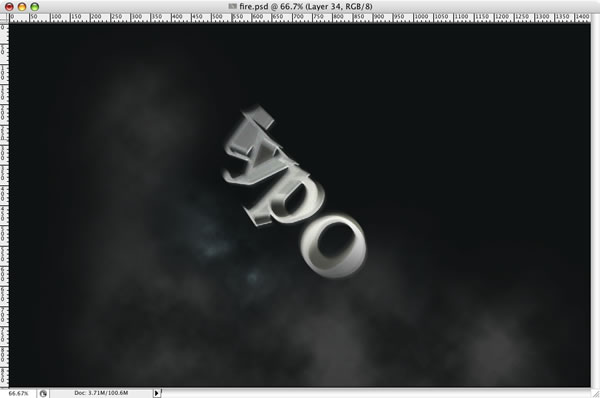
- Duplicate the Type layer and add a Motion Blur (Filter > Blur > Motion Blur).
- Set the angle of the blur to -53.
- Change the layer mode to Linear Dodge (Add).
- Create a Folder, call it “Typo,” and move these two layers into it.
Step 7
Create a new layer and repeat the Step 2, this time using a selection as shown going out the back of the letter T. This will create the trailing smoke.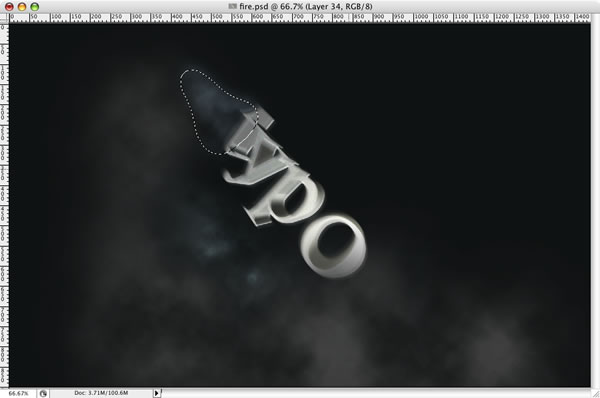
Step 8 Creating the FIRE
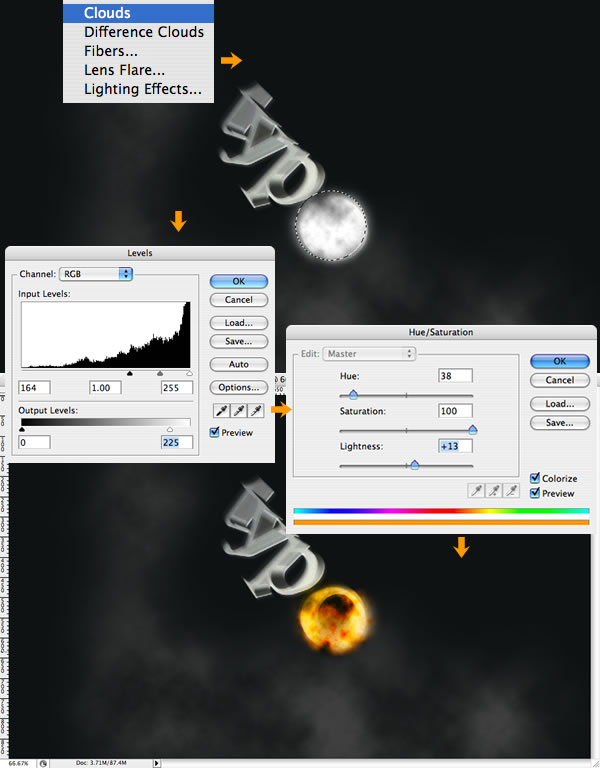
1 – Create a new layer and call it “fire1.”2 – With the Elliptical Marquee Tool (M), create a selection.
3 – Set the background color to light grey and the background to black.
4 – Create clouds as we did in Step 2.
5 – Change the Levels to increase the contrast;
6 – Change the Hue/Saturation with Colorize selected until you get an orange/yellow color.
Step 9
Create a new layer, call it “blazes,” and repeat Step 8. After that, duplicate the layer and call it “flames.” Create a folder and move the Fire1, Blazes, and Flames layers to this folder and call the whole folder “Fire.” It will be on top of the Typo layer.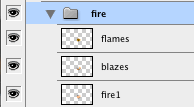
Step 10
Select the layer “blazes” and go to Filter > Liquefy. There select the Turbulence Tool (T). Now, on the edges of the fire, start creating some blazes. Use it like you would the smudge tool.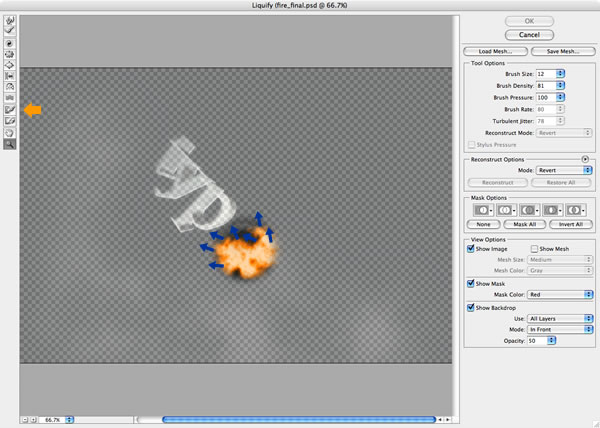
Set 11
After the Liquefy, go to Edit > Transform > Warp and change the blaze’s form to something similar to the image below. After that apply Filter > Sharpen > Sharp.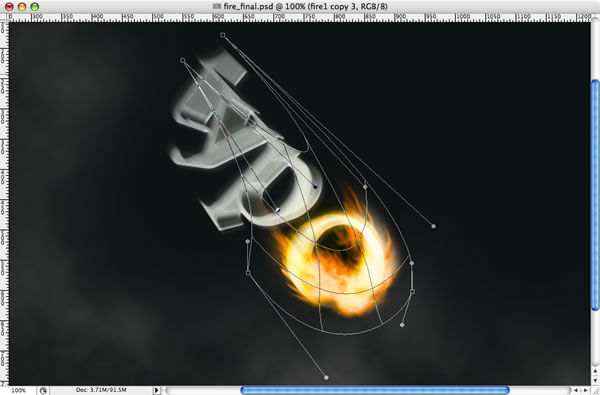
Step 12
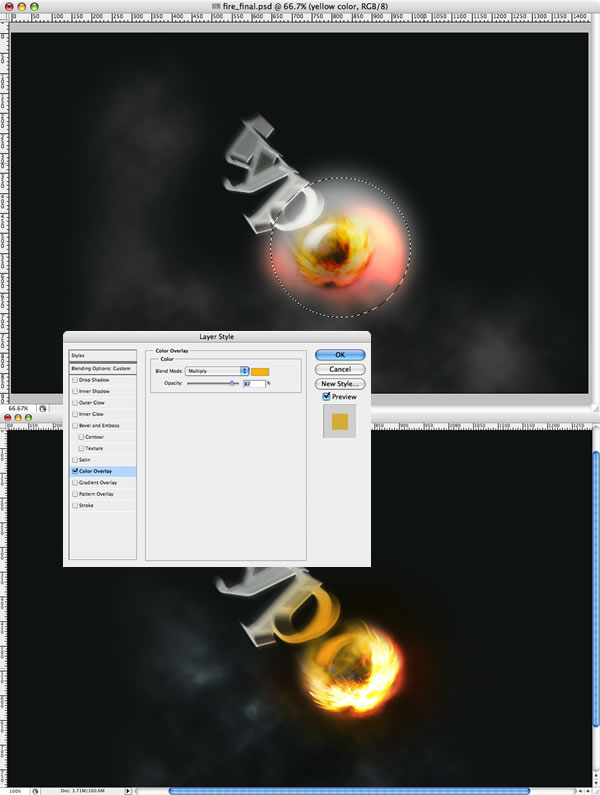
- Create a new layer and call it “yellow color.”
- Create an ellipse selection with 30px feather and fill it with white.
- After that edit the Layer Style and apply a Color Overlay using an yellow color and Multiply for the layer’s blend mode.
Step 13
The order and the Blend modes for the fire are:- Flames: Lighter Color
- Blazes: Normal
- Fire1: Lighten
- Yellow Color: Multiply
Step 14 Sparks
For the sparks we will use brushes. Create a folder and call it “Sparks.” It will be on top of the Fire folder.- Inside the folder, add a new layer.
- Fill it with black and change the Blend Mode to Color Dodge.
- Select the Brush Tool and let’s create a brush.
- In Brush Tip Shape, change the Diameter to 12, and increase the spacing.
- Select Scattering and set Scatter to the 1000% and Control to off. Change the Count to 2 and Count Jitter to 100%.
- Select white and start painting some sparks.
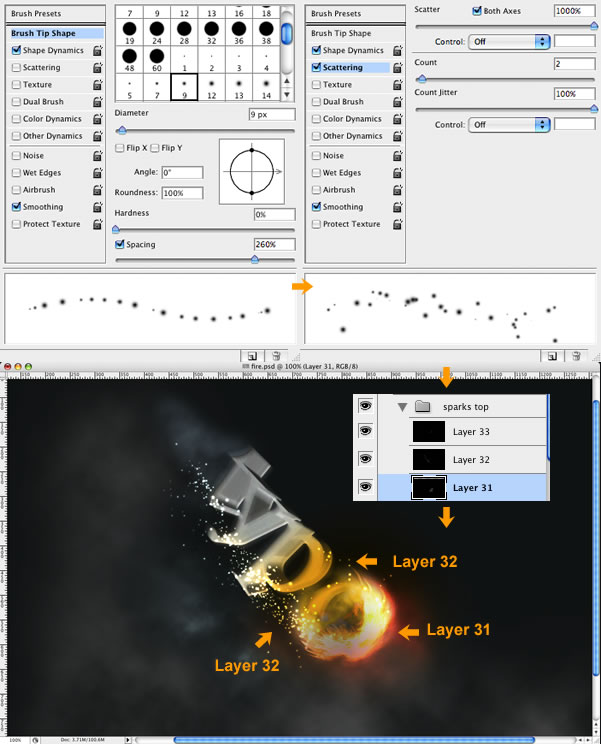
Step 15
Create a new layer and repeat the Step 14 but now change the Scatter Option to 0%. Start creating some single line sparks like swirls.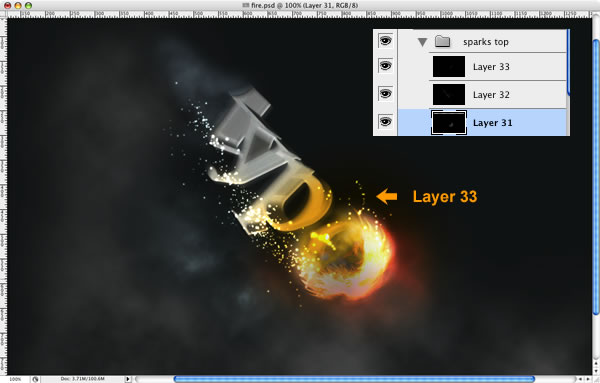
Step 16
Here I used the Gomedia Spraypaint brushes to create those tiny little sparks, but you can repeat the step 14 changing the Brush size only. Basically, create a new layer, put it behind the others, fill it with black, change the Blend Mode to Color Dodge, see the color to white, and create the sparks.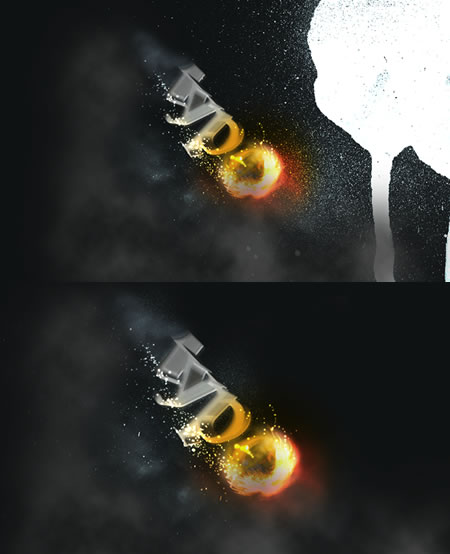
Conclusion
Click the image above to view a full screen version of the final image
0 comments:
Post a Comment