Step 1
To start softening the hair you need to have in mind:- How to use the smudge tool properly (this includes changing shape, hardness and strength and adequate them to the piece you're working on);
- To delimit parts of the hair that invisibly form a line shape (pieces of the hair);
- Smudging pieces at a time, not all at once;
If you're not so good with those, it's not a big deal, just keep reading. If by other side you're completely new to the matter, it may be a little difficult for you.
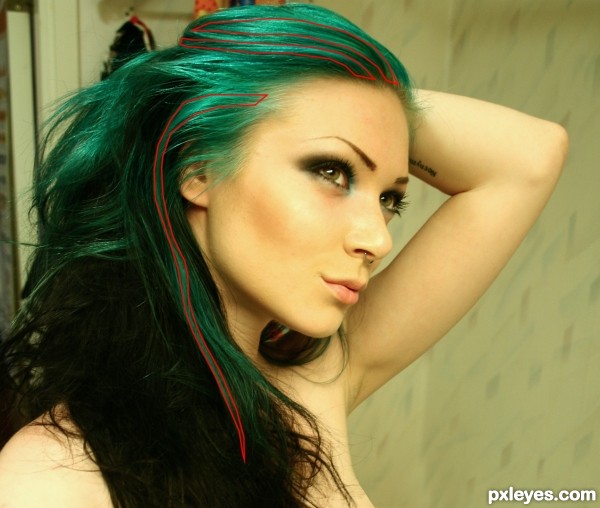
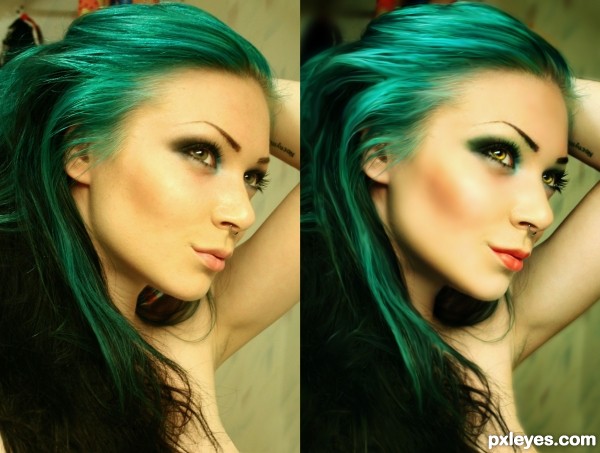
So to star0, download a stock with a pretty good amount of hair that hasn't been manipulated yet. I've chosen this one from TwiggXstock:

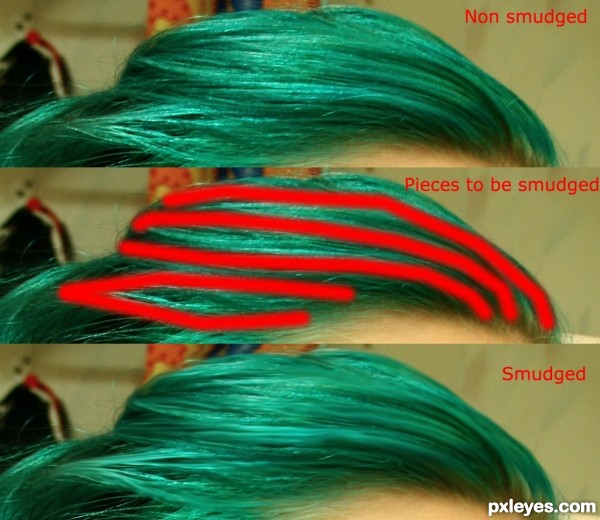
Step 2
To make it clear about what i mean with hair's pieces check the image below. I'll give various examples, which will help a lot when we'll be smudging these same pieces.Don't forget, they're not exactly precise, feel free to adjust the limits to your own preference.
Step 3
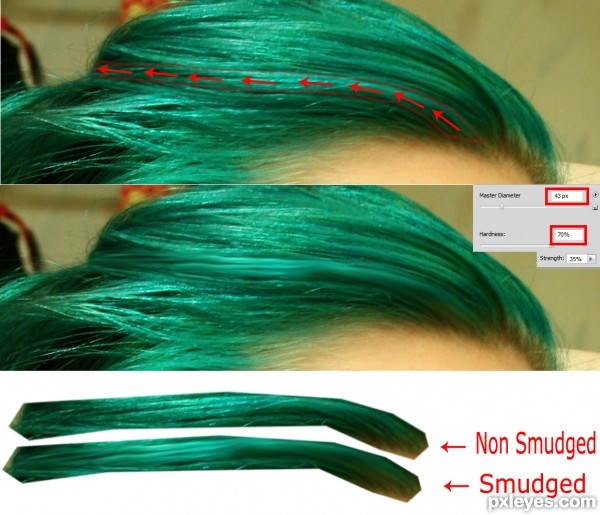
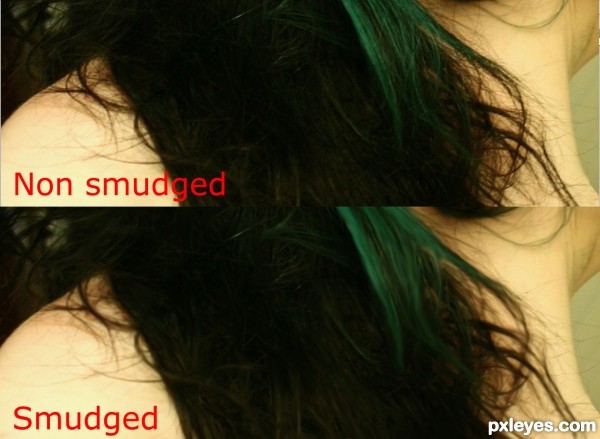
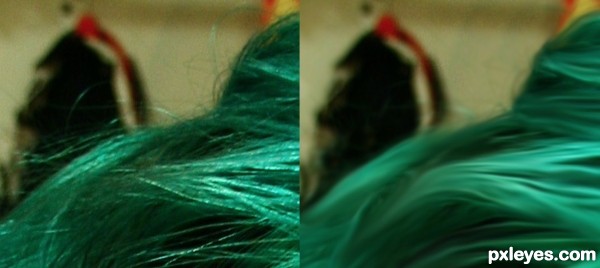
Having in mind the second piece i indicated on the last step, select the smudge tool with diameter around 40-45, hardness 70% and strength at 35%.Then apply slowly and only once (don't rush, the effect will be differently!) in a direction of right-> left, which is the same direction that the "hair goes".
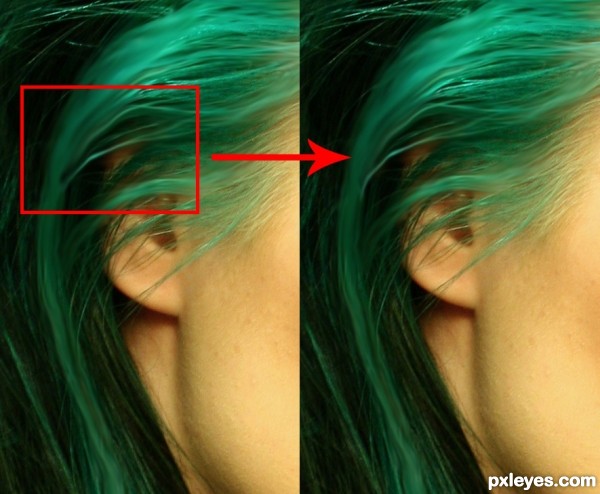
Step 4
Just so you can see the difference between slow (not extremely slow tho) and fast smudging, i'll place an image. In the early steps it may not be really noticeable but along the process and specially at the end the result is totally different.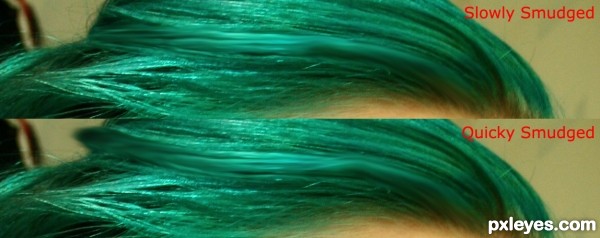
Step 5
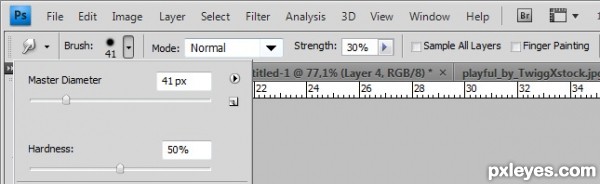
Move on to the next hair pieces and apply the same process... Don't forget to vary the diameter, strength and hardness, for example if the piece is more tight the diameter should be smaller, if the piece doesn't have a lot of details lower the strength and so on.For the second piece of hair to be smudged, the first with a stroke on red on the step2, I've used:
Diameter: 41
Hardness: 30%
Strength: 50%
Step 6
Using the technique mentioned, visually limit pieces and start smudging.Some tips:
- Avoid going out the head's border, when the piece ends between the head and the background's edge;
- Always follow the hair's' direction, if it's going right-down don't smudge it right-up;
- Try to always apply the same amount of smudge, if you press 1-2 times in one piece don't go on 3 or 4 times on the next one.
- Don't smudge more than one piece at once, you may get confused and lose the natural shapes.
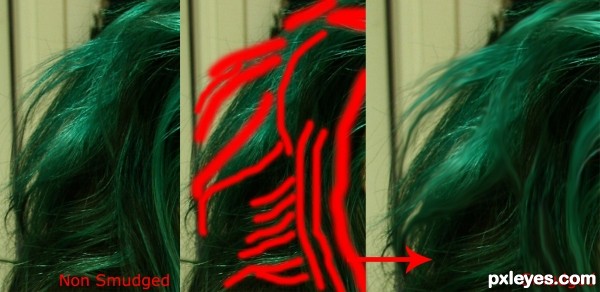
Step 7
To help you out in some situations you may want to sue the Clone Stamp Tool (S). For example see the image below, while I've smudged that part the black totally overcame the hair and it looks really strange... so using the clone i placed the hairs back there so it looks natural once again. Create a new layer before you start cloning, this way you sure you don't "mess up" in the picture's layer.Using the Eraser Tool (E) may help too, if you clone too much just clean the parts you don't wish to see.
For this matter if used a really small clone, sized 12, and i cloned the thin hair slice and gave it a continuation as you can see int he image.
Step 8
A little help for the left side of the image... to give more hints where to smudge:In here you should apply smudge more than once in some hair pieces, like the really long ones since the shape will probably look weird once smudge, so you should "re-do" it to define a shape again.
Step 9
This is what i have so far... basically made all the large pieces until now. The evidences are becoming more clear now.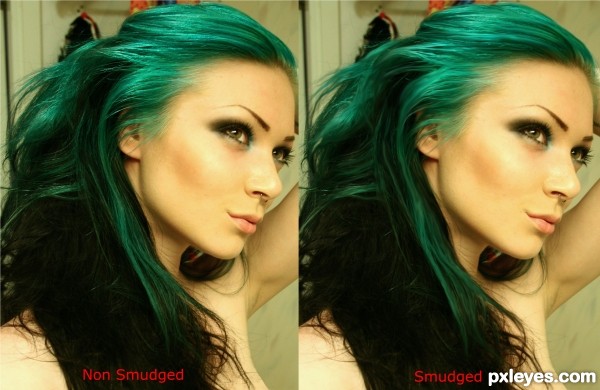
Step 10
Now, the black hair is remaining, they're too sharp. The roots aren't that much smudged either, so we should focus on these two areas now.Using smudge with a diameter around 25, 0 hardness and 35 strength , start gently smudging the black hairs (bottom). Avoid messing up with the skin. On the end of each piece you may want to do the same technique you did on step 8, "re-do" the shapes.

Step 11
I tried to always remove the sharp feeling on the thin hairs, some parts are extremely hard due to the collision of direction and the skin.You may prefer using Blur Tool in some parts (edges), if you do so use a really small amount of it.
Step 12
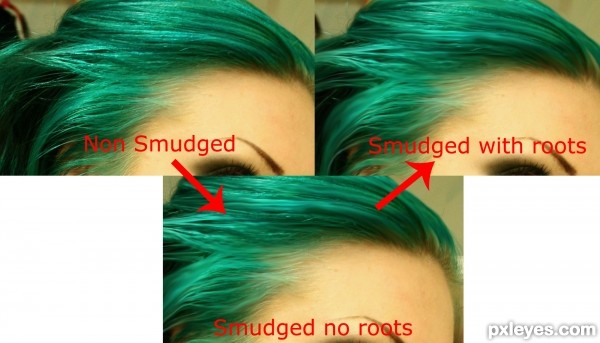
Now the roots and the beginning of each piece - same technique as the previous step, small diameter (around 15 now), 0 hardness... try to give them a really defined shape.To do not drag the skin you can smudge from up.-down where the hairs meets the skin.
After doing this apply a really small amount of blur with the Blur Tool at the skin around the roots.
Step 13
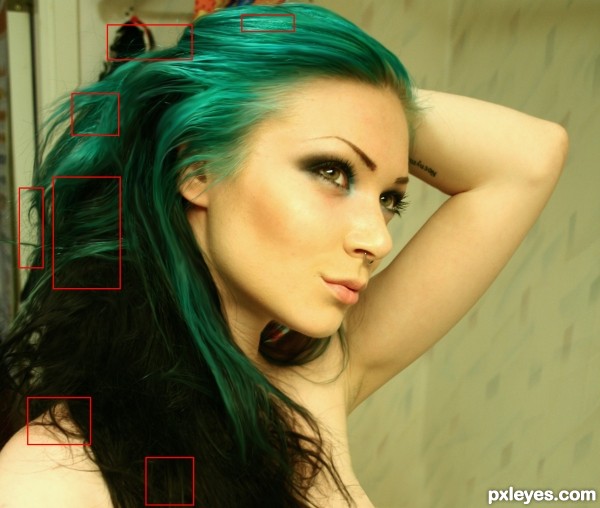
This is what we have so far... as you can see there's a lot of really sharp zones and we don't want that.So to start, we'll re-do all the process on the smudged areas, to give it a more soft touch, focus on creating pieces. Once we finish this we'll smudge a bit the truly sharpen areas.
The red rectangles indicate the intensely sharpen areas.
Step 14
Once you smudge all the smudged areas, you should notice a lot the difference between no smudge and your current layer. The pieces will be really defined and the soft touch is notable.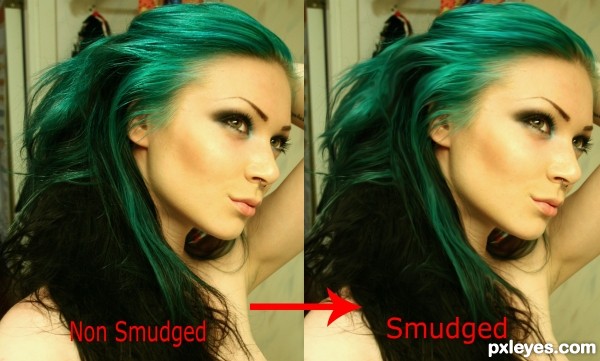
Step 15
Now let's get rid of the hairs off the edge of the head, using the Clone Stamp Tool, clone the background around the head and cover all the messy hairs. Do this in a new layer, use the mode "Current layer" to copy, you'll need to click on the place you wish to clone on the main image then move tot he new layer to paste.Tip: The really thin hairs will vanish if you apply the Blur Tool at 100% strength.
State the difference:
Step 16
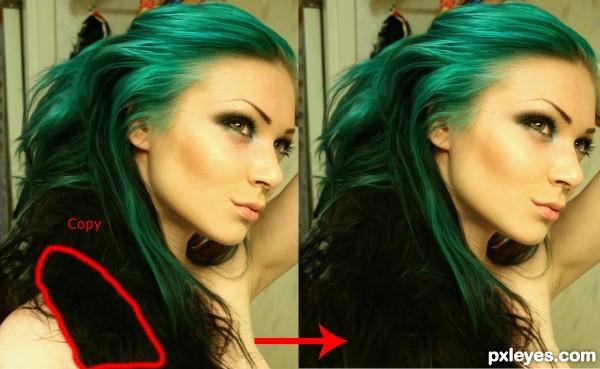
Once you're done with the hairs on the background we need to get rid of the messy hairs on her skin too, this is harder, specially if you can't draw or paint. For example on the left arm you would need to re-paint all her skin to do not look fake.Possible solution: I did this, since her hair is really long and has a lot of volume, copy the darken part and enlarge it, occupying all her arm.
How to do it: Use the Pen Tool (P) with the Paths option enabled and limit the zone in red. Then with the layer selected click CTRL+C and then CTRL+V you should have a new hair with the zone you've just selected. Now click CTRL+T to transform the hair and adjust it to the zone we pretend.
Step 17
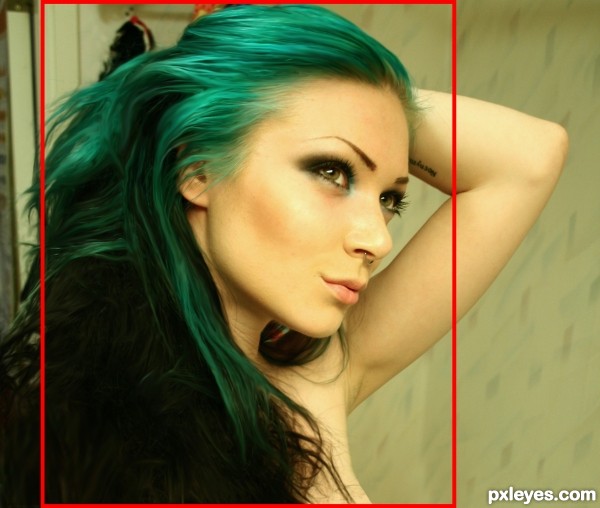
I've decided to crop the image now, that much hair and background won't add anything to it.I cropped it by the red strokes (Crop Tool - C).
Step 18
Using the Quick Mask Mode, select the below areas and then go Select -> Inverse. Then Filter > Blur > Gaussian Blur (around 5-6 radius).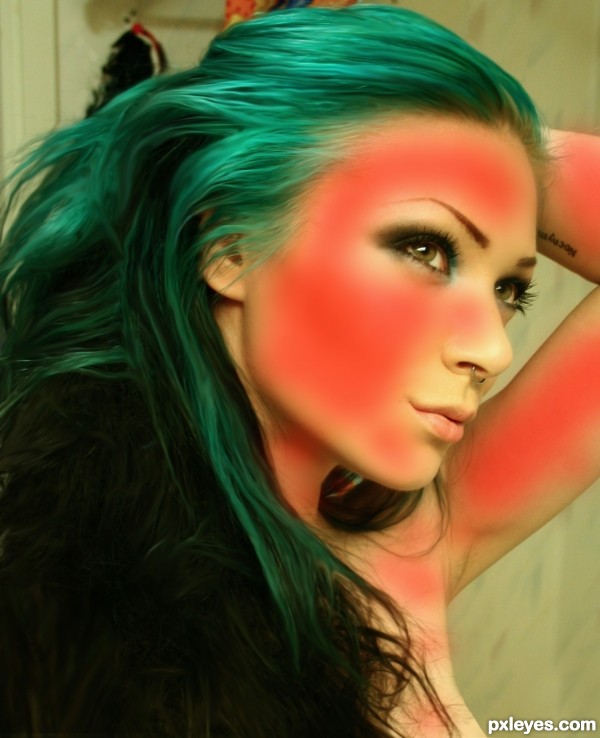
Step 19
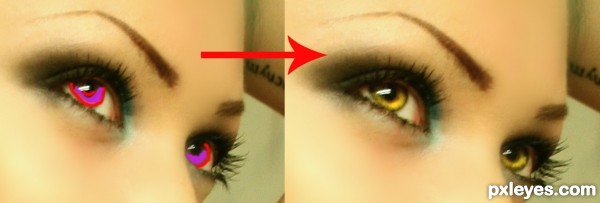
Let's add a little make up to her face.Start by the eyes. Using the burn and dodge tools: Use the burn tool at 12% strength, 15 diameter on Shadows mode and burn gently the dark line around the exterior of the eye. Then using the dodge with the same diameter and strength, apply on the light part on the eye, first apply on Midtones mode then on Highlights.
The red indicates you should use the burn tool and the purple indicates you should use the dodge tool.
Step 20
Now add a little make up no her eyes, select one of the light blues on her hair with the Eyedropper Tool (I) and draw it with the Brush Tool (B), then select the mode Soft Light at the opacity of 25%.Do the same for her lips, with a medium red, watch out the edges, you want want to use a soft eraser at them. I used a soft smudge on the lips to remove the "dry skins". Also soft mode and at 90% opacity. Make both of them in separated layers.
You can add soft white beams of light, there's some already, just increase them either with dodge/burn or with black/white brushes on soft light mode.
I've also darkened her eyebrows a bit with the Burn Tool on shadows mode and 15 strength.
Step 21
Now let's add some dynamics to her face, first of all increase the shadows on the neck and the bone at left and the top of the forehead:- Make a new layer and brush the zones with a true black color;
- Add Gaussian blur to them, not a lot tho, around 15 radius;
- Change the layer's mode to Soft Light.
Also add a little black brush on the same conditions to the cheek line, to give it more depth.

Step 22
Do the same process for the lights... Use a true white brush now and start painting lines in a new layer. The brush's sizes should change depending on the zone's dimension. Don't forget to add Gaussian blur before you reduce the opacity and change the blending mode to Soft Light.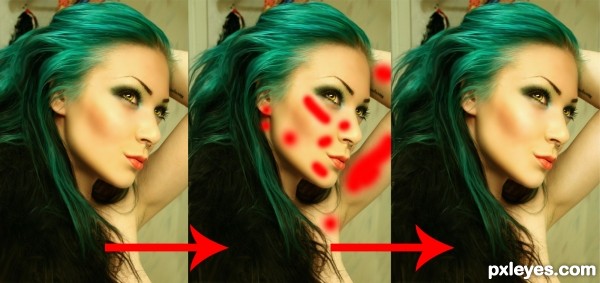
Step 23
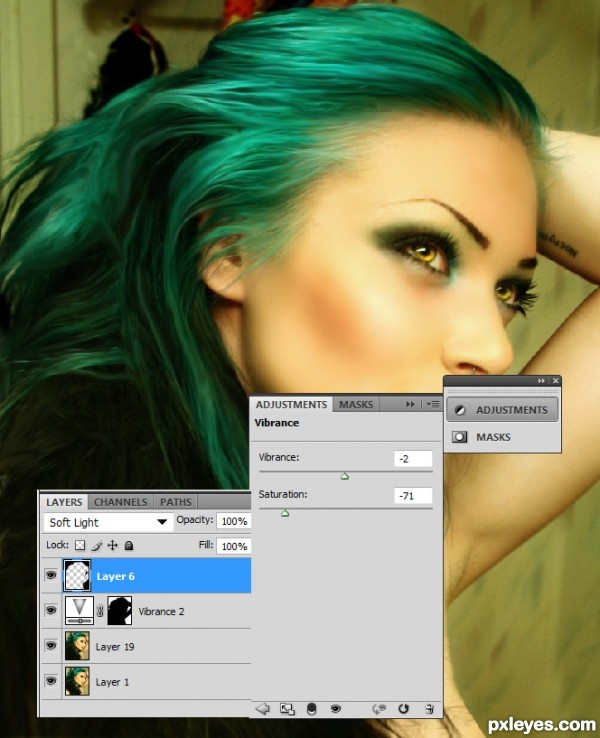
- I decided to slight increase her lips using the Liquify Tool > Forward Warp Tool;- Then i used the Quick Mask Tool and select the background. Added a adjustment layer to it (Vibrance) - Saturation: -71 Vibrance: -2.
- With the same selection (Select > Reselect). I painted it all black in a new layer then changed the blending mode to Soft Light with the opacity of 100%.
Step 24
- Using the same technique add light lines in her hair tot he brightest zones;- Add an adjustment Curves layer (values below) - with the eraser clean the face and the highlight beams on the hair;
- Add an adjustment Color Balance layer (values below);

Step 25
Merge everything you have visible, then duplicate that layer. Go to Filter > Other > High Pass, 60 radius. Set it to Soft Light and 50% opacity.I'm sure you can notice a lot of differences!
Step 26
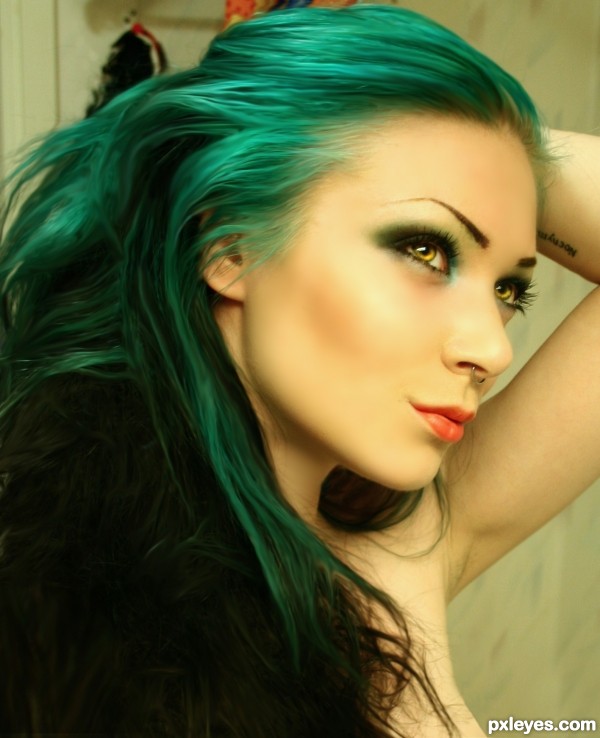
As a final result you should get something similar: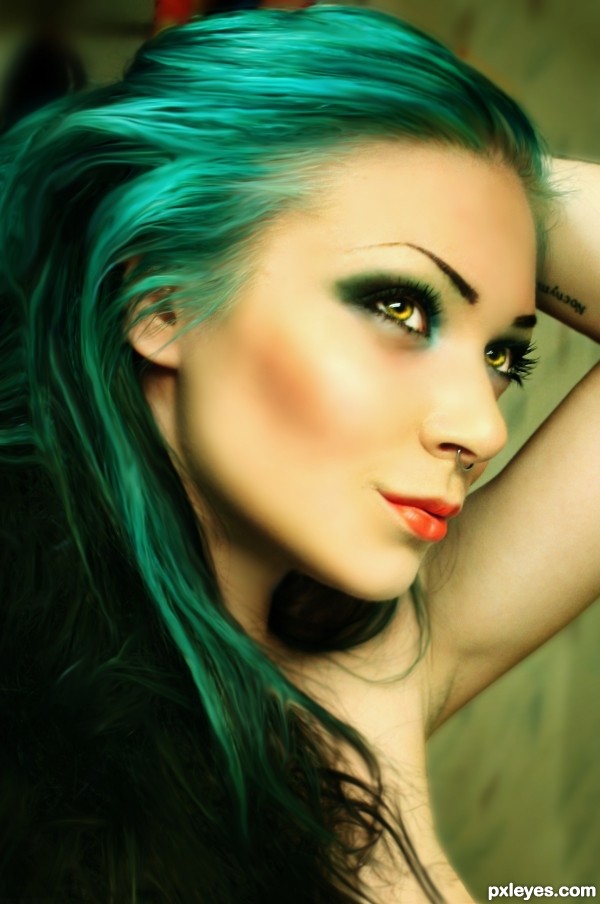


0 comments:
Post a Comment