Final Product What You'll Be Creating

Tilt-shift is an effect that when applied to an image or in this case, a video, will create the illusion of
miniaturization, making it seem as if the video is shooting a model set and not real life. To create one
of these videos outside of Photoshop would require an expensive camera and and an even more
expensive lens, which can cost into the thousands of dollars. In this tutorial I will show you how
to create this effect using only Photoshop and how to apply it to almost any video.
Tutorial Assets
The following assets were used during the production of this tutorial.
Download Original Footage
Before you begin. Let’s take a look at the original footage. Make sure to download it from here.
Step 1
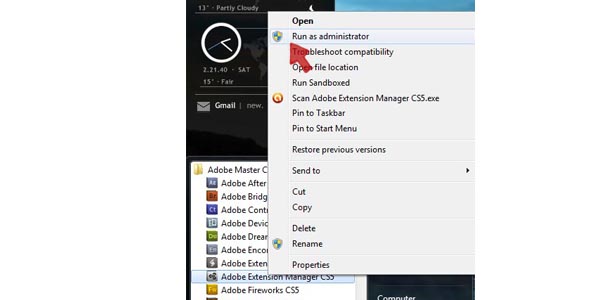
Before opening Photoshop, install the Extension that was included in the tutorial assets. Open the Adobe Extension Manager, which should be found in the Adobe folder.
PC users, if for some reason, it will not let you install the Extension, close and re-open the Extension Manger by right-clicking on the program in the start menu and selecting “Run as administrator”.
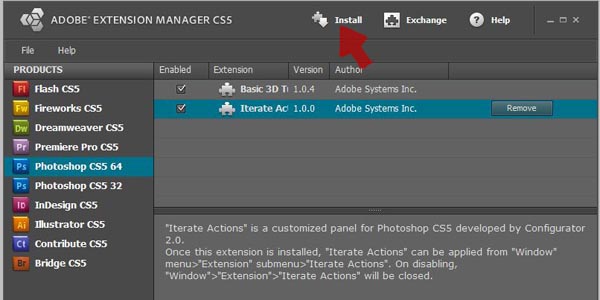
With the Extension Manager open, click the install button, and locate where you saved the Iterate Action extension.
Step 2
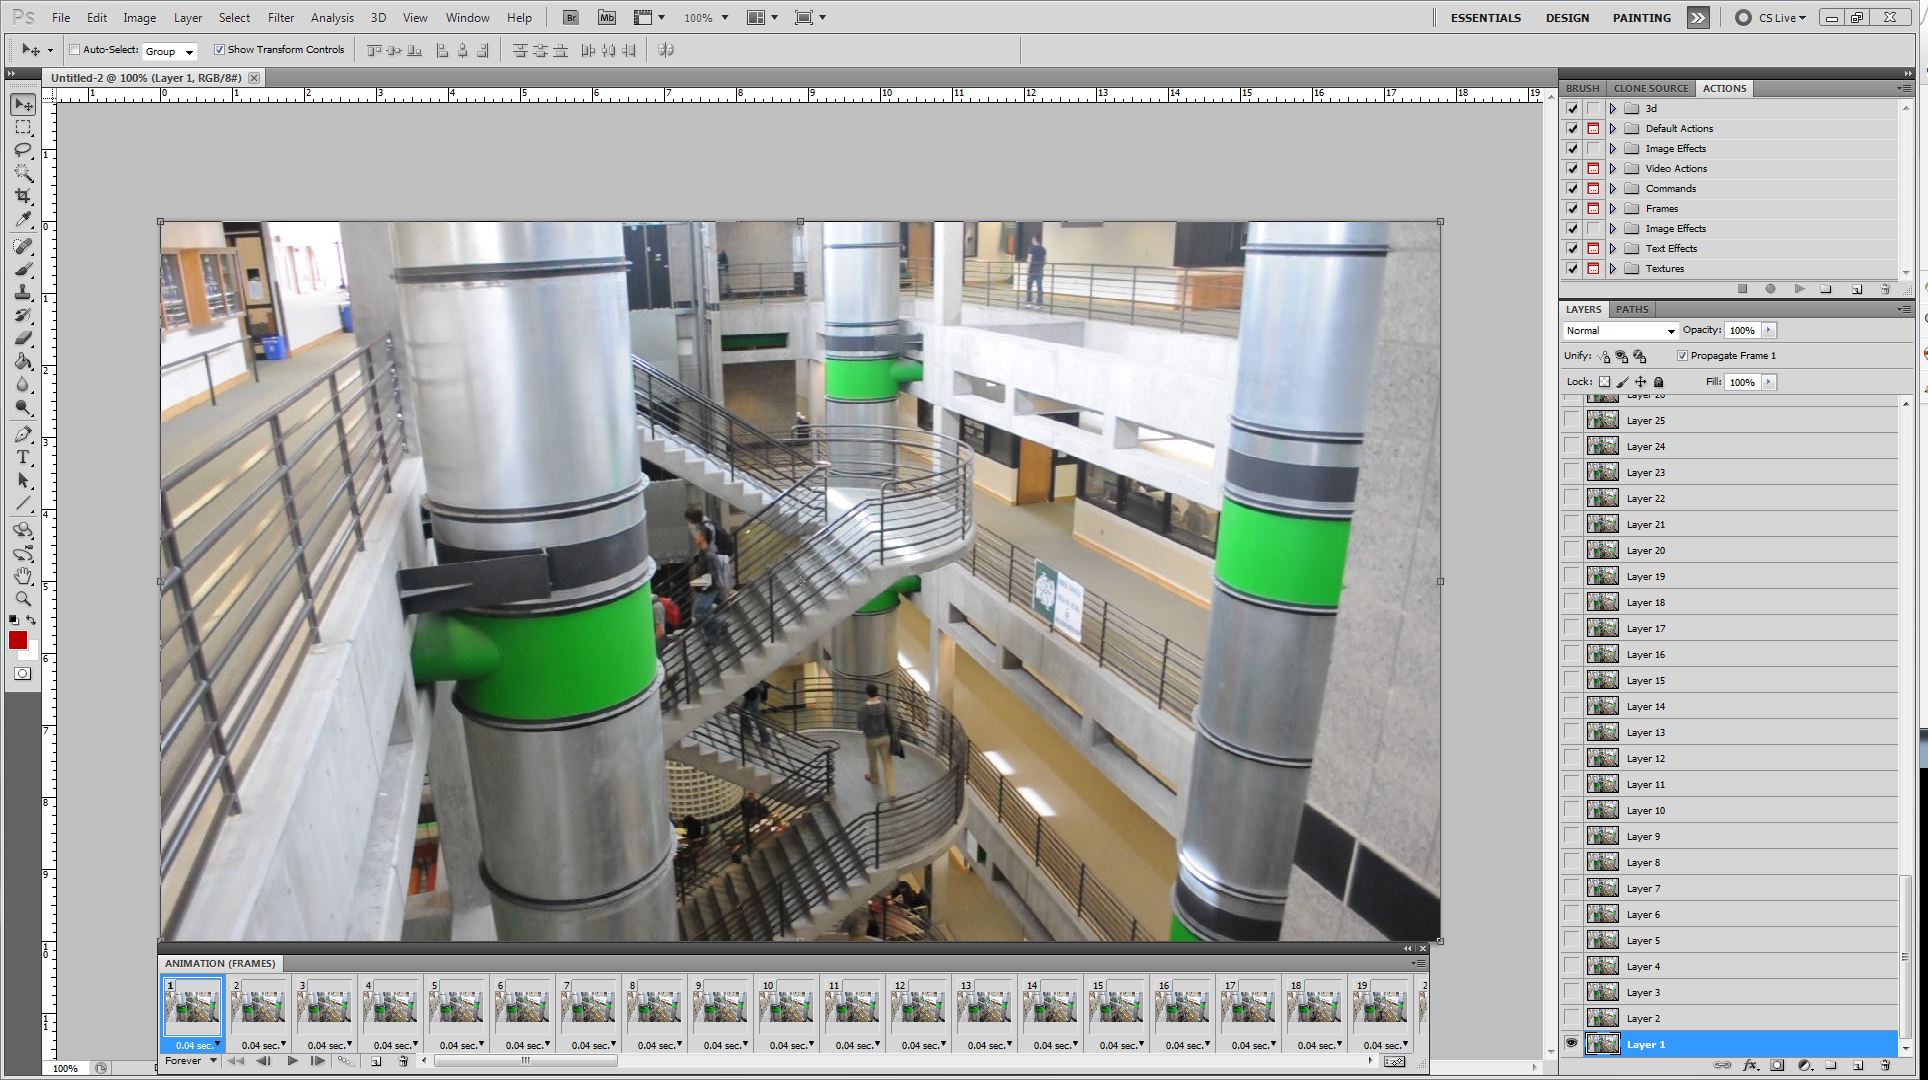
Open Photoshop and then choose File > Import > Import video frames to layers.
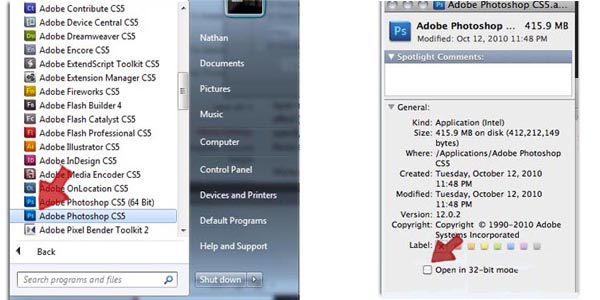
For those users using CS5 or higher you’ll need to use the 32bit version of Photoshop that should have been included in your install. You have to use the 32bit version because unfortunately Import video frames to layers utilizes the Quicktime API which remains a 32bit application.
For PC users, you should find the 32bit version in the Start menu, right next to the 64 bit version, if it’s not there check the (x86) folder, still not there then re-install, the 32bit version was unchecked during the initial installation.
For Mac users, open the Photoshop folder in a finder window and Command/Ctrl-click on the Photoshop icon, then click on Get info, click the check mark to run the program in it’s 32 bit mode.
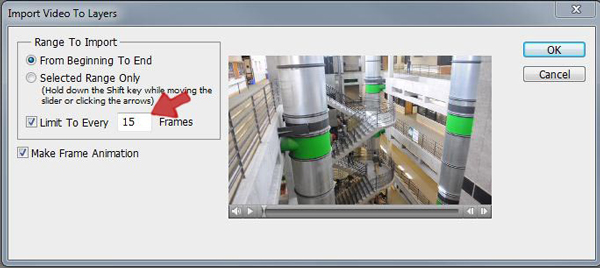
Import video to layers offers a few options for importing. Depending on the video, you can grab the whole thing or just a selected range. Make sure that “Make Frame Animation” is checked and then for this video limit the imported frames to every 15th frame. Doing this is going to not only cut the length of the video it’s also going to mimic a stop-motion effect which will help sell the overall effect.
Note: You can work with video frame layers in the 64bit version. To do so import the video using the 32bit version, save the file as a .PSD file, then open the file up in the 64bit version.
Step 3
Before moving on, it will be helpful to setup your workspace, in the top right corner there are a number of workspace presets, you can select the Motion preset to load a number of popular tabs. However for this tutorial you will only be needing the Animation tab, Layers tab, Action tab and History tab.
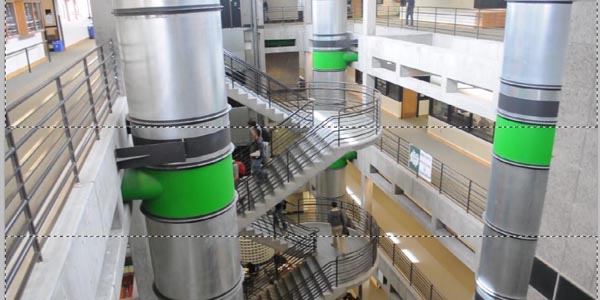
To begin applying the tilt-shift effect press (Q) to enter the Quick mask mode. Press (D) to reset your Foreground/Background colors, then select the Gradient tool. In the top left of the screen there are a number of Gradient styles, select the Reflected Gradient which is the fourth style from the right. While holding the Shift key, draw a line from the bottom of the staircase to just above the railing.

You’ll now see a light red gradient running horizontally across the screen. This red area will be the area of focus for the tilt-shift effect, don’t be afraid to play with different widths and positions for the mask. Moving the mask higher or lower will allow you to place the area of focus for the effect. The focal point doesn’t necessarily have to be centered to be effective. For more complicated video’s you could paint in the the mask but for most videos, this step should be sufficient.
Once satisfied with the placement of the mask press (Q) to exit the Quick mask mode. You should now have and upper and lower selection.
Note: This selection MUST remain in place throughout the rest of the tutorial. DO NOT deselect or else the effect will not work.
Step 4
With the selection in place, Choose Filter > Blur > Lens Blur. For this video the default settings are bit too much, so reduce the Radius to 20. Drop the Curvature to 27 and kill the Noise. Be advised that this filter can take some time to refresh on slower machines, so be patient. When you are happy with the effect press OK to apply.

Step 5
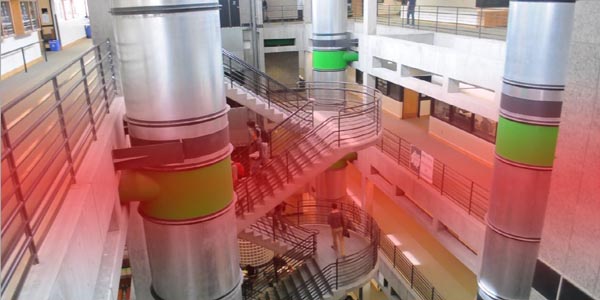
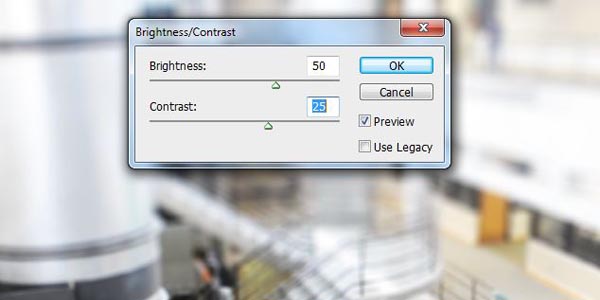
For the next two steps you’ll want to try and exaggerate the brightness and color to help sell the effect. Choose Image > Adjustments > Brightness/Contrast, bump the Brightness by 50 and the Contrast by 25.
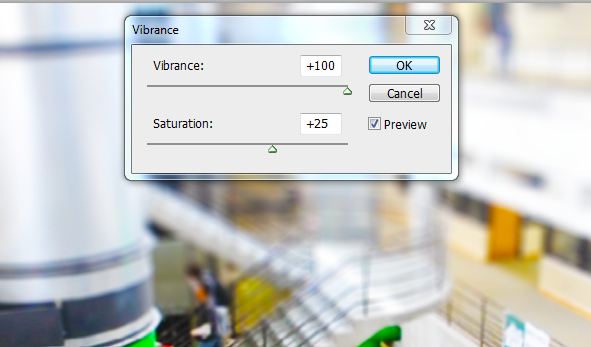
Then Choose Image > Adjustments > Vibrance and bump the Vibrance by +100 and the Saturation by +25. Experiment with different setting’s, now is the time to find which settings create the most dramatic effect.
Step 6
Now that you have an effect that you are happy with, it’s time to apply it to the rest of the video. First save your file out as a .PSD file, then undo everything back to Step 4. Make sure that you DO NOT deselect the selection created in step 3.
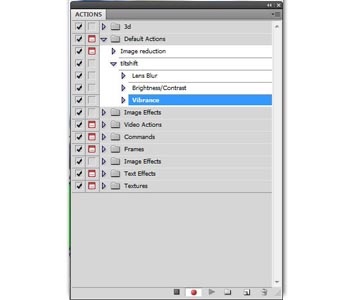
To create an Action, open the Action tab, press the new Action button near the bottom of the tab. Name the Action "titlshift", making sure it is saved in the Default Actions folder, (This will be important later on) then press Record. The round button at the bottom of the Action tab should turn red when recording.

Step 7
Now that Photoshop is recording, you can begin by re-applying the Lens blur effect. Choose Filter > Blur > Lens Blur or press Command/Ctrl + F to apply the last filter. Then Choose Image > Adjustment > Brightness/Contrast and apply the same setting’s as before. Then Choose Image > Adjustment > Vibrance and apply the same settings as before. Double check that Photoshop only recorded these three actions. If Photoshop accidently recorded an extra step, don’t worry, press the stop button, drag the unwanted step to the garbage can at the bottom right corner, then press the round record button to begin recording again.
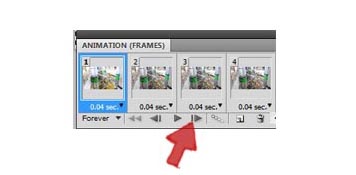
Now that the Filter and Image Adjustments have been recorded you need to record an Action that will move the Animation frame forward. If you simply selected Animation frame 2, Photoshop would record “Select animation frame 2″ which when you played the Action back it would not advance forward but remain on frame 2 indefinitely. To record a generic Action that moves the selection forward one frame, press the Fast Forward button at the bottom of the Animation tab. This will record an Action that tells Photoshop to “Activate next animation frame”.
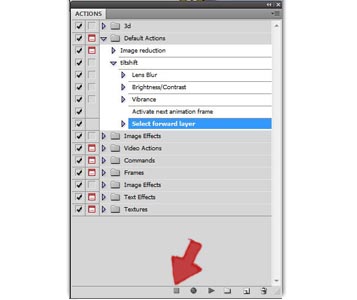
However you are not done yet, telling Photoshop to activate the next animation frame is not enough, if you left it at that you would move the Animation frame forward but Photoshop’s ability to apply your setting’s would remain on Layer One. A little confusing, but what is happening is that an Animation frame only effects the visibility of a layer, not whether Photoshop can edit that Layer. To fix this you need to add one last step in our Action. As with the Animation frame you need to use a generic command to move forward one layer, press Alt/Command + ] to record the Action “Select forward layer”.
These last two actions are critical to the looping script you are going to use. All the looping script is doing is pressing the play button a set number of times for us, by having Photoshop move the selection forward, it is going to allow the looping script to move up the layers in the file applying the effect.
With this last step recorded, press the square Stop bottom at the bottom of the actions tab to end the recording.
Author’s Note
It’s time to test your Action. Press the Play button a couple of times to ensure that it is applying the effect the way you want and that it is moving the selections forward. Now is the time to make adjustments if needed. Remember to save the document if you haven’t already.
Before you proceed, I need to take a moment and give credit to Dr. WooHoo who has generously provided the Iterate script free of charge to the world. It was published in the May/June 2009 issue of Photoshop User Magazine and is also available on his website here.
Step 8
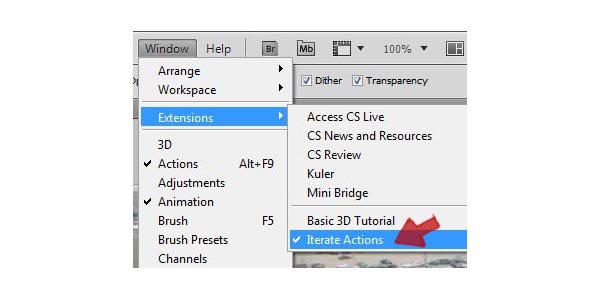
If you have ever played around with Photoshop Actions, you may have come across this odd limitation within Photoshop’s extensive Automation tools. For whatever reason, Photoshop cannot loop Actions to multiple layers within a single file, it is this limitation that Dr. WooHoo script corrects. If you haven’t already installed the Iterate script then save your work, close Photoshop and jump back to Step 1. If the extension’s been installed, then choose Window > Extension > Iterate Actions.
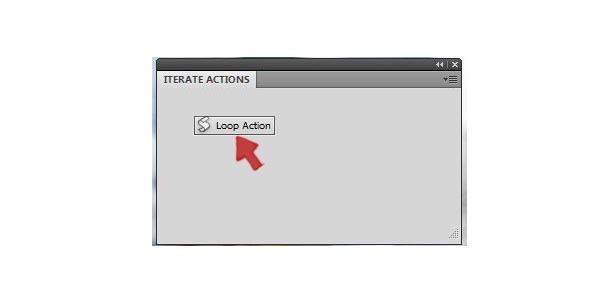
Click the Loop button.
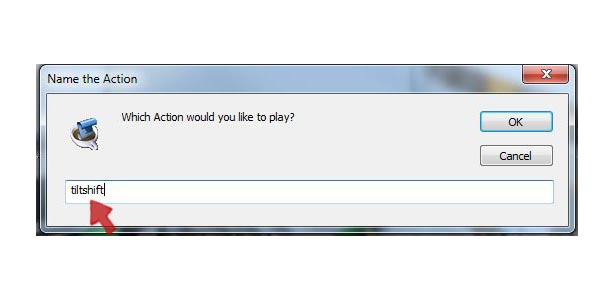
Enter the Actions name exactly as you spelled it. Remember the Action must be located in the Default Actions folder or else the script will not be able to run the Action.
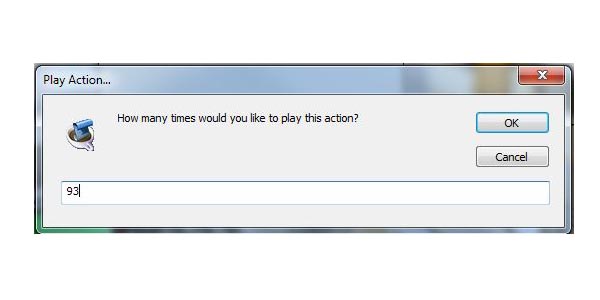
It will then ask how many times to repeat the Action. Press OK and it will start applying the Action to each layer, this may take some time.
(Don’t worry if your off a frame or two, you can always manually run the action if the script misses a few frames, However make sure you don’t tell the script to run more times than you have frames, once the script hits the last frame, it will start over with frame one.)
Step 9
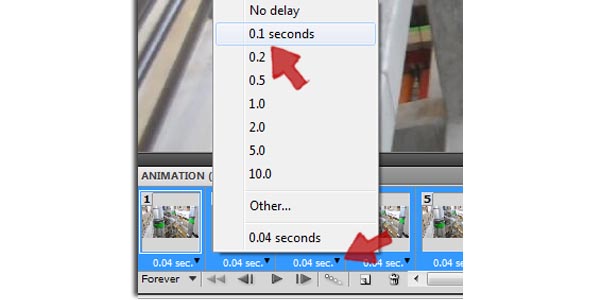
Once it’s done applying the effect, play the video through a couple times, If you are happy with the final effect, its time to render the video out. First step is to change the frame delay from it’s native 0.04secs to 0.1 secs. To change the delay, select Frame One then scroll down and Shift-Click on the last Frame, you should then see a blue outline around all the Frames. Click on on the small black arrow just under the right corner of the one of the Frames, and change the delay to 0.1 secs. Changing this setting’s will adjust the rendered video playback speed, leaving it at 0.04secs would have the video playing back a bit too fast.
Then Choose File > Export > Render video. Name your file and select where you want to save it. Then you have a couple of options for exporting your video.
Option One: Export as a compressed video file, perfect if the video is a stand alone piece.
Option Two: If your using this video as part of a larger project, export the video as an image sequence, you’ll retain the highest image quality possible, however this method will require the use of another program, such as After Effects, when it comes time to export the image sequence as a video file.
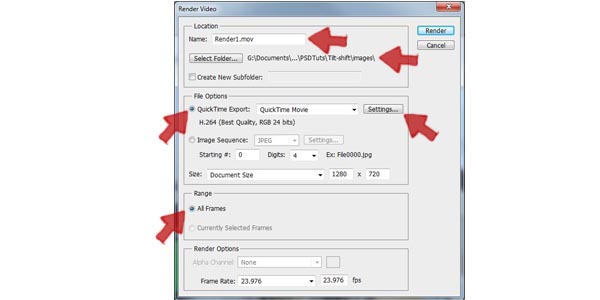
To render as a movie, click on Setting’s then on the Video Setting’s button
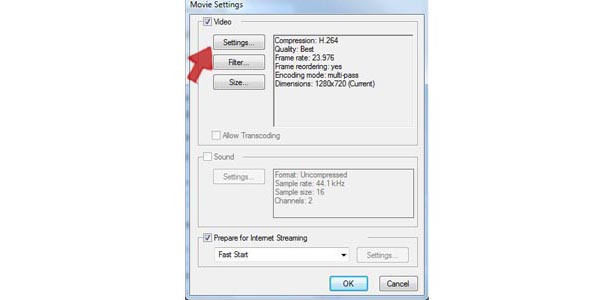
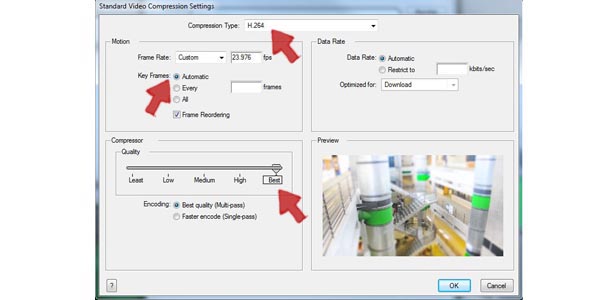
My personal preference leans to the .mov format using H.264, the file size will be tiny and the video quality will remain excellent. Press OK and in a moment your video will be ready to amaze the world.


0 comments:
Post a Comment