Step 1
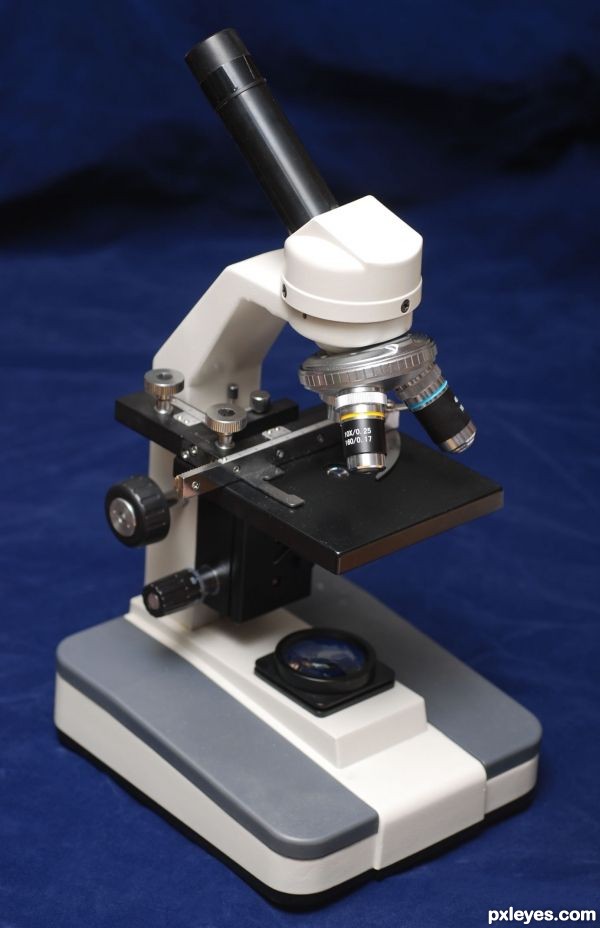
This is the Microscope image, that we are going to manipulate in to our insect. You can download the high resolution image from here. http://www.pxleyes.com/photoshop-contest/15204/microscope.html. Also check the other awesome entries.
Step 2
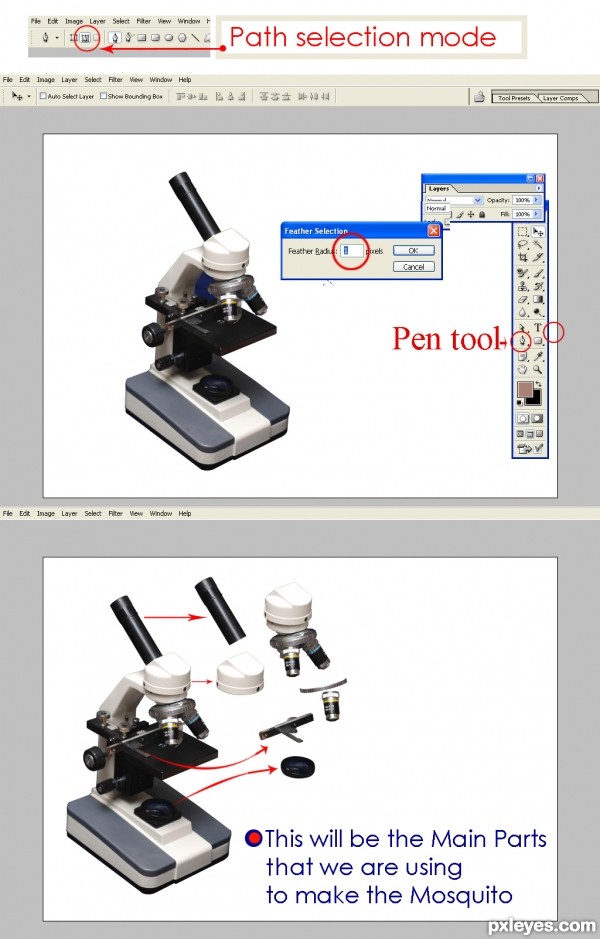
Use a Pen tool for extracting the Microscope from the background. Pen tool is the best tool for an accurate masking from dark backgrounds, especially when masking machines.
Make sure that the Pen tool is in Path selection mode . After making the path over the image, hit Ctrl+ Enter in keyboard to load selection. Now Press, Ctrl + Alt + D . Now we will have a window named ‘Feather Selection’ Enter a radius of 1 or 2. I usually prefer ‘1’, for machines.
Once U have the extracted Microscope, Break it into parts again as shown in the figure. Also keep a copy of the extracted image.
Step 3
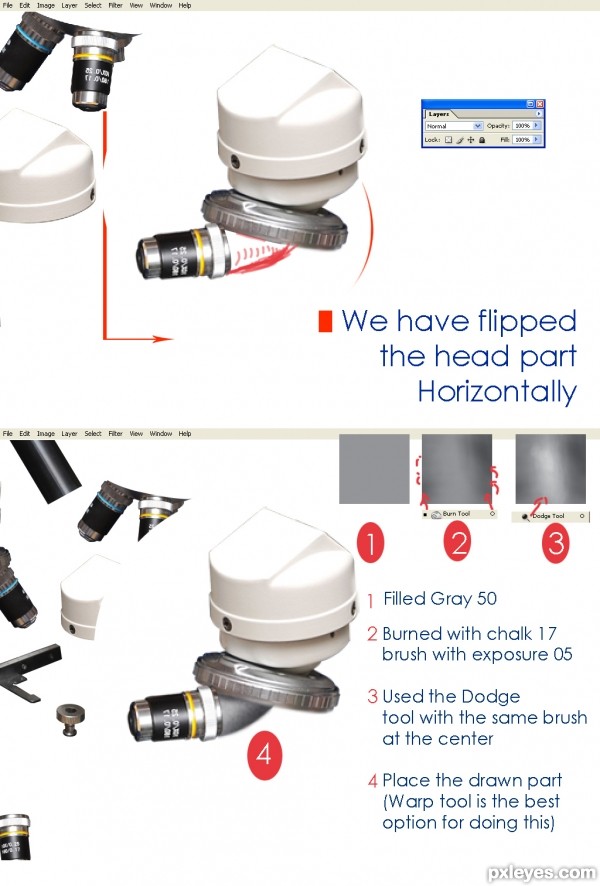
This Part of the microscope itself forms a shape of head. So this will be our DANGEROUS guy’s head.

Step 4
Now flip the head part horizontally and add the Lens part under it as in the figure. The red marked area is going to be filled with a gray color, so that to blend each parts together. Use burn and dodge tools to give some depth to the filled part.
Step 5
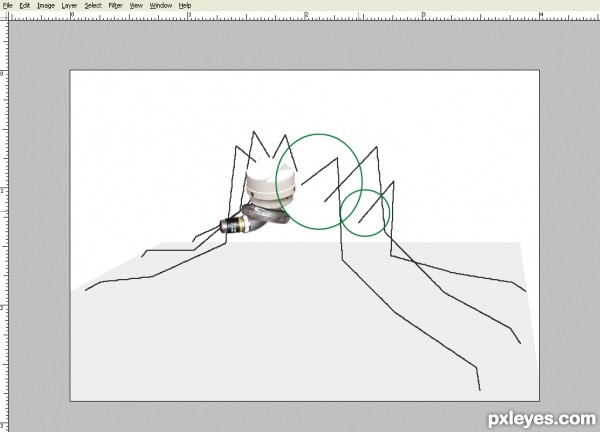
I have created a new layer and made a rough sketch with lines and circles to form a basic shape of the creature that we are going to create.
Step 6
Now place the parts for the rest of the body.
Use the burn tool to add depth to the steel parts.
You can also use a clipping mask ( Make a new layer and Press (Ctrl +G) in multiply mode to shade any objects.
When you use the multiply mode, It allows you to shade an object without loosing its texture. Use brush opacity of 10-15 with a dark gray color for doing this.
Step 7
MAKING THE LEG
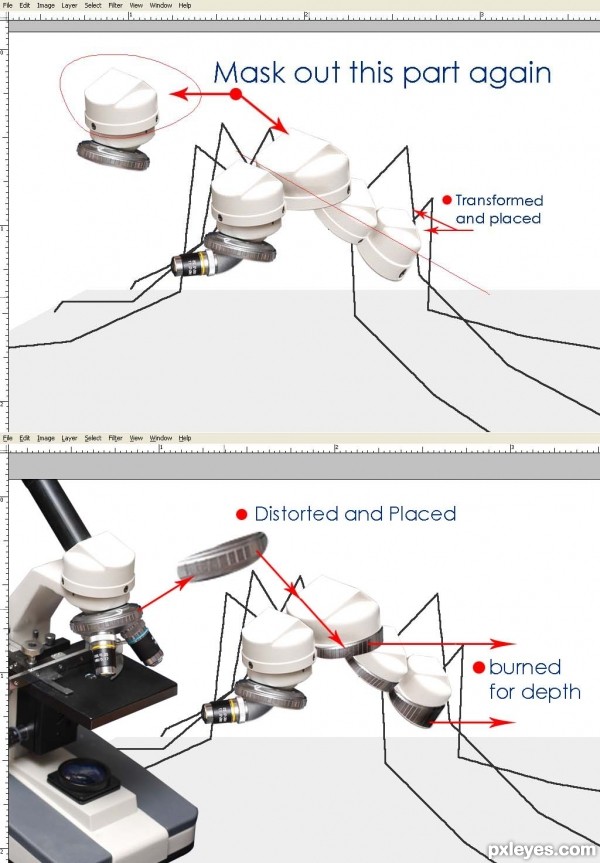
Using the simple transform options, I have placed the microscope parts as legs. Be accurate in distorting. Try not to loose the texture. I temporarily added a light gray color in the background so that to see the white creature more clear.
Using the simple transform options, I have placed the microscope parts as legs. Be accurate in distorting. Try not to loose the texture. I temporarily added a light gray color in the background so that to see the white creature more clear.

Step 8
We have completed the legs. Now we are going to make his anterior.
Mask out the selected portion from the Microscope. It’s a little darker at this time. So we will be adjusting it a little bit. Keep a copy of the masked part. Because we are going to make his eyes with the same material.
Now go to image-adjustments- brightness/contrast. Increase the brightness until you get a result like the one in the picture. Then we will colorize it. Here de saturate the image (Ctrl+U) and then go to color balance (Ctrl+B). Increase the Reds, Magenta's and Yellows. We need a blood like output. So experiment with parameters until you get the result. Now place it under the last segment of the mosquito body. Warp tool is the best option to do this. Other wise use rotate and distort options and use a pen tool to get the accurate shape.
Now create clipping mask (Ctrl+Shift+N, and Check the ‘use previous layer to clipping mask option’) layer over the current layer with blending mode overlay.
[In Overlay mode the base color is mixed with the blend color to reflect the lightness or darkness of the original color. So this is the best option for adding highlights on objects]
Save This Picture and then work

Step 9
Now let’s start making the background.
Step 10
Create a new layer under the floor layer, and draw some shadows. use a pen tool for creating the shadows. You can fill the shapes with black and lower the layer opacity to adjust the darkness with the background.
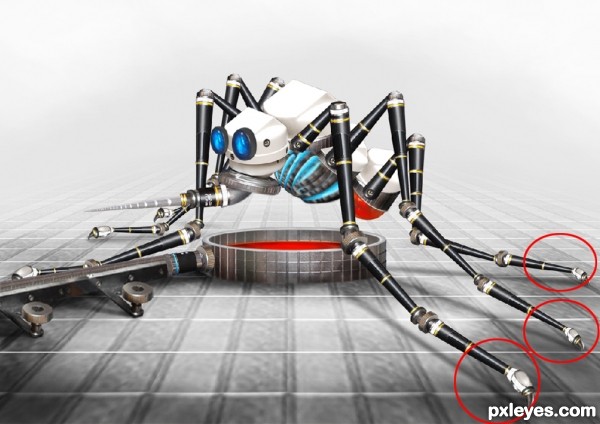
Step 11
And we have him ready to disturb us... :-D Thanks for reading this tutorial.


0 comments:
Post a Comment