In this photo effects tutorial, we’ll learn how to turn a photo into a pattern of solid-colored dots! As we’ll see, all it takes to create the effect is one of Photoshop’s filters, a layer mask and a simple custom-made pattern, although we’ll add a few extra (but still very easy) steps at the end to enhance things even further. It can take a bit of trial and error to match up the size of the dots with your specific image, so to keep things as flexible as possible, we’ll be taking advantage of Smart Objects and Smart Filters.
I’ll be using Photoshop CS6 here but this tutorial is also fully compatible with Photoshop CC (Creative Cloud). If you’re using CS5 or earlier, you’ll want to follow along with the original version of the tutorial.
Download our tutorials as print-ready PDFs! Learning Photoshop has never been easier!
Here’s the image I’ll be working with (colorful sunglasses photo from Shutterstock):

The original image.
And here’s what the "colored dot pattern" effect will look like when we’re done:
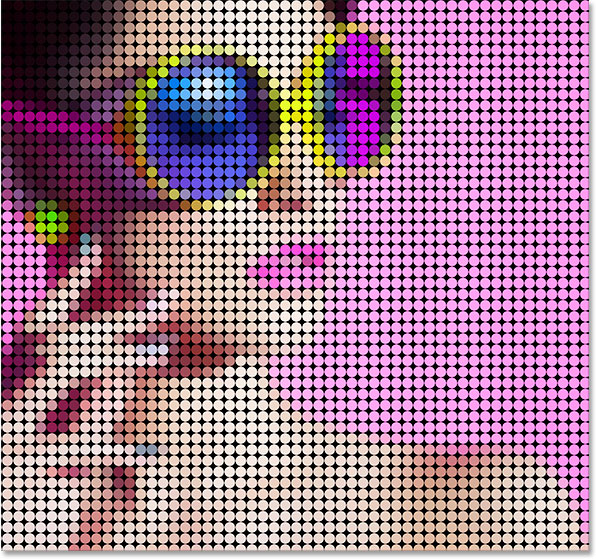
The final effect.
Let’s get started!
Step 1: Convert The Background Layer Into A Smart Object
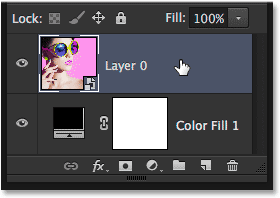
With the image newly opened in Photoshop, we see in the Layers panel that the image is sitting on the Background layer, currently the only layer in the document:
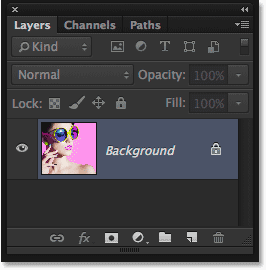
The Layers panel showing the photo on the Background layer.
Let’s start by converting the Background layer into a Smart Object. That way, when we apply a filter to the layer, as we’ll be doing in a moment, the filter will be applied as a fully editable Smart Filter. Go up to the Filter menu in the Menu Bar along the top of the screen and choose Convert for Smart Filters, which means “convert this layer into a Smart Object for me so I can apply filters to it as Smart Filters”:
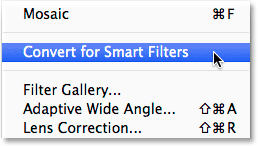
Going to Filter > Convert for Smart Filters.
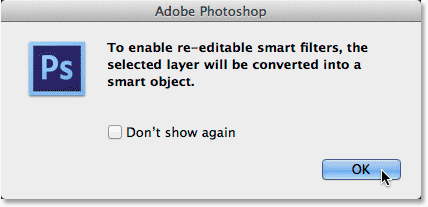
A dialog box will pop open letting you know that Photoshop is about to convert the layer into a Smart Object. Click OK to close out of it:
Photoshop lets you know it’s about to convert the layer into a Smart Object.
Nothing will happen to the image, but if we look again in the Layers panel, we see that a small Smart Object iconnow appears in the lower right of the layer’s preview thumbnail. This tells us that the layer is now a Smart Object. Also notice that Photoshop has renamed the layer from Background to Layer 0. Normally, I’d want to rename the layer to something more meaningful, but in this case, the generic name is fine:
A Smart Object icon appears in the preview thumbnail.
Step 2: Add A Black Solid Color Fill Layer
Before we do anything more to the image itself, let’s add a Solid Color fill layer to serve as the background color for the effect. Click on the New Fill or Adjustment Layer icon at the bottom of the Layers panel:
Clicking the New Fill or Adjustment Layer icon.
Choose Solid Color from the top of the list that appears:
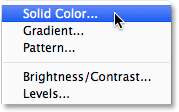
Choosing a Solid Color fill layer.
Photoshop will pop open the Color Picker so we can select the color we want to fill the layer with. We need our background for the effect to be black, so choose black in the Color Picker, then click OK to close out of it:
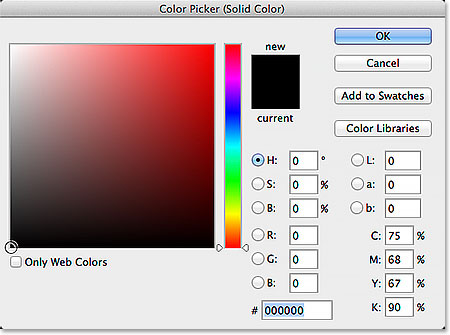
Choosing black in the Color Picker.
Step 3: Drag The Solid Color Fill Layer Below The Image
Our new fill layer is currently sitting above Layer 0 which is why its blocking the image from view in the document. We need to move it below the image. To move it, click on the fill layer in the Layers panel and, with your mouse button still held down, drag it down below Layer 0. When you get close enough to the bottom edge of Layer 0, ahighlight bar will appear:
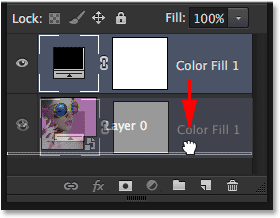
Dragging the Solid Color fill layer below Layer 0.
Release your mouse button when you see the highlight bar. The fill layer will snap into place below Layer 0, making the image once again visible in the document. Of course, this now hides the fill layer from view, but don’t worry, we’ll be seeing it again a bit later:
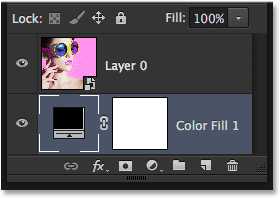
The fill layer will now be the background for the effect.
Step 4: Select Layer 0
Click on Layer 0 in the Layers panel to select it and make it the active layer:
Selecting Layer 0.
Step 5: Apply The Mosaic Filter
To create the colored dot pattern for the effect, we first need to turn our image into a series of solid-colored squares, and we can do that using Photoshop’s Mosaic filter. Go up to the Filter menu at the top of the screen, choose Pixelate, then choose Mosaic:
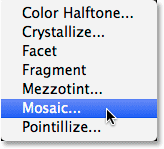
Going to Filter > Pixelate > Mosaic.
This opens the Mosaic filter’s dialog box. Keep an eye on your image in the document as you drag the Cell Sizeslider along the bottom of the dialog box left or right to increase or decrease the value. Larger values create larger squares. Smaller values, smaller squares. These squares will eventually become our colored dots so you’ll want to set the value based on the size of the dots you’ll want for your effect. This will depend a lot on the size of the image you’re working with and may take a bit of trial and error to get it right (which is why we’re applying the Mosaic filter as a re-editable Smart Filter). In my case, I’ll set the value to 60 which I think works well for my image. It’s very important that you remember the exact value you used here because you’ll need it again in a moment:
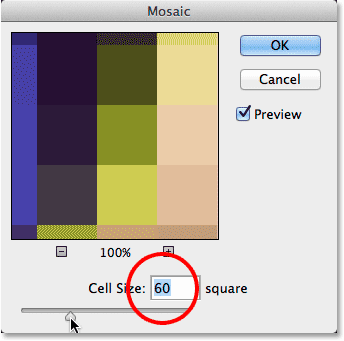
Remember the value you chose for the cell size.
Click OK when you’re done to close out of the Mosaic filter. Your image should now look very pixelated:
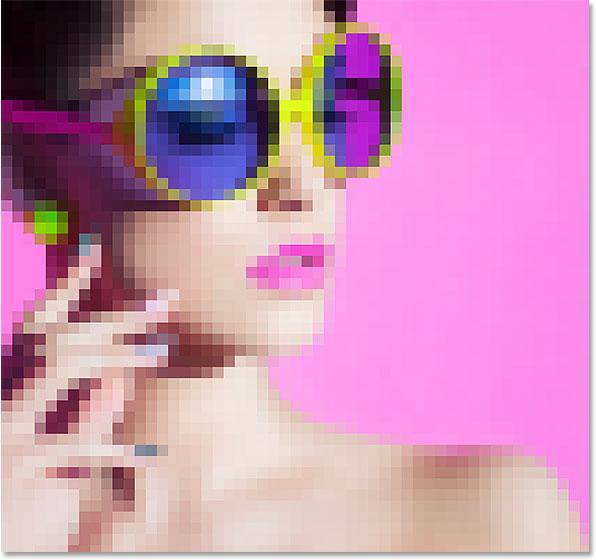
The image after applying the Mosaic filter.
Since we applied the Mosaic filter to a Smart Object, we can see it listed as a Smart Filter directly below the image in the Layers panel. If you want to try a different Cell Size value, simply double-click on the filter’s name to re-open its dialog box and make your changes, then click OK to close out of it:
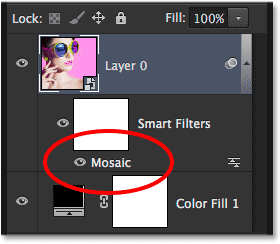
Smart Filters can be re-edited at any time by double-clicking on their name.
Step 6: Create A New Document
Next, we need to create our repeating dot pattern. For that, we’ll set the image’s document aside for a moment and create a brand new document. Go up to the File menu at the top of the screen and choose New:
Going to File > New.
This opens the New dialog box, and this is where you need to remember the value you used for your Cell Size option in the Mosaic filter. Enter that exact same value for both the Width and Height of the new document (in my case, it was 60) and set the measurement type for both to Pixels. This will create a document that matches the size of the squares in the image. Don’t worry about the Resolution value but make sure Background Contents is set to White:
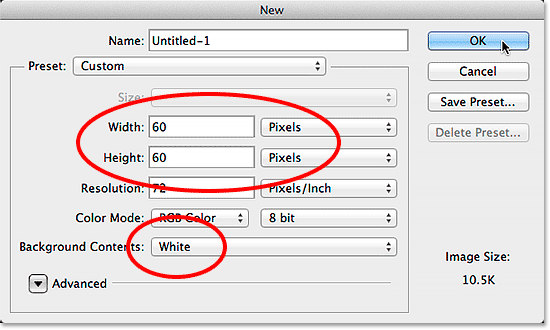
Creating a new Photoshop document that matches the Mosaic filter’s cell size.
Click OK to close out of the dialog box. Your new document will appear on your screen (the dark gray border in the screenshot is just the pasteboard area surrounding the document). Since it’s rather small, press and hold the Z key on your keyboard to temporarily switch to the Zoom Tool and click a few times inside the document to zoom in on it. Here, I’ve zoomed in to 500%. Release the Z key when you’re done:

Press and hold Z and click repeatedly on the document to zoom in.
Step 7: Select The Elliptical Marquee Tool
To draw the round dot we’ll need for our pattern, we’ll use Photoshop’s Elliptical Marquee Tool. By default, it’s hiding behind the Rectangular Marquee Tool in the Tools panel, so to access it, click and hold on the Rectangular Marquee Tool, then select the Elliptical Marquee Tool from the fly-out menu:
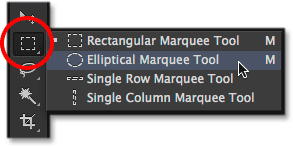
Selecting the Elliptical Marquee Tool.
Step 8: Draw A Circular Selection
With the Elliptical Marquee Tool in hand, click in the very top left corner of the document and, with your mouse button still held down, drag diagonally downward to the bottom right corner. We need the selection outline to be in the shape of a perfect circle, so to force it into a circle, press and hold the Shift key on your keyboard as you’re dragging your mouse. If you need to reposition the selection outline as you’re drawing it to center it in the document, press and hold your spacebar, drag the selection outline into position with your mouse, then release your spacebar and continue dragging out the selection.
When you reach the bottom right corner of the document, release your mouse button, then release your Shift key (in that specific order – mouse button first, Shift key second) to keep the selection outline forced into a perfect circle. You should now have a circular selection as large as the document itself:
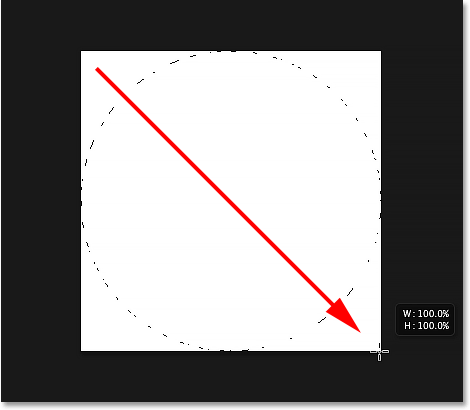
Press and hold Shift as you’re drawing the selection to force it into a circle.
Step 9: Fill The Selection With Black
With the selection outline drawn, go up to the Edit menu at the top of the screen and choose Fill:
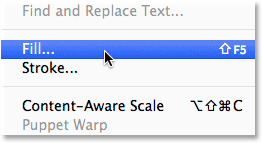
Going to Edit > Fill.
When the Fill dialog box appears, set the Use option at the top to Black, then click OK:
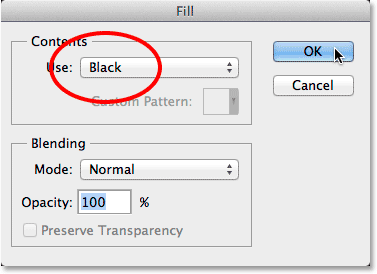
Setting the Use option to Black.
This fills the circular selection with black. To remove the selection outline from around the circle (since we don’t need it anymore), either go up to the Select menu at the top of the screen and choose Deselect or press Ctrl+D(Win) / Command+D (Mac) on your keyboard:
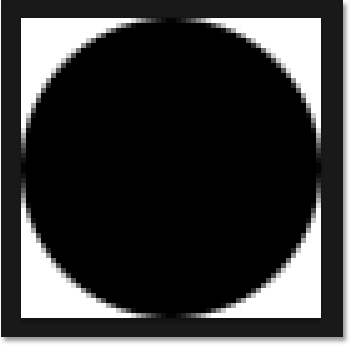
The circular selection is now filled with black.
Step 10: Invert The Colors
At the moment, the circle itself is black and the area surrounding it is white. We actually need the opposite of that, which means we need to invert the colors. To do that, go up to the Image menu, choose Adjustments, then choose Invert, or press Ctrl+I (Win) / Command+I (Mac) to select the Invert command from the keyboard:
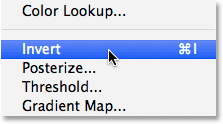
Going to Image > Adjustments > Invert.
After inverting the colors, the circle is now white and surrounded by black:
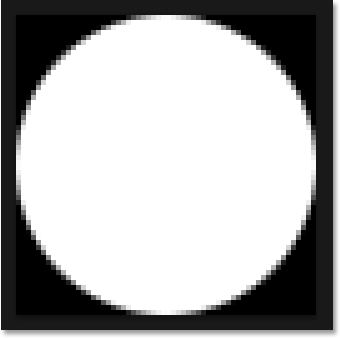
The document after inverting the colors.
Step 11: Define The Circle As A Pattern
Now that we have our circle, or dot, we need to define it as a pattern. Go up to the Edit menu and choose Define Pattern:
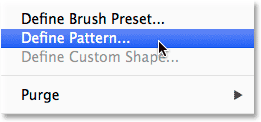
Going to Edit > Define Pattern.
Give the new pattern a name in the Pattern Name dialog box. Since my document is 60×60 pixels, I’ll name the pattern “Circle 60×60 px”. You may end up creating more circle patterns, each with different dimensions, so it’s a good idea to include the size of the document in the name. Click OK when you’re done:

Naming the new pattern.
Step 12: Close The Circle’s Document
We don’t need the circle’s document anymore, so to close it, go up to the File menu and choose Close, or pressCtrl+W (Win) / Command+W (Mac) on your keyboard. When Photoshop asks if you want to save the document, click No (Win) / Don’t Save (Mac). This will leave just the image document open on your screen:
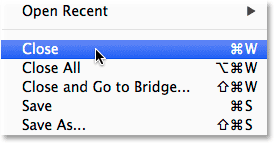
Going to File > Close.
Step 13: Add A Layer Mask To Layer 0
Back in the main image document, with Layer 0 selected, click on the Layer Mask icon at the bottom of the Layers panel:
Clicking the Layer Mask icon.
This adds a layer mask to the image layer. We can’t see the mask in the document but we can see its newly-addedthumbnail to the right of the layer’s main preview thumbnail. Notice also that the mask thumbnail has a whitehighlight border around it which tells us that the mask, rather than the layer itself, is currently selected:

The layer mask thumbnail.
Step 14: Fill The Mask With The Circle Pattern
With the mask selected, go up to the Edit menu and once again choose Fill. This time when the Fill dialog box appears, set the Use option at the top to Pattern, then click on the little thumbnail to the right of the wordsCustom Pattern:
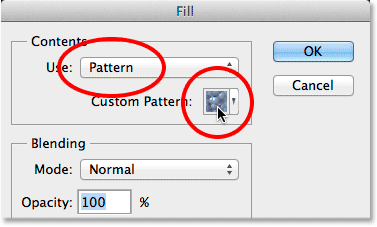
Setting Use to Pattern and clicking the Custom Pattern thumbnail.
This will open the Pattern Picker showing thumbnails of all the patterns currently available to choose from. Select the circle pattern you created earlier by clicking on its thumbnail. It will be the last thumbnail in the list:
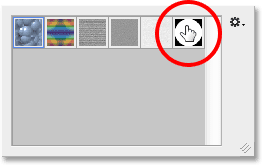
Selecting the circle pattern.
Once you’ve selected your pattern, click OK to close out of the Fill dialog box. Photoshop fills the layer mask with the circle pattern, creating our initial colored dots effect:
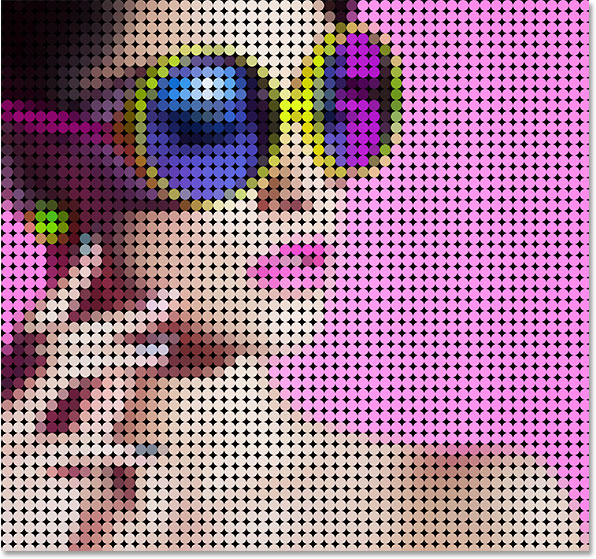
The effect after filling the mask with the circle pattern.
I’ll zoom in a bit closer to the image so we can get a better look at what’s happening. Each dot in the effect is made up of a single solid color thanks to the Mosaic filter we applied earlier, while the black area surrounding each dot is from the Solid Color fill layer sitting below the image:
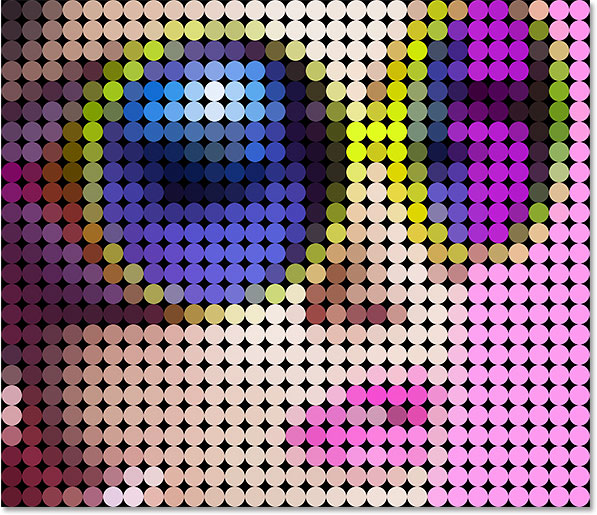
The effect up close.
Trying Different Size Dots (Optional)
At this point, if you think a smaller or larger dot pattern would look better with your image, here’s what you do. First, with the layer mask still selected, go back up to the Edit menu, choose Fill, then set the Use option to White and click OK. This will fill the mask with white, clearing away the circle pattern. Then, double-click on the Mosaic Smart Filter’s name under Layer 0 in the Layers panel to re-open its dialog box. Change the Cell Size value with the slider, remembering the value you used, and click OK. Go back to Step 6 to create a new document with the same dimensions as your new Cell Size value, then repeat Steps 7 – 12 to create a new pattern at the new size. Skip Step 13 because you’ve already added the layer mask. Jump right to Step 14 to fill the mask with the new pattern.
Step 15: Add A Stroke Around The Dots
With the initial effect now complete, you could stop here if you wanted to, but there’s a few more things we can do to enhance it further. First, to really bring out the dots, we can add a stroke around them. With the layer mask still selected, click on the Layer Styles icon (the fx icon) at the bottom of the Layers panel:
Clicking the Layer Styles icon.
Choose Stroke from the list that appears:
Choosing a Stroke layer effect.
This opens the Layer Style dialog box set to the Stroke options in the middle column. Leave the stroke set to its default color of black, but lower the Size down to 1 px and change the Position to Inside:
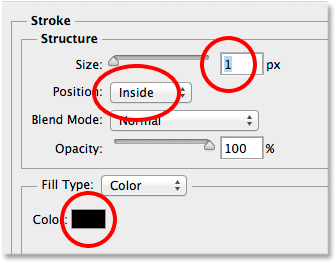
The Stroke options.
Click OK to close out of the dialog box. Each dot now has a thin black stroke outlining it, making them stand out a bit more:
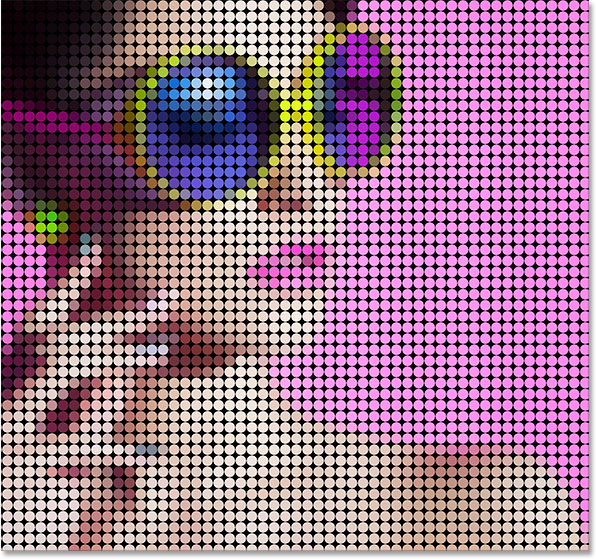
The effect with a stroke applied to the dots.
If you want to compare the effect with and without the stroke to see which version you like better, just click the littleeyeball icon to the left of the Stroke effect in the Layers panel to toggle it on and off:
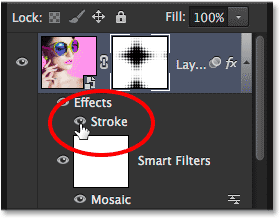
Clicking the Stroke visibility icon.
Step 16: Increase Color Saturation With A Hue/Saturation Adjustment
Next, we can bring out the colors in the effect by increasing color saturation. Click on the New Fill or Adjustment Layer icon at the bottom of the Layers panel:
Clicking the New Fill or Adjustment Layer icon.
Choose a Hue/Saturation adjustment layer from the list:
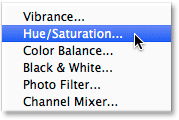
Adding a Hue/Saturation adjustment layer.
The controls for the Hue/Saturation adjustment layer appear in the Properties panel. Increase the Saturationvalue to around +20 by dragging the slider towards the right:
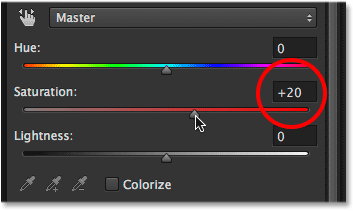
Increasing the Saturation value with the slider.
The colors now look richer and more intense:

The effect after increasing color saturation.
Step 17: Brighten The Image With A Levels Adjustment Layer
Finally, one potential drawback with this effect is that it tends to darken the overall image, but we can brighten it back up. Click once again on the New Fill or Adjustment Layer icon at the bottom of the Layers panel and this time, choose Levels:
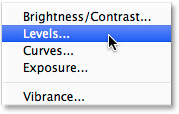
Adding a Levels adjustment layer.
Don’t worry about changing any settings for it in the Properties panel. Instead, all we need to do is change theblend mode of the Levels adjustment layer from Normal to Screen. You’ll find the blend mode option in the upper left of the Layers panel. This will make the image too bright, so lower the Opacity value directly across from the blend mode option down to around 25%:
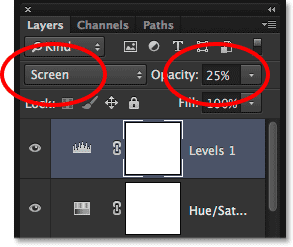
Changing the blend mode and opacity of the Levels adjustment layer.
Related tutorial: Photoshop’s Five Essential Blend Modes For Photo Editing
And with that, we’re done! Here, after brightening up the image, is my final “photo to colored dots” effect:
The final result.


0 comments:
Post a Comment